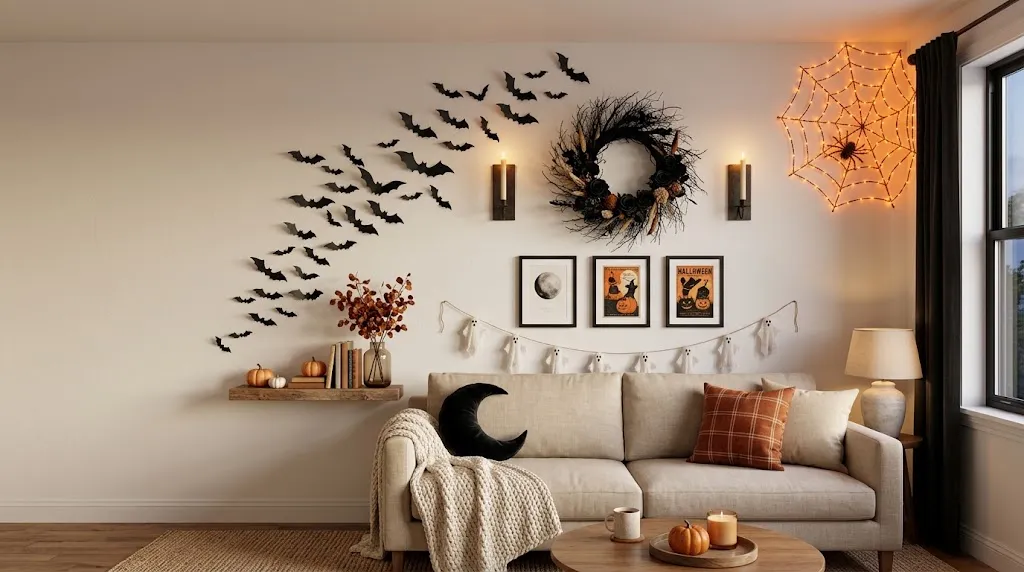
October guests notice walls first, and in a small apartment, walls are the biggest canvas you have. These Halloween apartment wall decor ideas turn blank paint into spooky, cozy focal points without using a single inch of floor space. No drill is needed for most of them.
If you rent, you know the struggle. You want a festive home, but you also want your full deposit back. I’ve tried nearly every renter-friendly trick out there, and I’ve noticed the best Halloween looks come from smart placement, not a big budget.
Below you’ll find 23 ideas, from glowing paper bats to haunted portrait galleries, each with simple steps, real costs, and setup tips that fit tight spaces. Save your favorites and start with one wall this week.
1. Floating Paper Bat Swarm
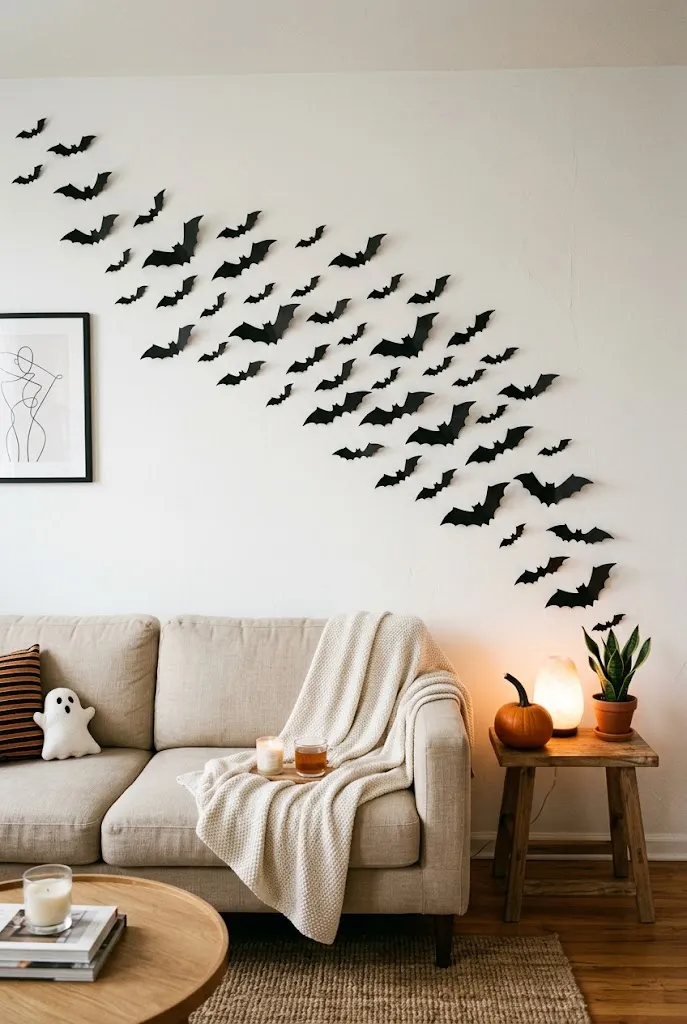
Nothing gets a reaction from guests quite like a flock of black bats flying across a blank wall. Cut 30 to 40 bats from black cardstock in three sizes, then fold each wing slightly at the center so they lift off the wall. That small bend adds shadow and movement for zero extra cost.
Arrange them in a loose diagonal swoop, starting small near one corner and growing larger as they spread. I’ve noticed this looks far more natural than a scattered pattern. Use removable mounting putty so nothing damages your paint or your security deposit.
2. Haunted Portrait Gallery
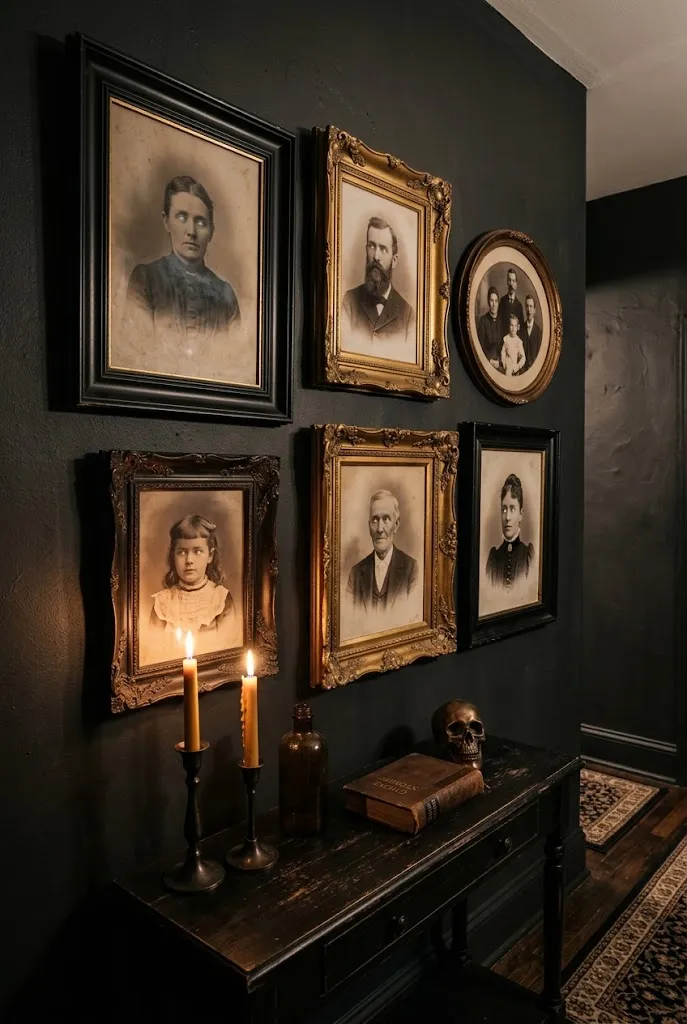
- Swap the photos in your existing gallery wall for printable haunted portraits, which you can find as free or low-cost downloads on Etsy and vintage art sites.
- Look for lenticular prints that shift from a normal face to a skeleton as guests walk past. They start conversations instantly.
- Keep your current frames and slip the prints over your usual photos, so switching back in November takes ten minutes.
- Mix one or two oval frames into the set, since that shape instantly reads as old and eerie.
- Hang the largest portrait with its center about 57 inches from the floor, then build outward.
The best part is that your nails are already in the wall. You are reusing hooks you placed months ago, which matters in a rental where every new hole counts. In my experience, guests stop and stare at these longer than any other decoration, especially the prints that change as you move.
3. Spiderweb Corner Decals
Quick Tip:
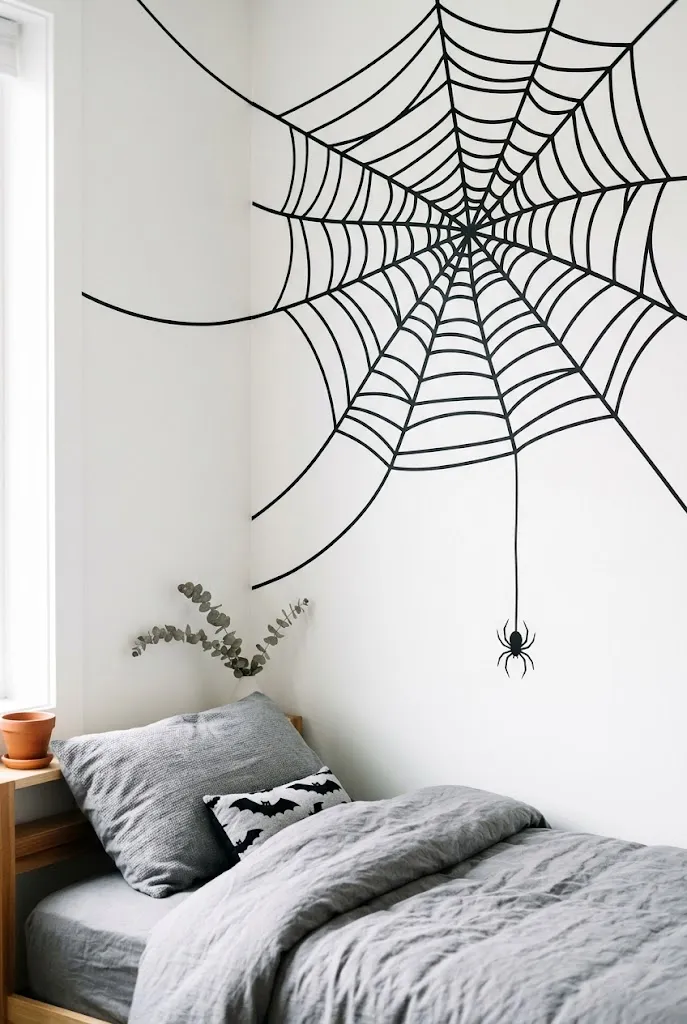
Before sticking decals across the full wall, test one small piece behind a door or dresser for 24 hours. Flat and matte paints can peel when vinyl comes off, so a hidden test saves you from patching later.
Corners are the most overlooked spot in small rooms, and webs belong there naturally. Of all the Halloween apartment wall decor ideas renters ask me about, decals are the easiest to remove without a trace. Stretch one large web from ceiling to wall so it bends into the corner and looks real.
4. Glowing Fairy Light Web
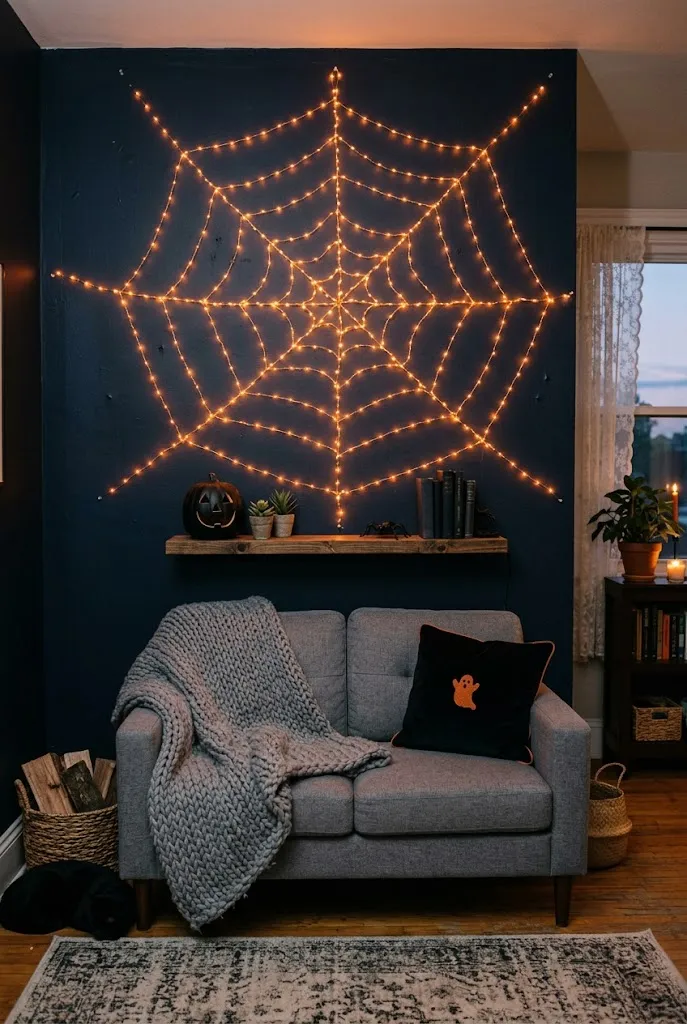
Before: Your living room wall goes dark the moment the sun sets. Overhead lights feel harsh, and switching them off leaves the space flat and gloomy in the wrong way.
After: A glowing orange web now stretches across that same wall. It works as decor during the day and doubles as a soft night light when guests arrive. The whole room feels warm and a little eerie.
Start with a 100-count string of orange or warm white LEDs and clear adhesive hooks. Pin eight spokes of black yarn from a center point first, then weave the lights in rings across them. Battery-powered strands with a timer are worth the extra few dollars, since no cord needs to reach an outlet.
5. Witch Broom Entry Wall
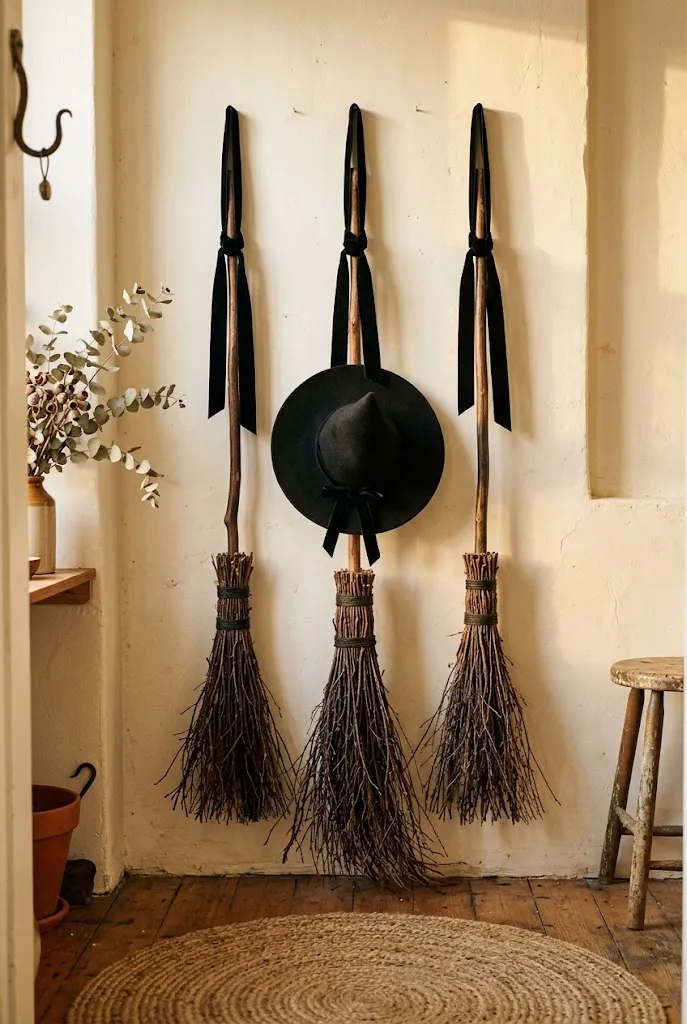
- Pick up two or three decorative besom brooms from a craft store. Mini 24-inch versions fit narrow entryways best.
- Stick one heavy-duty adhesive hook per broom, rated for at least 3 pounds, spacing them about 8 inches apart.
- Tie a black velvet ribbon around each handle, then hang the brooms by the ribbon loops at slightly staggered heights.
- Hook a small witch hat or a sprig of dried eucalyptus onto the center broom to finish the look.
Entryways in apartments are usually tight, so anything that sticks out from the wall becomes a hazard. Brooms stay flat and slim, which is exactly why they suit a narrow hallway. I’ve seen this work well even in walk-up units where the door opens straight into the living room. Guests notice it first.
6. Moonlit Tapestry Backdrop
| Comparison Point | Fabric Tapestry | Peel-and-Stick Wallpaper |
|---|---|---|
| Cost | About $15 to $35 | About $30 to $80 per wall |
| Setup Time | 10 minutes | 1 to 3 hours |
| Wall Risk | Almost none | Can lift paint on removal |
| Storage | Folds into a drawer | Usually single use |
| Coverage | One focal area | A full wall |
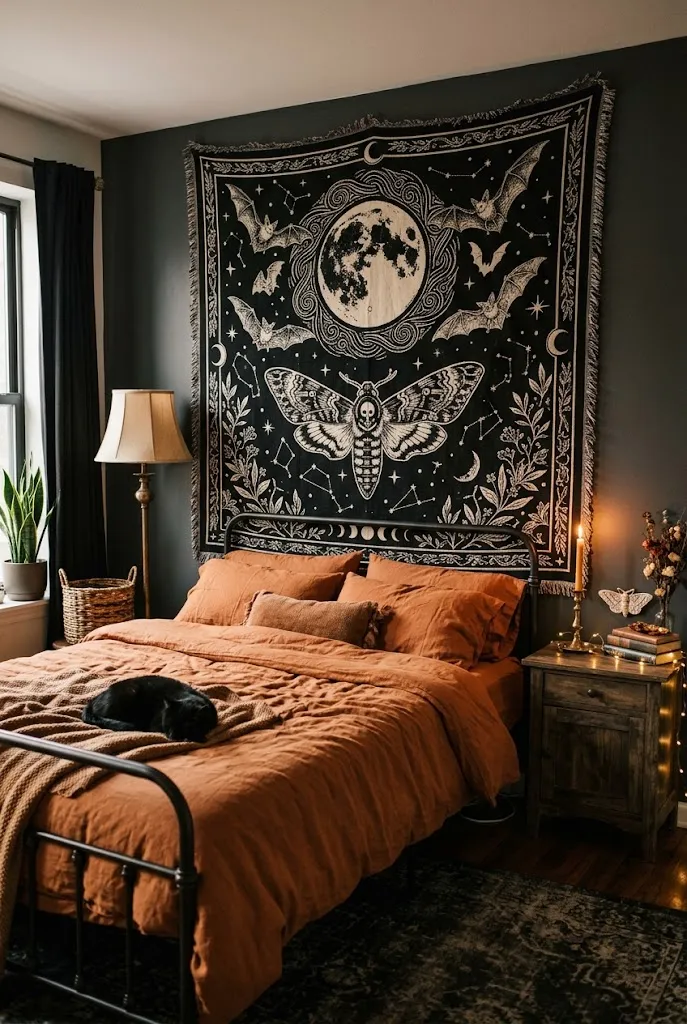
A tapestry covers a big stretch of wall with almost no effort, which is why it wins for renters. Drape it over a lightweight curtain rod resting on two adhesive hooks, or use clip rings for a cleaner edge. Pick a design that doubles as a headboard, and your sleeping nook feels finished.
7. Gothic Mirror Cluster
Do:
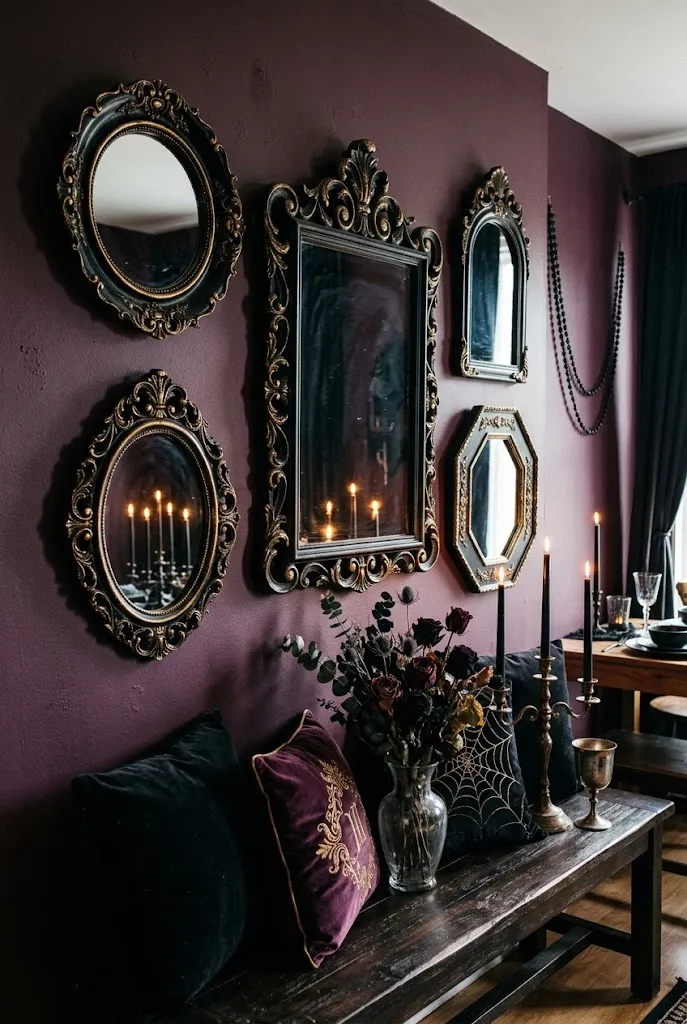
- Mix at least three mirror shapes, such as oval, arched, and round.
- Spray paint thrifted plastic frames matte black for a cheap gothic match.
- Hang the cluster across from a window or lamp so it bounces light.
- Lay the arrangement on the floor and photograph it before hanging anything.
Don’t:
- Don’t hang heavy glass mirrors with adhesive strips alone.
- Don’t place mirrors where they reflect a cluttered kitchen counter.
- Don’t space them more than 3 inches apart, or the cluster looks random.
Mirrors do double duty in a small apartment. They make the room feel larger while the ornate frames bring that haunted manor mood. In my experience, acrylic mirrors are the smartest pick for renters since they weigh very little and hang safely on removable strips. The frames look just as good in December.
8. Mini Pumpkin Floating Shelves
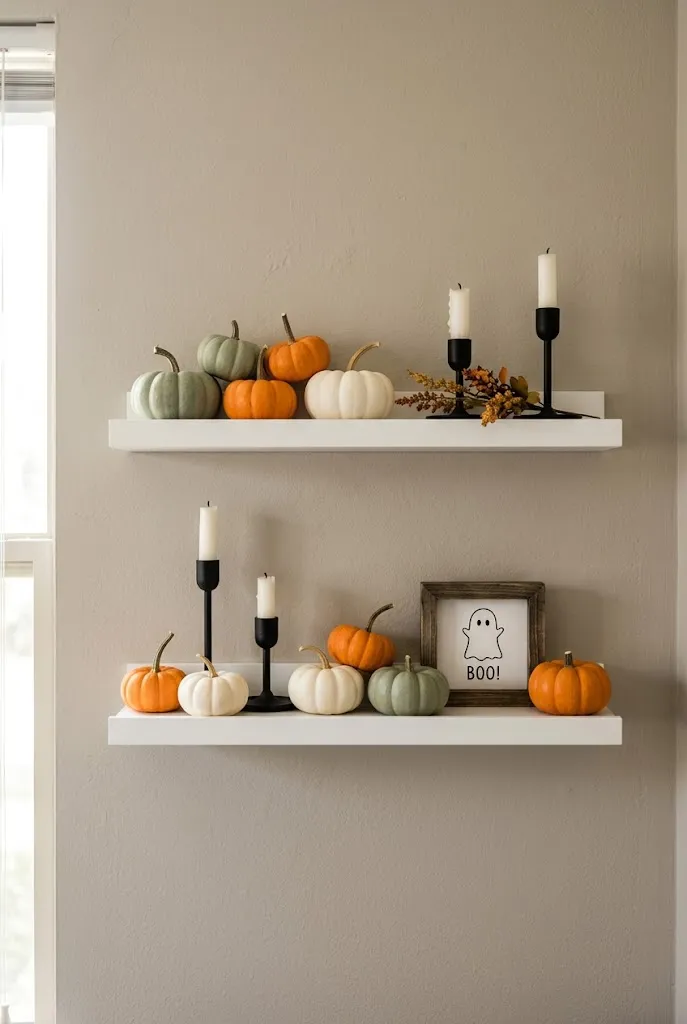
Cost: Low | Time: 20 minutes | Skill Level: Beginner | Best For: Studios with little floor space
Shelves you already own are prime seasonal real estate. Clear off everyday items and restyle them in odd-numbered groups of three or five pumpkins, varying heights with a stack of old books. Faux velvet pumpkins last for years and never rot, which beats real ones in a warm apartment.
9. Glowing Eyes Hallway
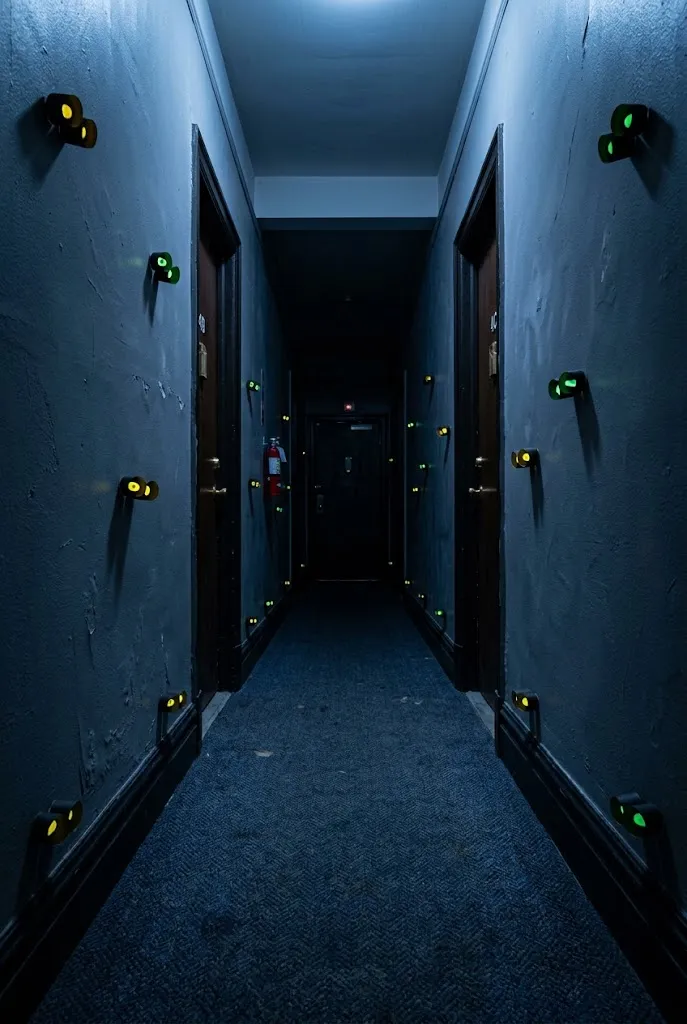
Few things beat the moment a guest spots glowing eyes staring back from a dark hallway. Save empty toilet paper tubes, cut two eye shapes into each one, and slide a snapped glow stick inside. Mix almond, slit, and round shapes so every creature looks different.
Attach the tubes low along the baseboard and high near the ceiling with small putty dots, so the eyes appear in unexpected places. Hallways rarely get decorated, which makes the surprise bigger. Snap fresh glow sticks right before guests arrive, since most fade after six to eight hours.
10. Cheesecloth Ghost Garland
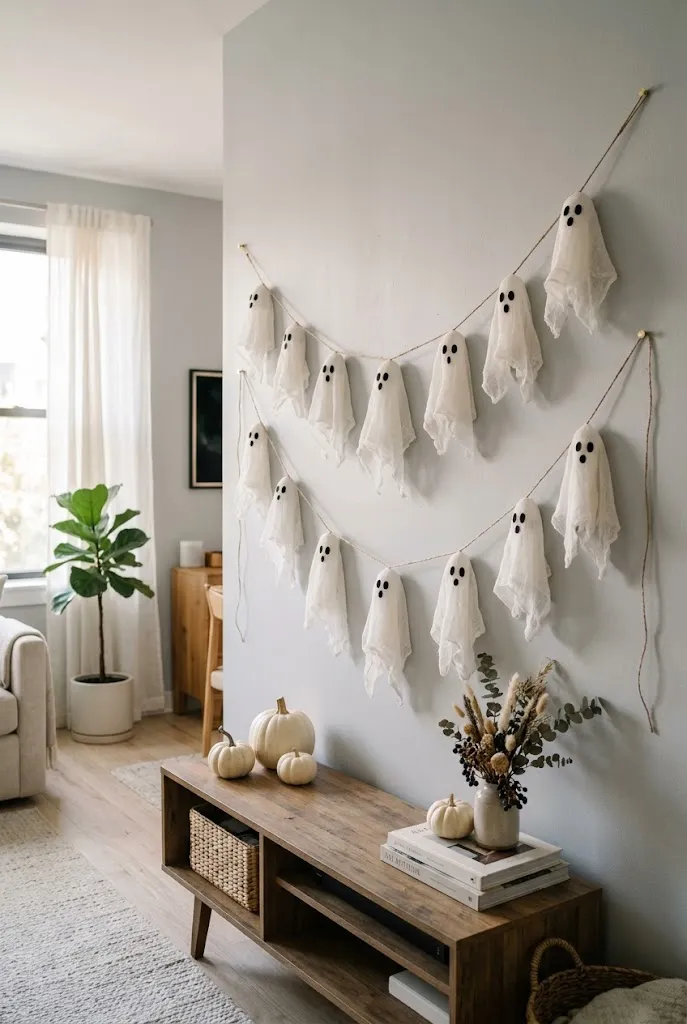
- Wrap cheesecloth squares around cotton balls or small foam balls, then cinch the neck with white thread to form each ghost head.
- Cut two eyes and an oval mouth from black felt and glue them on, keeping each expression slightly different.
- Tie 8 to 10 ghosts onto jute twine, spacing them about 6 inches apart.
- Hang the garland from two adhesive hooks and let it droop in two soft swoops rather than one tight line.
- Keep a lint roller nearby, since cheesecloth sheds a little onto dark furniture.
Cute beats creepy for a lot of households, especially with kids or guests who scare easily. These ghosts hit that sweet spot. The whole garland costs under $10 in craft supplies and packs flat into a zip bag. Over a sofa or a bed, it softens the space instead of crowding it.
11. Skeleton Hand Wall Hooks
Quick Tip:
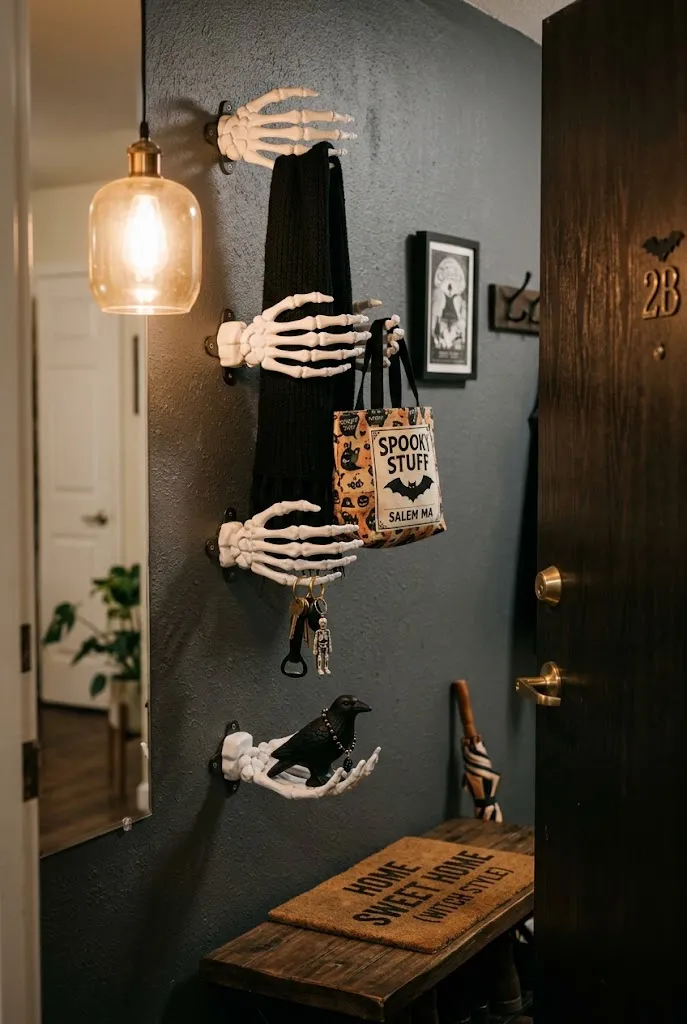
Skip screws by gluing each plastic hand, palm up with fingers curled, onto a heavy-duty adhesive hook using strong craft glue. Let it cure overnight before hanging anything, and keep the load to light items like scarves and keys.
Decor that also works earns its spot in a tiny apartment. These hands grab your keys, a tote, or a scarf, and guests always comment on them. I’ve noticed guests shake one without thinking, which gets a laugh every time. Store them flat in a shoebox after the season.
12. Black Wreath Wall Accent
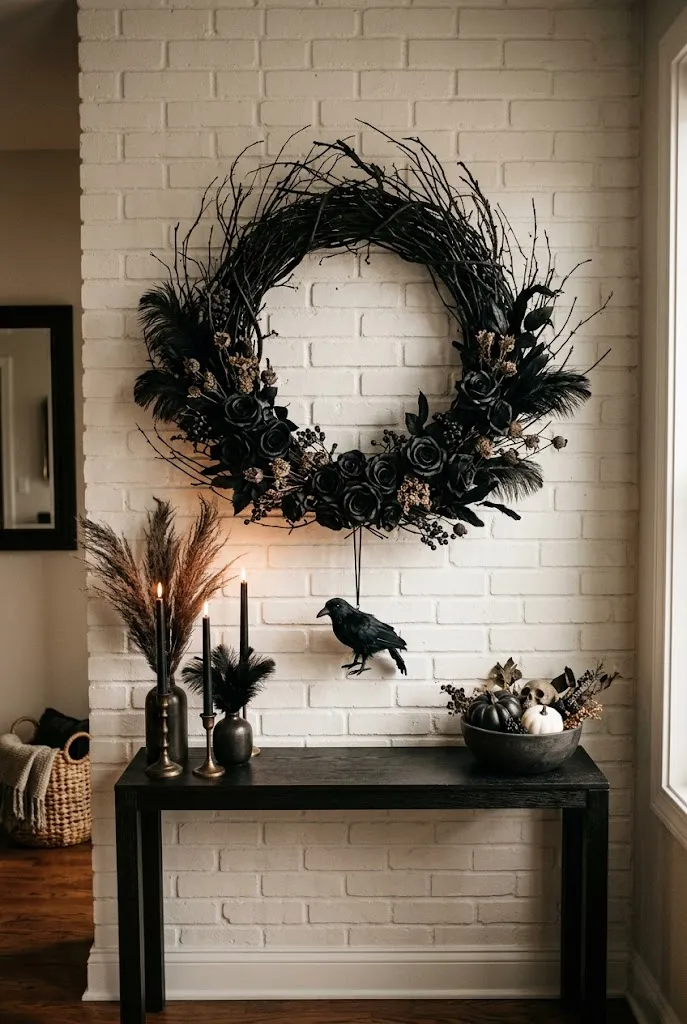
Before: The wall above your console or dresser holds one small print that disappears against the paint. It looks unfinished, and nothing draws the eye when guests walk in.
After: An oversized black wreath now anchors the wall as a bold focal point. The dark circle frames the space and makes the whole vignette look planned. It reads grown-up and dramatic without feeling cluttered.
Wreaths are not just for doors. Hung inside, a 20 to 24 inch size fills the wall space above most consoles, and it stays protected from wind and rain. Among the Halloween apartment wall decor ideas in this list, it’s the one I’d pick for anyone who prefers elegant over gory.
13. Vintage Halloween Plate Wall
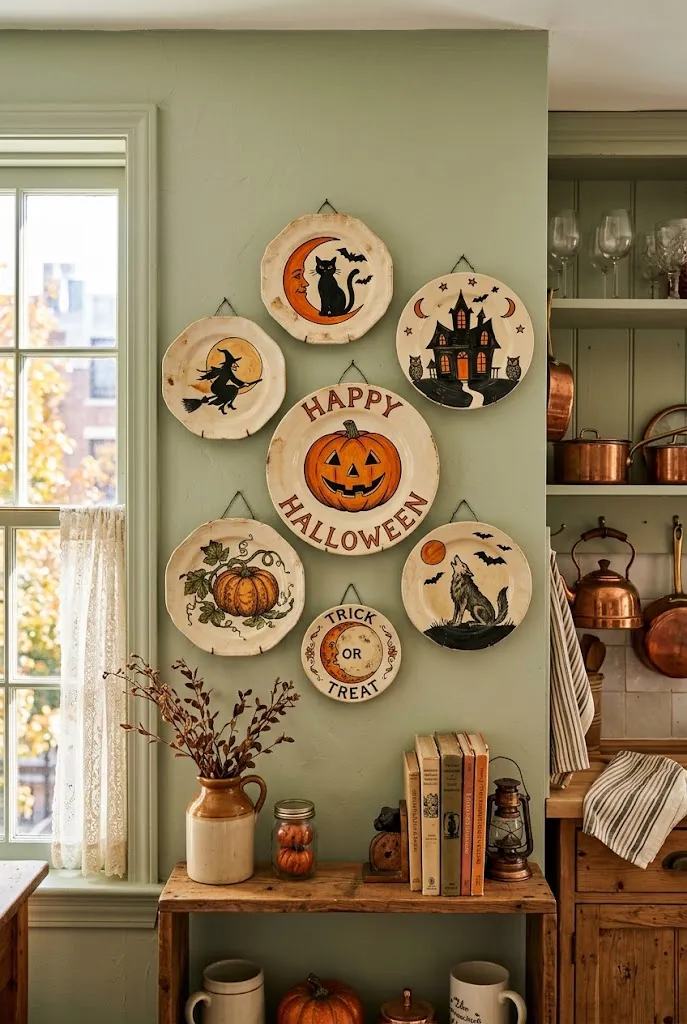
- Collect 5 to 7 plates in mixed sizes from thrift stores or dollar shops, sticking to an orange, black, and cream palette.
- Attach an adhesive disc plate hanger to the back of each plate and let it set for 24 hours.
- Trace each plate onto kraft paper, cut the shapes out, and tape them to the wall to test the layout.
- Hang the largest plate in the center first, then work outward, keeping about 2 inches between plates.
Kitchens usually get skipped at Halloween, yet that’s where everyone ends up gathering. A plate wall brings the theme into the room without taking a single inch of counter space. Melamine plates are the safer pick if you worry about drops, since they won’t shatter on tile floors.
14. Prowling Black Cat Silhouettes
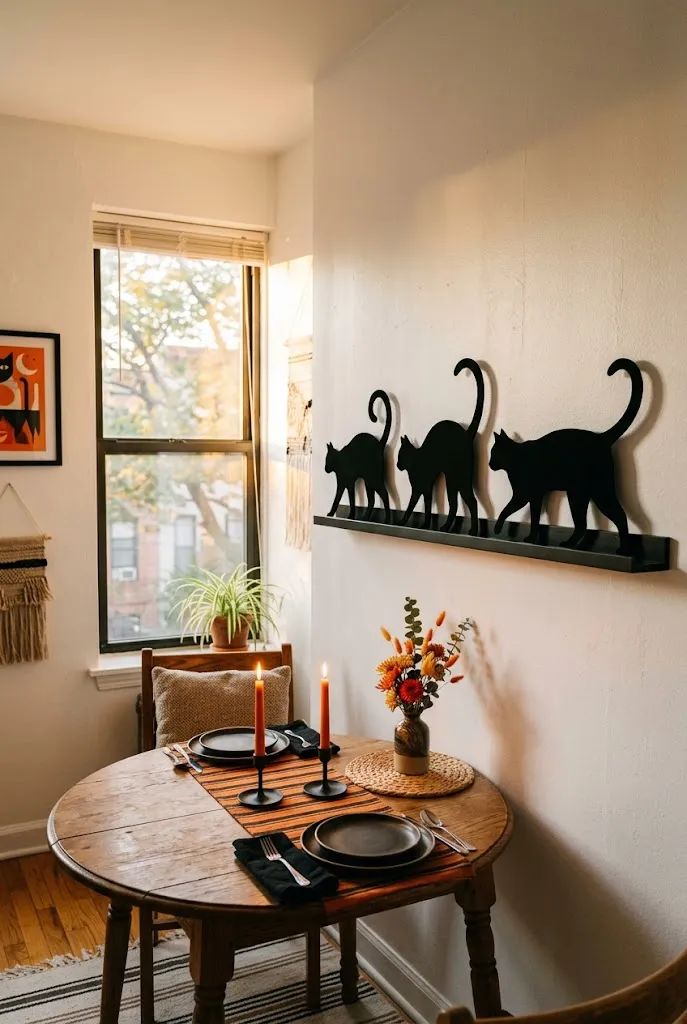
| Comparison Point | Cardstock Cutouts | Vinyl Wall Decals |
|---|---|---|
| Cost | Under $5 | About $10 to $20 |
| Detail | Simple, bold shapes | Fine whiskers and tail curves |
| Durability | One season | Several seasons if stored flat |
| 3D Effect | Can stand upright on a ledge | Sits flat on the wall |
A black cat silhouette reads as Halloween from across the room in half a second. Set the silhouettes so they all walk in one direction, as if they’re prowling somewhere. That tiny detail creates motion. Standing cardstock cats on a picture ledge works best for renters who want zero adhesive.
15. Washi Tape Haunted House
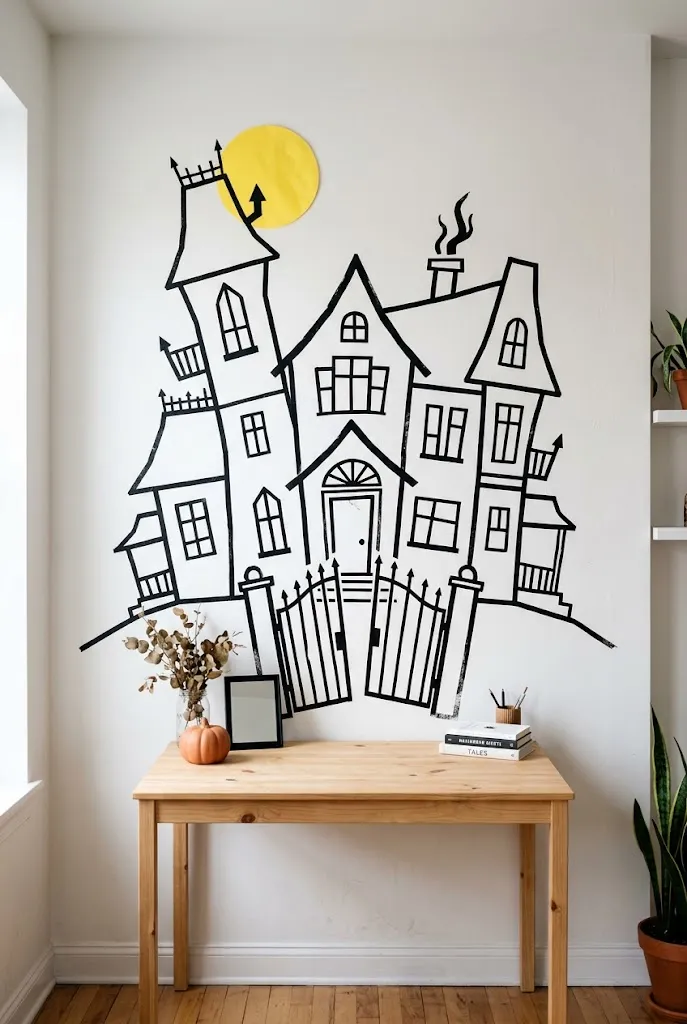
Do:
- Sketch the outline on paper first, then mark key corners on the wall with tiny pencil dots.
- Use 15mm black washi tape for main lines and thinner tape for windows.
- Tilt roofs and towers slightly so the house looks crooked and spooky.
- Add a paper moon and a few taped bats to finish the scene.
Don’t:
- Don’t use electrical tape or duct tape, which can pull paint off.
- Don’t leave the tape up past mid-November, since adhesive grips harder over time.
- Don’t fuss over perfectly straight lines, because wobbly edges look more haunted.
Blank walls in a studio often stay blank because renters fear damage. Washi tape solves that, peeling off cleanly from most painted surfaces. I’ve tried this above a desk, and it made working from home in October feel a lot more fun. Kids love helping with the windows and door, too.
16. Dark Dried Floral Hanging
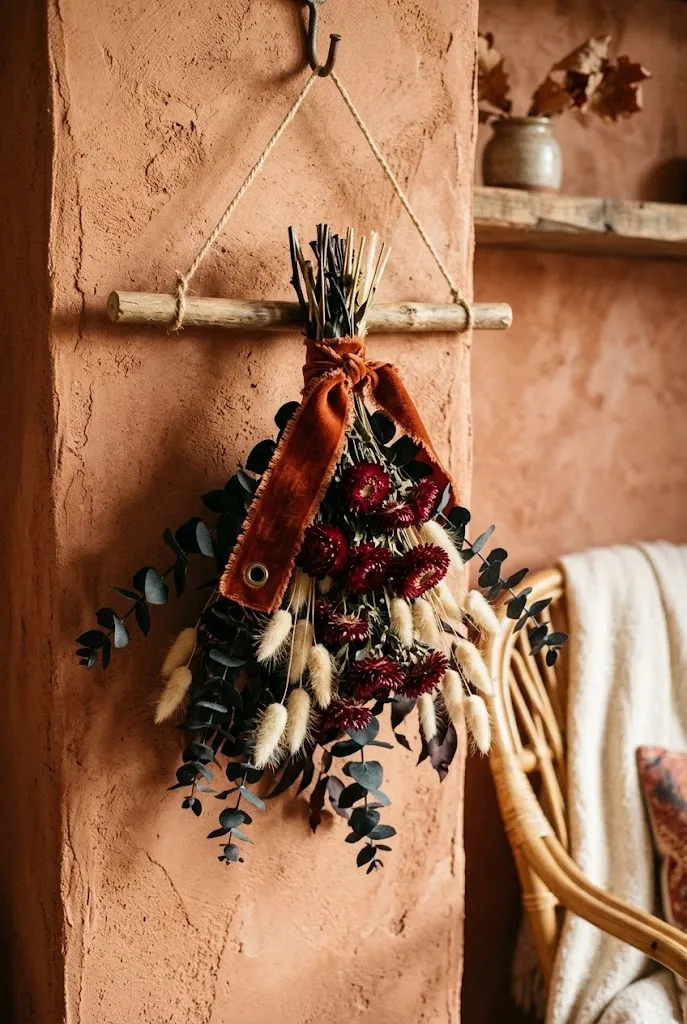
Cost: About $15 to $25 | Time: 30 minutes | Skill Level: Beginner | Lasts: Through Thanksgiving
Not every Halloween look needs skulls or cobwebs. Dark dried stems bring a quiet, witchy mood that bridges spooky season and fall. Hang the dowel on a single adhesive hook with twine looped at both ends. Mist the bundle lightly with hairspray first, and far fewer petals will scatter across your floor.
17. Flameless Candle Wall Sconces
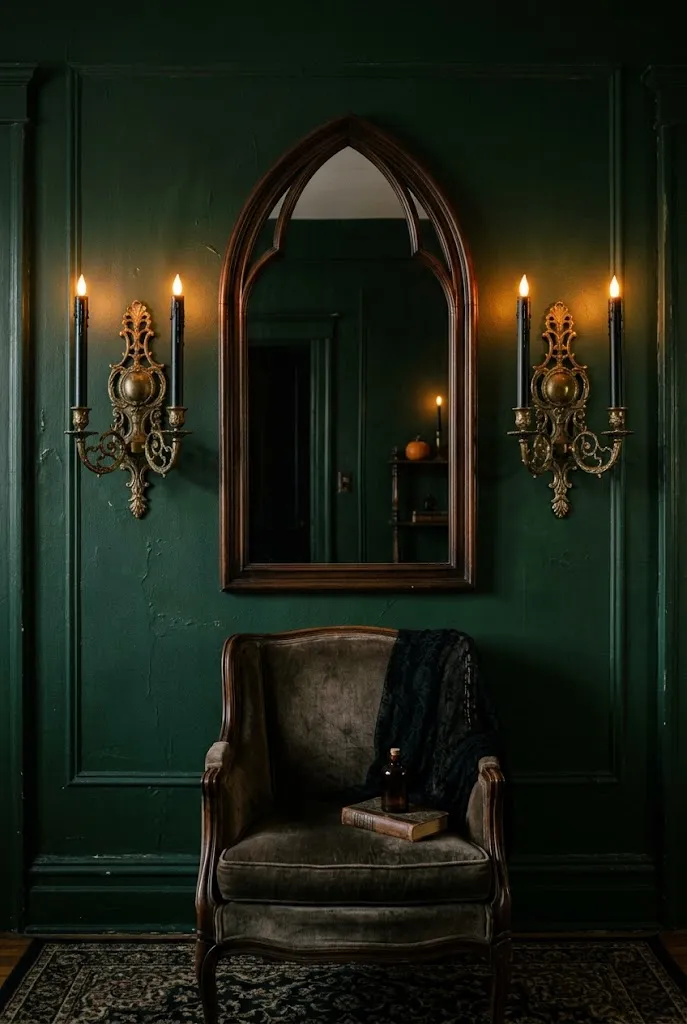
Candlelight on a wall feels like an old haunted estate. Real flames near walls and curtains are risky in a small space, so flameless LED tapers are the smarter swap. Look for ones with a flicker mode and a remote, then drip black hot glue down the sides for a melted wax effect.
Lightweight metal or resin sconces hang on adhesive hooks, since the candles weigh almost nothing. Place them in a pair on either side of a mirror or framed print for balance. The remote timer is the real win, since the candles glow on their own every evening.
18. Full Moon Wall Light
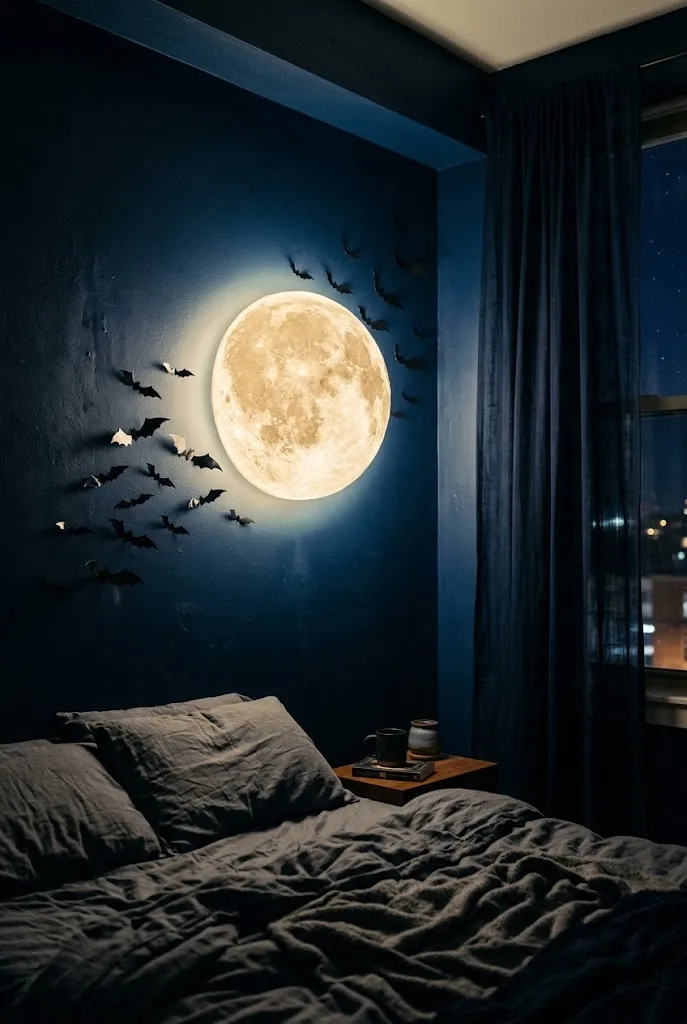
- Pick a wall-mount moon light, usually sold as 12 to 16 inch rechargeable lamps or flat LED moon panels.
- Mount it high, around 12 to 18 inches below the ceiling, so it feels like a moon rising.
- Choose the warm yellow setting over bright white for a more natural moonlit glow.
- Tuck three or four small bats or a single witch silhouette beside it for a storybook scene.
- Hide the charging cable behind a curtain, or go with a rechargeable model that needs no cord at all.
A glowing moon gives a studio real atmosphere after dark, and it replaces a harsh overhead light at the same time. Many rechargeable versions run for several hours per charge. After Halloween, drop the bats and it becomes a year-round night light for a bedroom corner.
19. Spooky Letter Board Quote
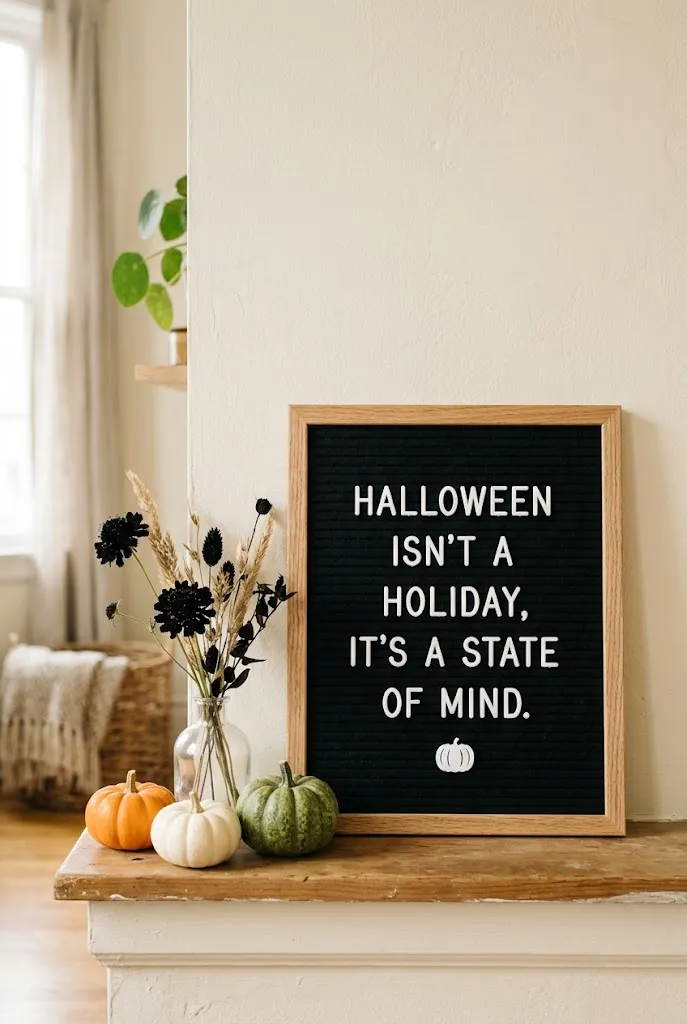
Quick Tip:
Change the message every few days leading up to October 31, like a countdown or a new pun each week. Short phrases of four to six words read best from across a small room.
Words give your walls personality in a way objects can’t. A letter board lets you crack a joke, count down the days, or welcome guests by name at a party. I’ve noticed people photograph a clever sign more than almost anything else in the room. It’s ideal for anyone who hosts often.
20. Faux Pumpkin Garland Swag
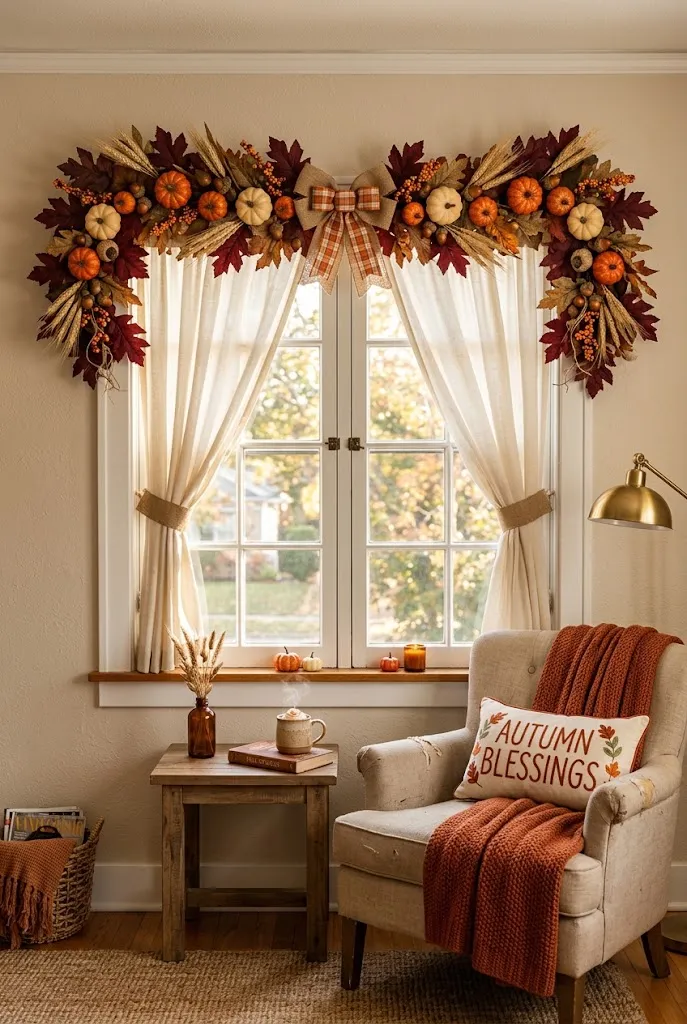
Before: The window is the brightest spot in your apartment, but the wall around it stays bare. All that natural light lands on nothing seasonal.
After: A full pumpkin garland now frames the top of the window in a soft curve. Sunlight hits the orange tones and makes them glow. The window reads as a finished feature instead of an empty rectangle.
Windows already pull the eye, so decorating around one gives you maximum impact for minimal effort. Two clear adhesive hooks at the upper corners hold most lightweight garlands, which usually run 5 to 6 feet. Fluff the leaves outward after hanging. Flat garlands look cheap, while fluffed ones look full and high-end.
21. Witch Hat Wall Trio
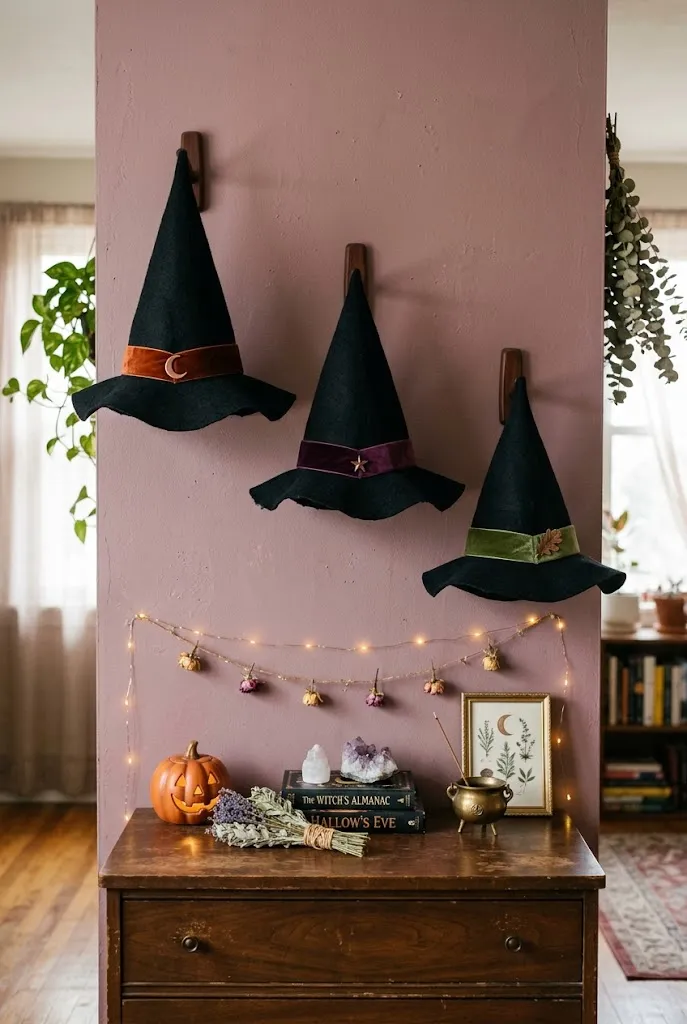
- Buy three felt witch hats from a party or craft store, ideally in slightly different sizes.
- Wrap a 1-inch velvet ribbon around the base of each crown and secure it with a dab of hot glue.
- Glue a small loop of fishing line inside the tip of each hat.
- Hang the hats on clear adhesive hooks in a staggered line, with the middle one about 4 inches higher.
Witch hats are usually worn, not displayed, which is exactly why they look fresh on a wall. The staggered heights create rhythm, and the colored bands tie in with pillows or throws you already own. Keep a cheap one aside for yourself, because someone always asks to wear it.
22. Halloween Shadow Projector
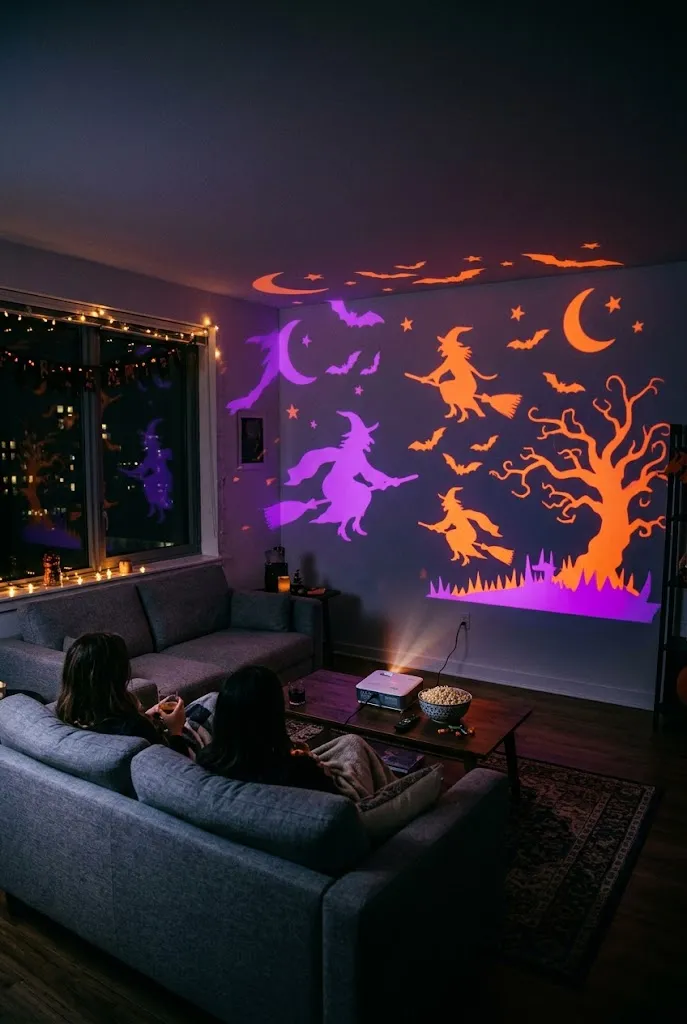
| Comparison Point | Halloween Projector | Paper Wall Cutouts |
|---|---|---|
| Cost | About $20 to $40 | Under $10 |
| Wall Contact | None at all | Putty or tape needed |
| Motion | Animated scenes | Static |
| Daytime Look | Invisible | Visible all day |
| Setup | Plug in and aim | 1 to 2 hours of cutting |
Zero wall contact makes this the safest option for strict leases. A compact projector on a bookshelf covers an entire wall with moving ghosts in seconds, which suits movie nights and parties. Since it disappears by day, I’ve seen this work best paired with one daytime piece, like a wreath or garland.
23. Halloween Countdown Envelope Wall
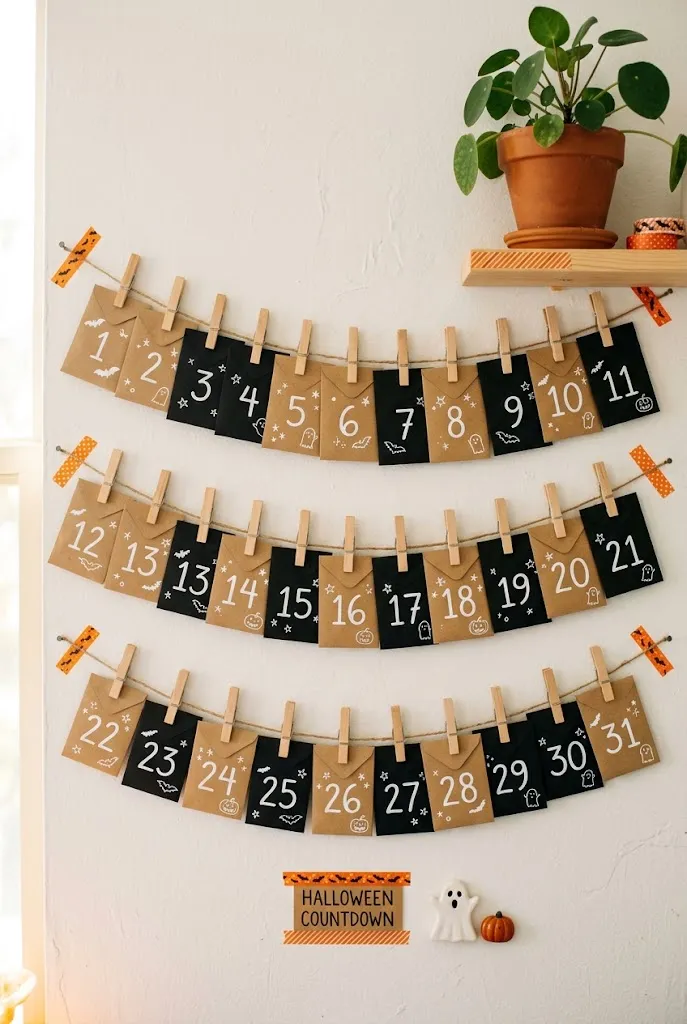
Do:
- Number the envelopes 1 to 31 with a white paint pen.
- Fill each one with a small treat, a mini activity card, or a fun Halloween fact.
- String four or five rows of twine between adhesive hooks, keeping rows about 5 inches apart.
- Open one envelope each morning and clip it back up empty so the wall stays full.
Don’t:
- Don’t fill envelopes with heavy candy that makes the twine sag.
- Don’t hang it where the sun hits all day, since chocolate melts fast.
- Don’t start late; hang it by September 30 so day one is ready.
Countdowns are usually a December thing, which makes an October version feel special. The grid of envelopes fills a large wall for just a few dollars, and it gives kids or roommates something to look forward to daily. Of all the Halloween apartment wall decor ideas here, this one builds excitement all month long.
Conclusion
Your walls can do a lot of heavy lifting this October. Whether you pick glowing paper bats, a gothic mirror cluster, or a simple washi tape haunted house, every idea here works in a small space and comes down cleanly when the season ends. I’ve seen how one decorated wall can make a whole studio feel ready for guests.
Save this post to your Halloween board on Pinterest so these Halloween apartment wall decor ideas are ready when you need them. Pick one or two to try this weekend, then share the article with a friend who’s decorating a rental too. Happy haunting!

Community
Join the conversation
Add a useful idea, ask a specific question, or share what worked in your space. Every comment is reviewed before it appears.