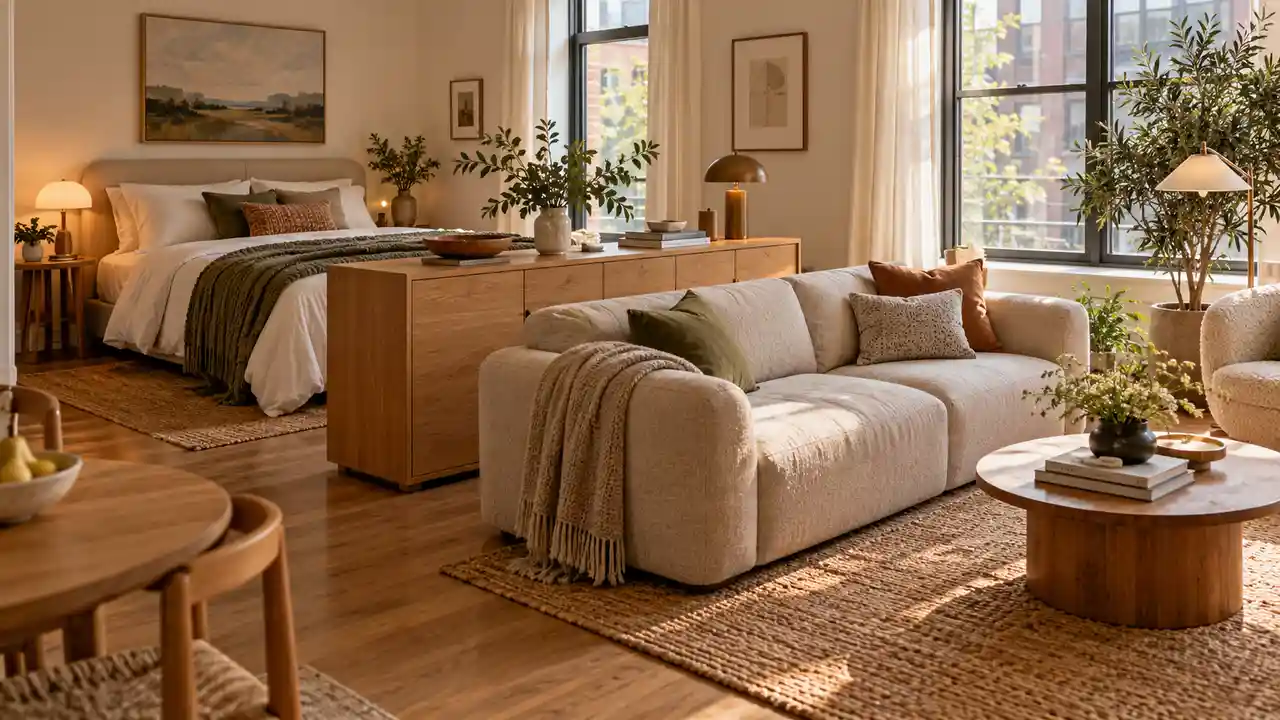
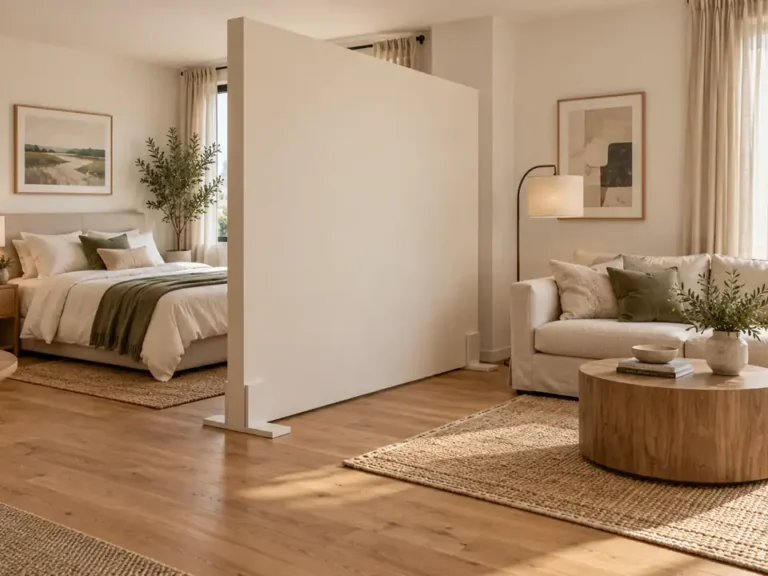
Privacy should not cost you a patching job at move-out. For anyone searching for studio apartment divider renter friendly options, the most useful starting point is furniture that stands on its own and makes your room easier to share. A low cabinet, a carefully positioned sofa, or a stable folding screen can give sleeping, working, and relaxing their own places. These ideas range from subtle visual boundaries to more enclosed corners, so choose the level of separation you actually need. Check furniture stability, manufacturer instructions, floor protection, and your lease before rearranging anything. Tall storage units may require wall anchoring, which makes low, broad alternatives a better match here. Keep exits, heaters, and everyday walking routes clear throughout.
1. Sofa Back Boundary
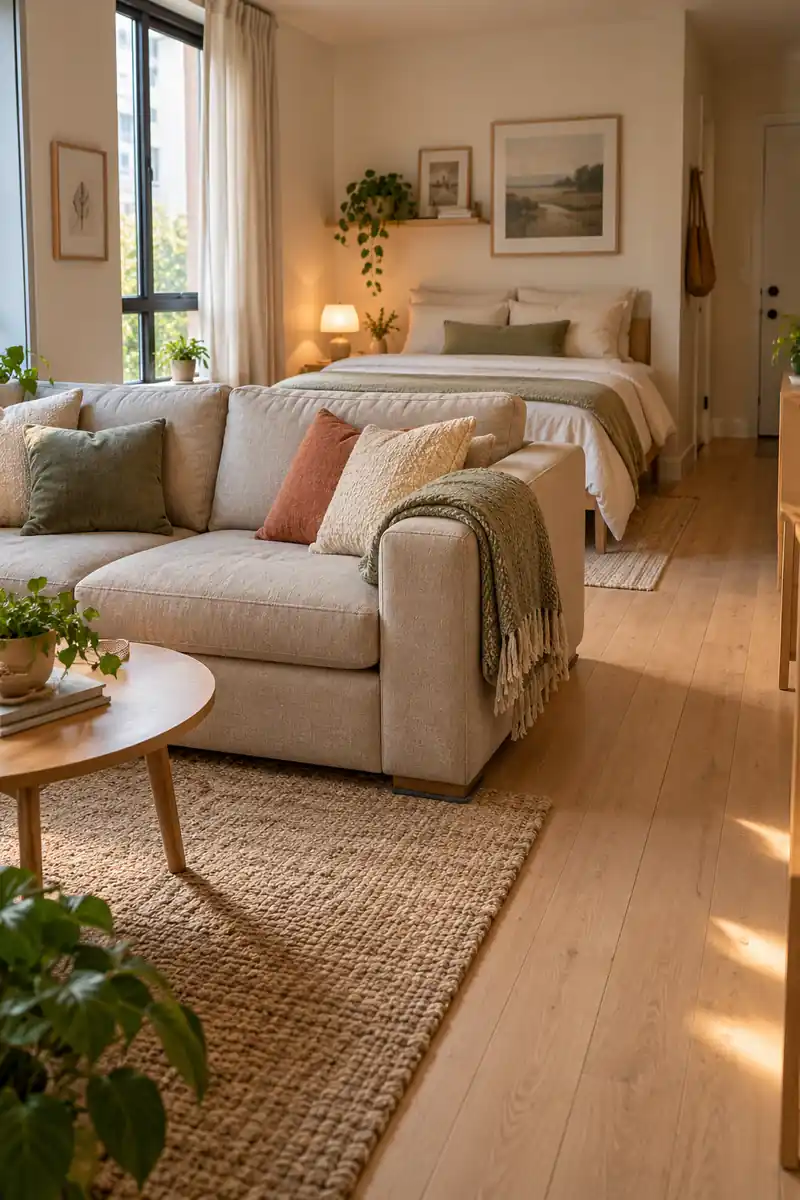
Your sofa can draw a room boundary before you buy a single extra piece. Turn its back toward the sleeping area and face the cushions into the lounge. A finished upholstered back looks intentional from the bed, while a clear route around one end keeps the studio easy to use.
Measure the sofa depth together with the space needed to walk past it before moving anything. Put furniture pads under suitable feet, following your flooring guidance. This arrangement creates visual separation rather than full privacy, but it lets one substantial piece organize the room without touching a wall at all.
2. Corner Loveseat
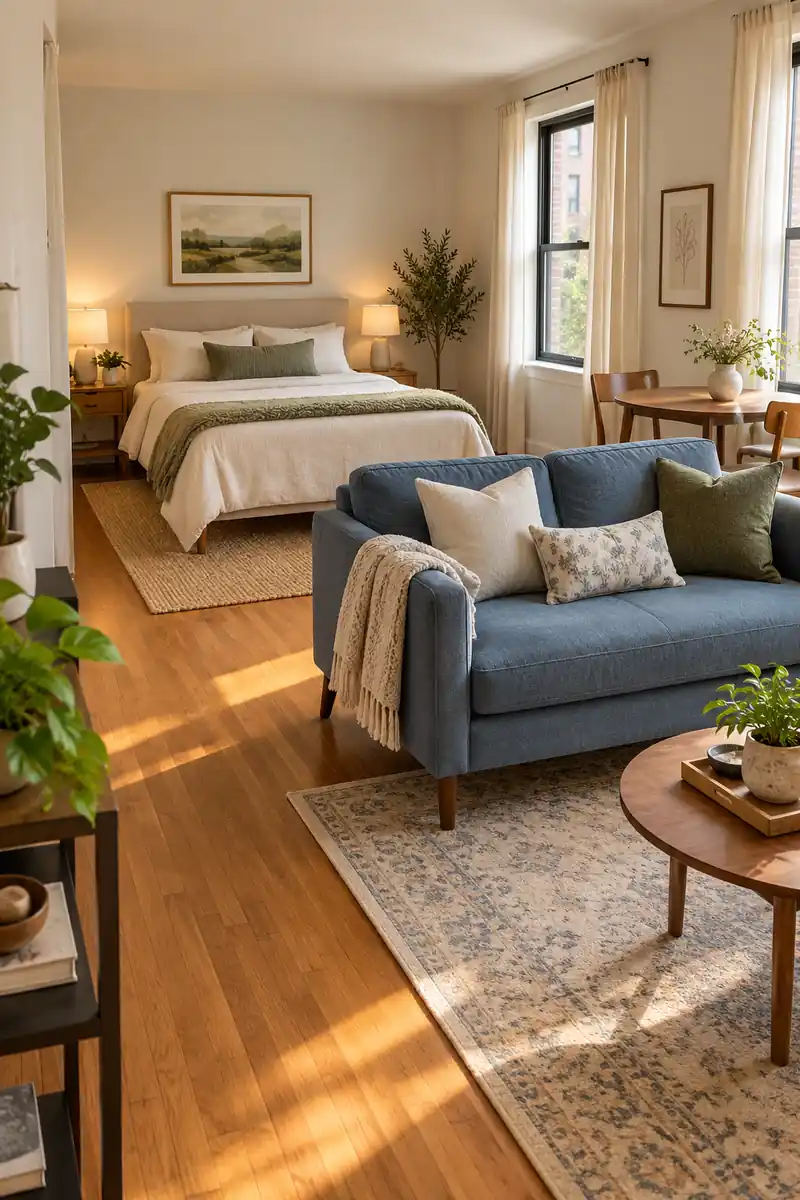
- Face a compact loveseat toward the main seating area rather than directly toward the bed.
- Set it perpendicular to the sleeping zone to create a soft corner.
- Leave the open end wide enough for your normal walking route.
- Choose a finished back and broad, stable feet.
An angled seating corner makes the bed feel less exposed without surrounding it completely. Tape out the footprint first, including the space needed to get into bed. Keep the loveseat clear of wardrobe doors, and check that its new position still gives everyone a comfortable view of the room.
3. Low Cube Storage
Quick Tip:
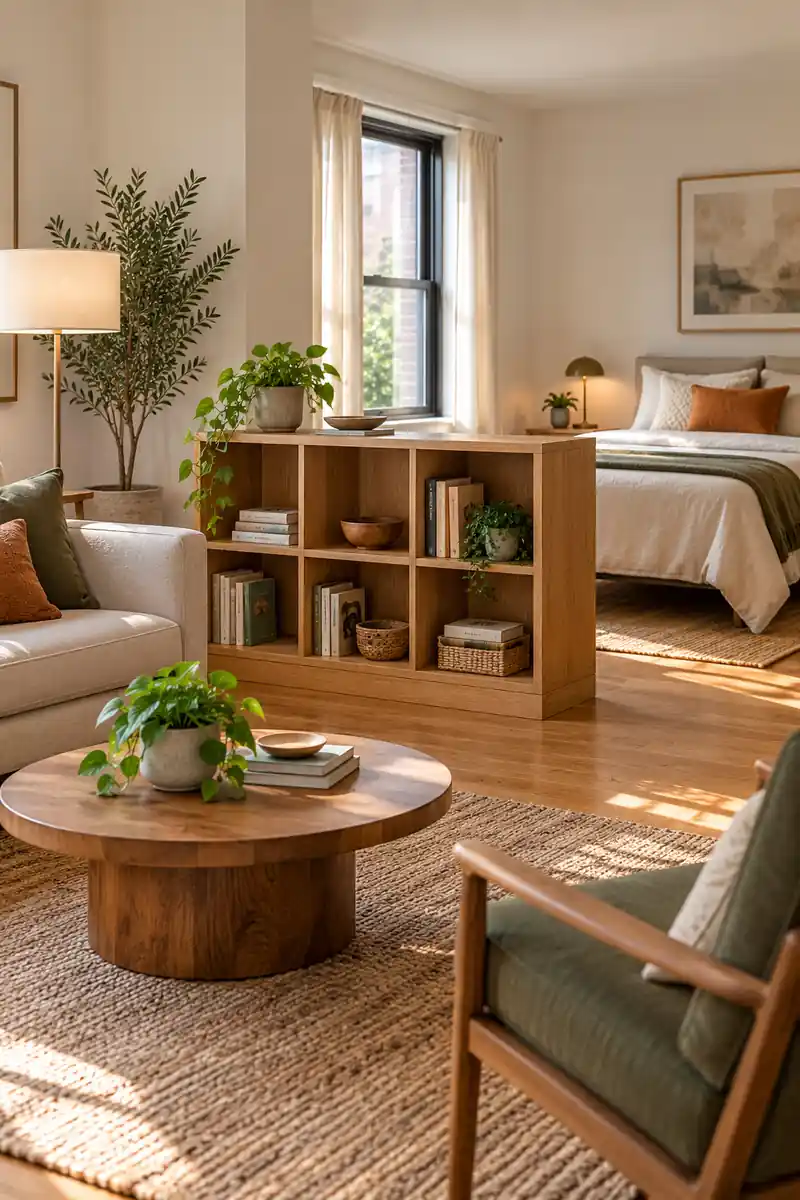
Let a low shelf do two jobs without towering over the bed. Choose a broad unit specifically approved for freestanding use, and follow its anchoring instructions; skip it if those instructions require wall attachment. Keep heavier contents low.
Open cubes allow light through while baskets hide everyday clutter. Place the unit across part of the room rather than spanning the entire width. A modest height keeps sightlines open, although it will not provide standing privacy. Protect the floor beneath the base and avoid overloading the upper surface.
4. Closed Sideboard
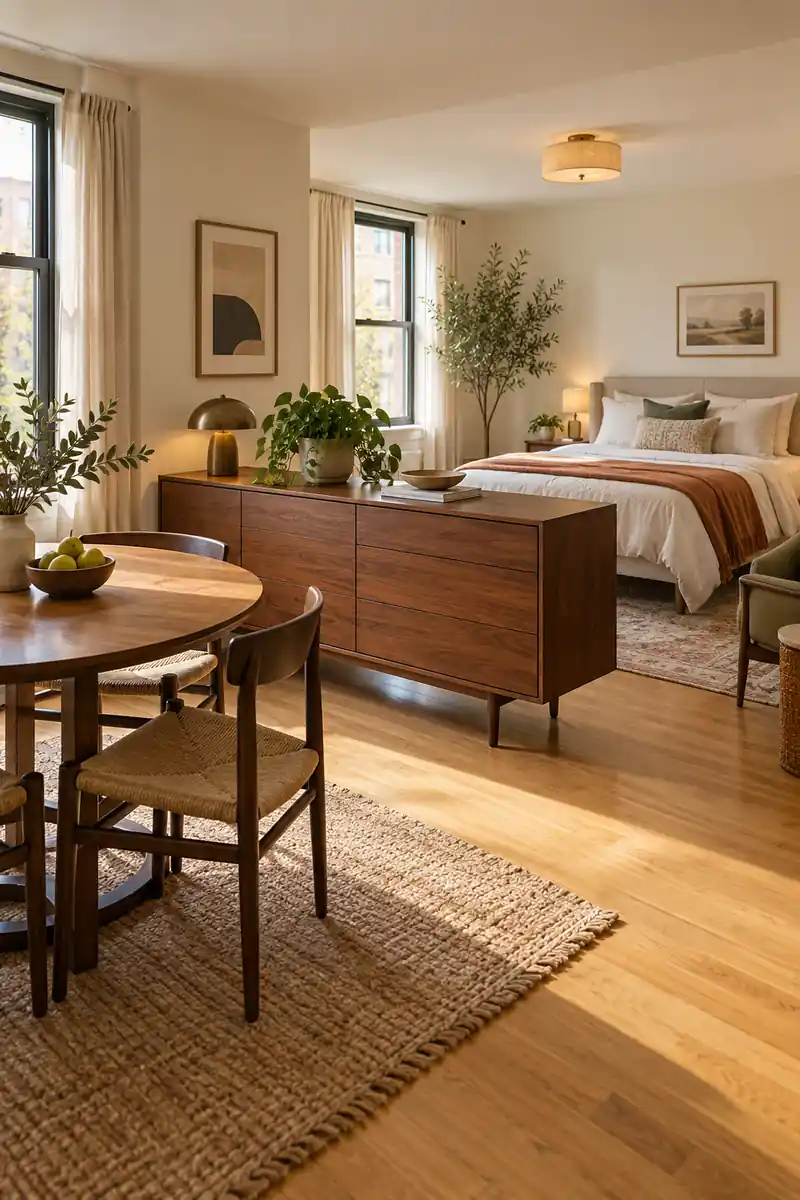
BEFORE:
A dining table and bed sit in one continuous view. Bags and spare linens spill into the space between them.
AFTER:
A low sideboard marks the dining edge and hides those loose items. Its finished back faces the bed, leaving a clear route around one end.
Closed storage makes a useful boundary when you would rather not see shelves from both sides. Choose a piece designed to stand safely in that position and check any anti-tip requirements. Leave full clearance for opening doors, with no handles projecting into the route you use to reach the bed.
5. Dresser Footboard
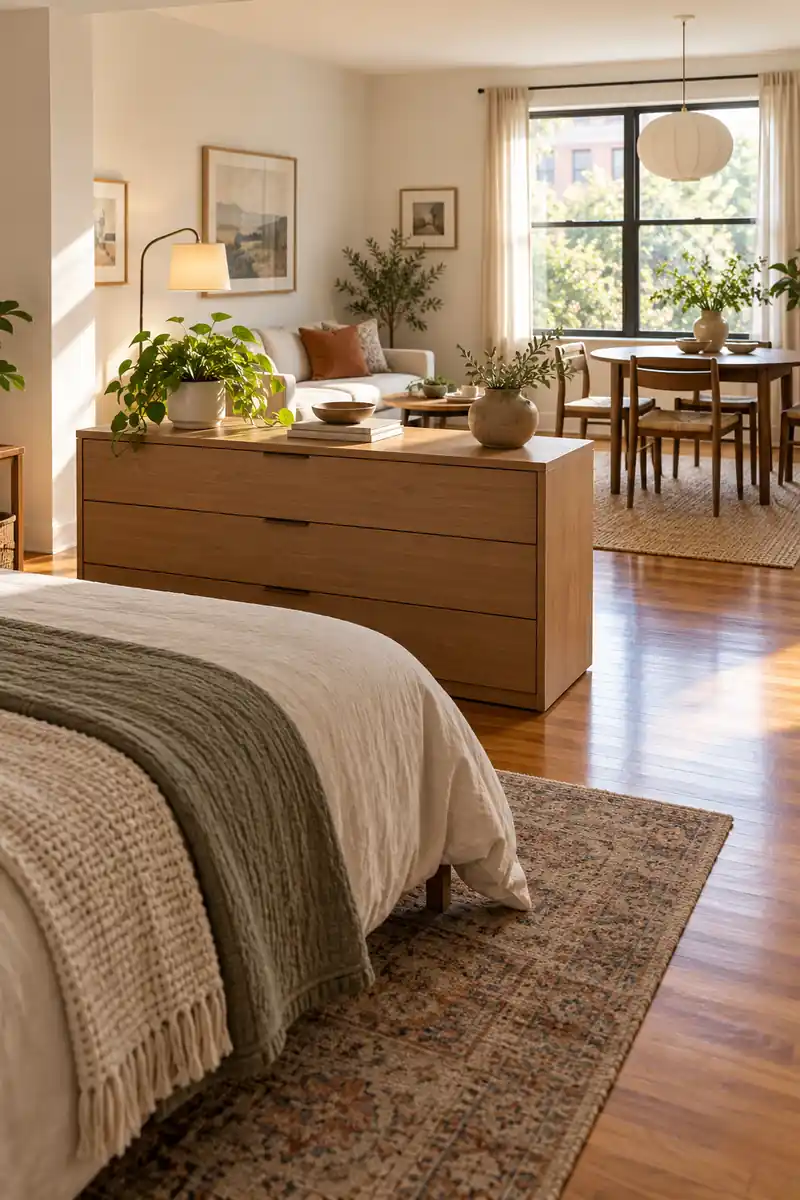
- Measure the width of the bed and the space beyond its foot.
- Choose a low, stable dresser with a finished back and suitable manufacturer instructions.
- Position it with drawers facing the side that has opening clearance.
- Check the walkway and protect the floor before loading it.
A footboard dresser creates a practical end to the sleeping zone. The top should stay mostly clear so the room does not gain a new clutter shelf. Never ignore required anchoring because a unit looks low; select another model if it cannot be used safely without attaching it to walls.
6. Storage Bench Border
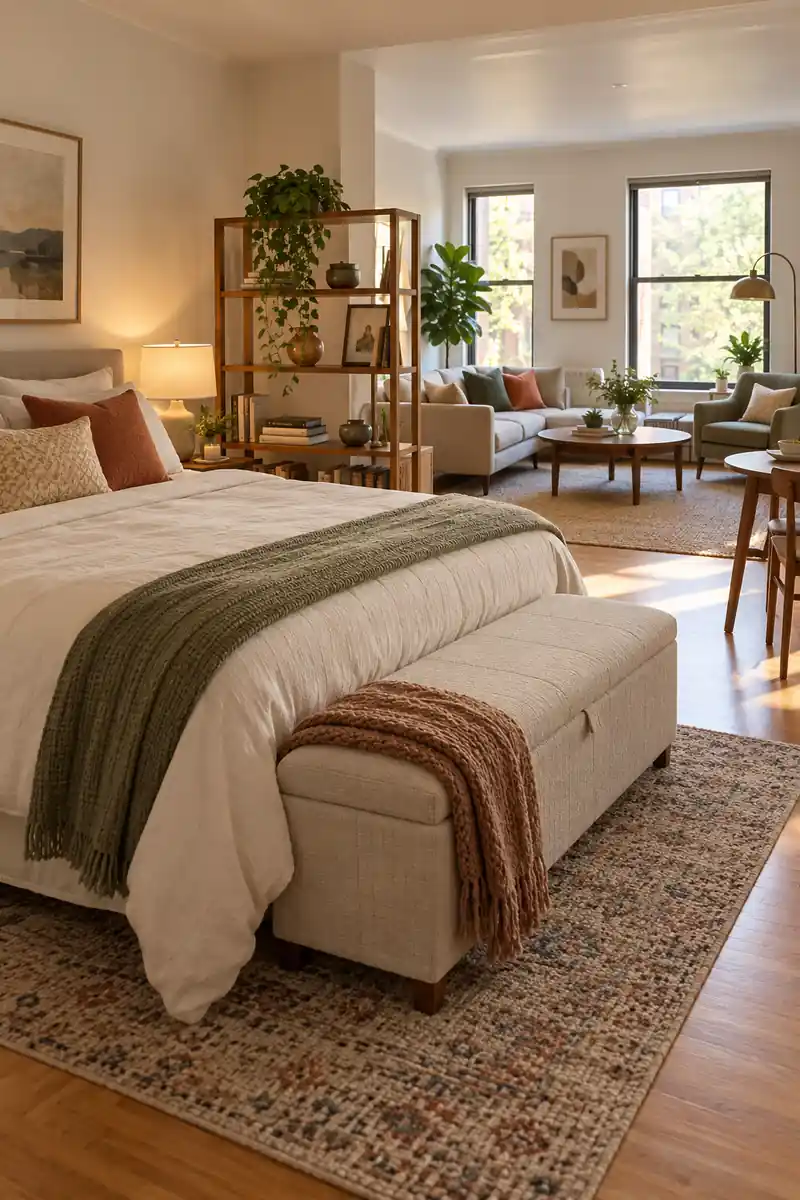
| Detail | Open Floor | Storage Bench |
|---|---|---|
| Boundary | No visible edge | Soft low edge |
| Storage | Separate container needed | Inside the seat |
| Privacy | None | Visual zoning only |
A bench separates routines more than views, which suits an open studio. Place it at the edge of the sleeping area, with enough space to lift the seat fully. Choose a stable design with a safe lid mechanism, and keep the walking route beside it free of shoes and bags.
7. Upholstered Ottoman Pair
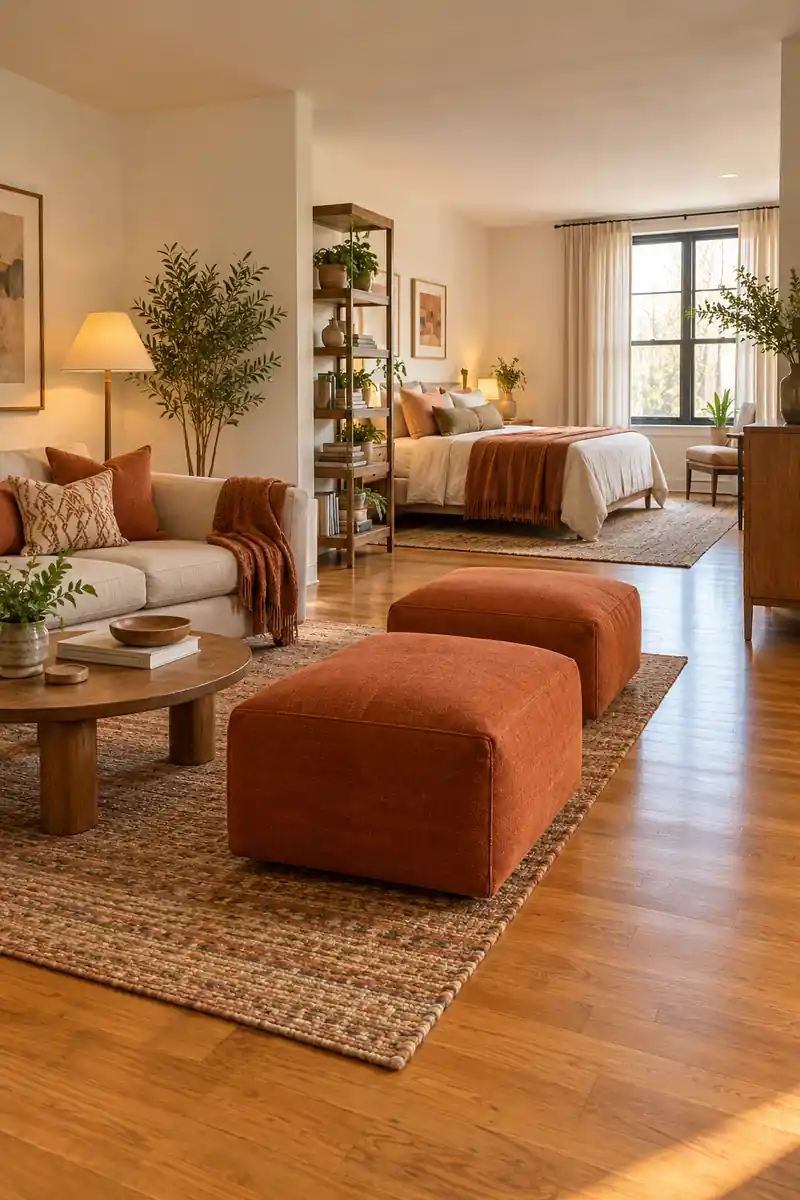
DO
- Choose broad ottomans that sit securely on the floor.
- Align them along one clear room boundary.
- Leave a generous opening at one end.
DON’T
- Scatter pieces across the main walkway.
- Stack ottomans to create height.
- Treat light stools as a safety barrier.
Two matching pieces can suggest a living room edge while doubling as occasional seats. Keep the gap between them small enough to read as one arrangement, without creating a tempting shortcut. This approach suits flexible zoning rather than privacy, and both pieces should move away easily when you need space.
8. Console Desk Divider
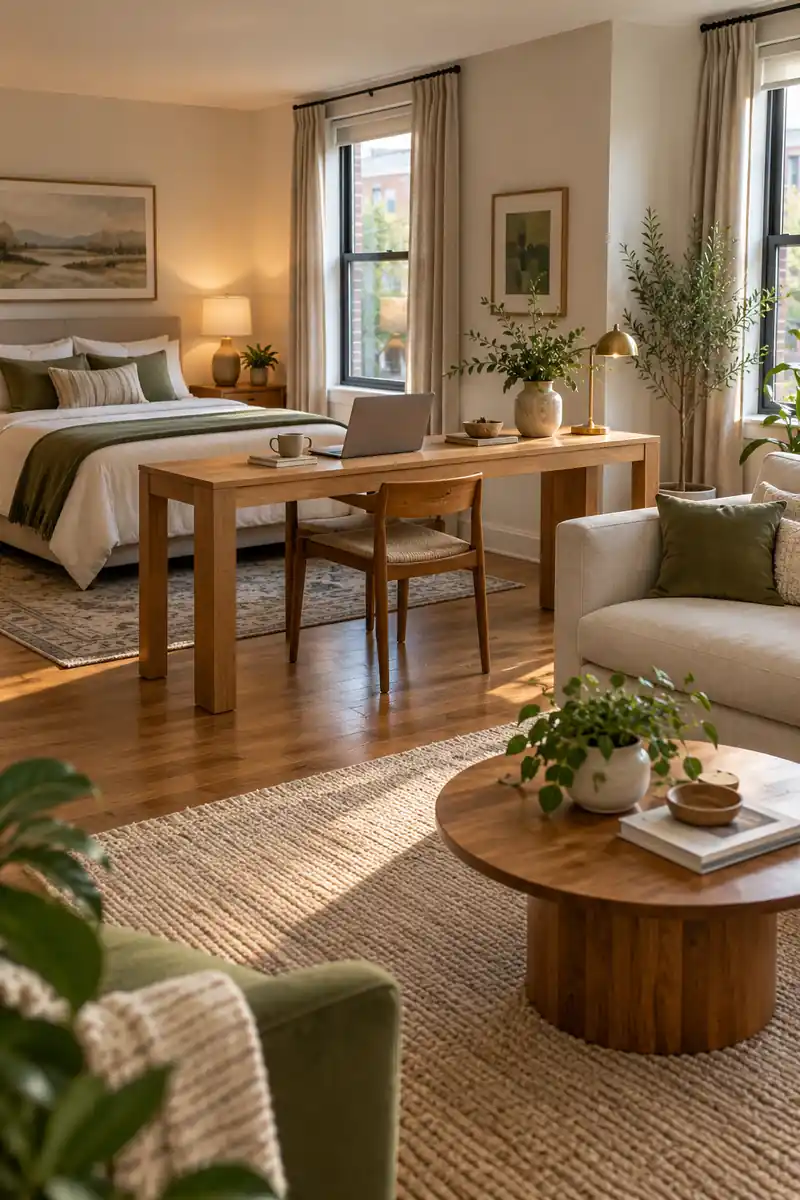
Best For: Separating work and sleep
Privacy: Low visual boundary
Setup: Freestanding desk with a finished back
Check First: Chair clearance and cable route
Work feels less scattered when the desk has a clear position of its own. Face the chair toward the living area, leaving the desk back toward the bed. A stable desk with concealed cable management looks tidy from both sides. Keep all cords away from the passage around its end.
9. Freestanding Dining Bench
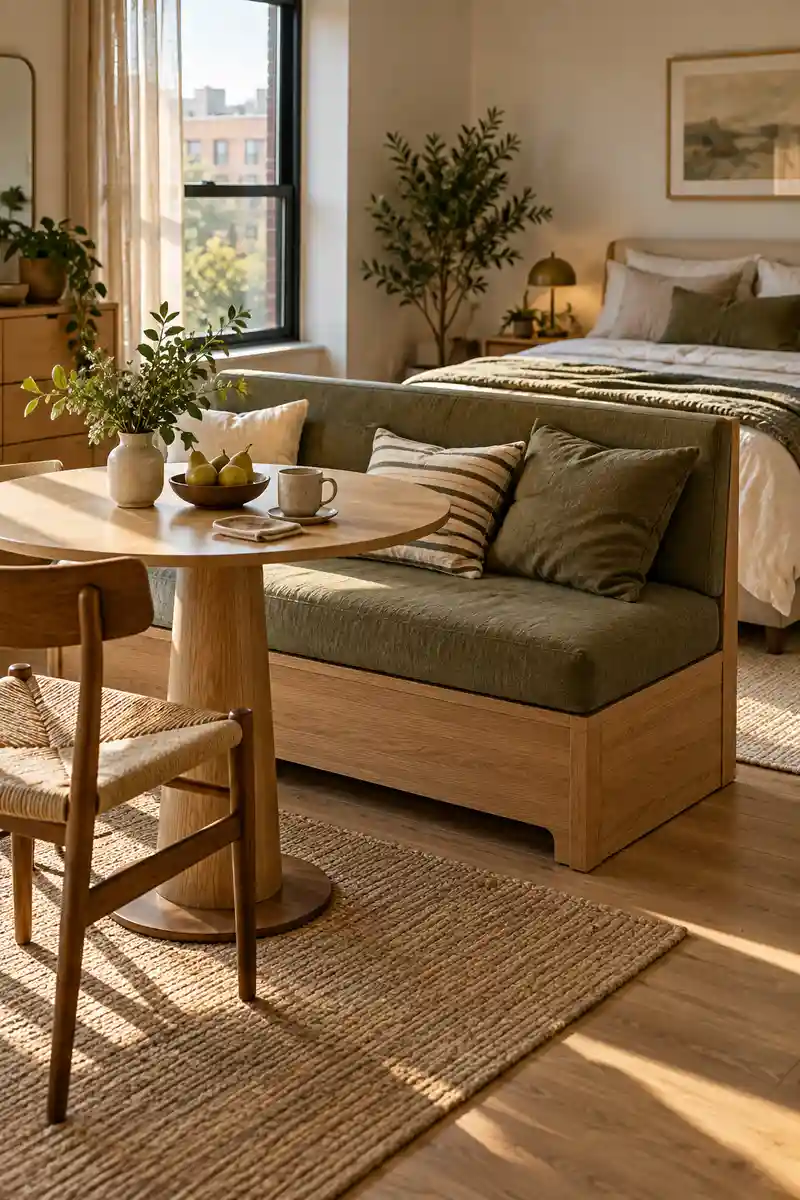
A dining bench can give your eating area a recognizable edge without adding another cabinet. Set a stable backed bench facing a small table, with its back toward the rest of the studio. Choose a model intended for independent use rather than a banquette that needs fastening to a wall.
Allow enough clearance to sit down and stand up without squeezing between furniture. A low back preserves the feeling of an open room while making meals feel separate from sleeping. Keep the upholstery practical, because this divider will be used every day and viewed from several different angles at once.
10. Drop Leaf Table Edge
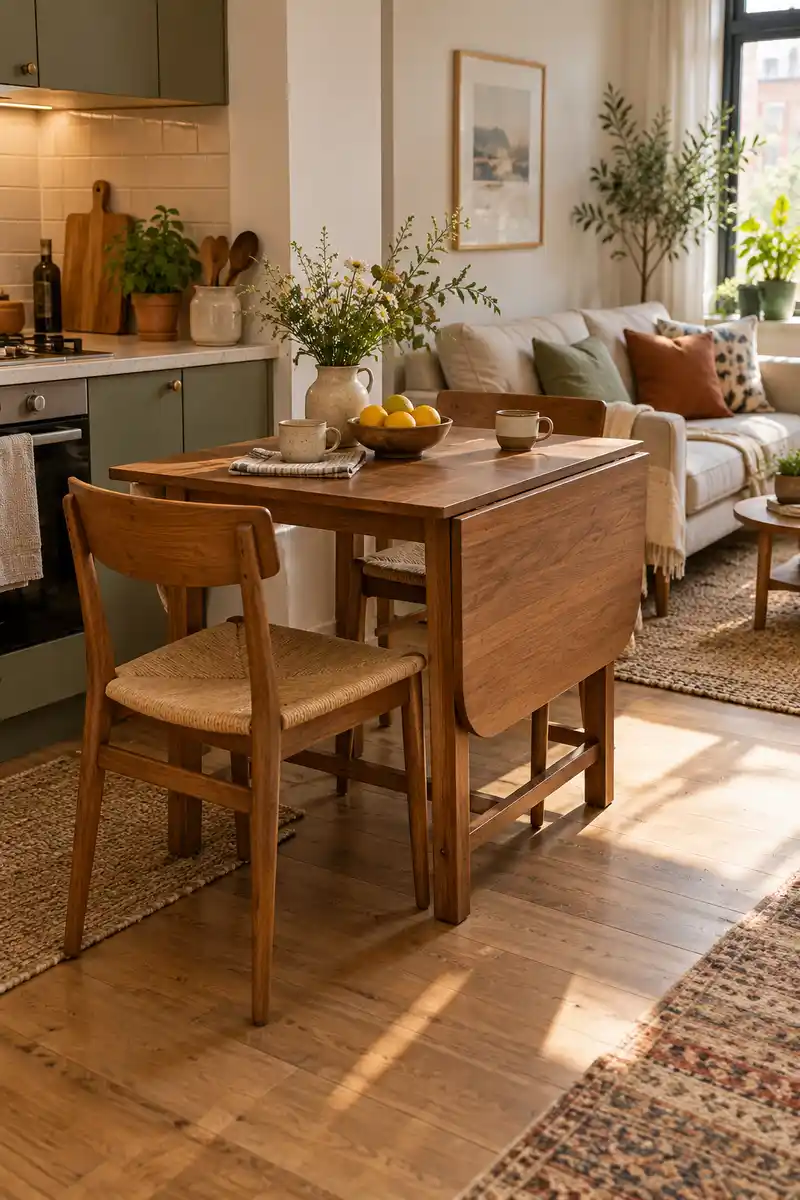
- Use the table as a compact boundary between kitchen and lounge.
- Choose a stable freestanding model with fully supported leaves.
- Keep one leaf folded when its extra surface is unnecessary.
- Store chairs where they cannot block the room opening.
A small table can mark the start of the dining zone without dominating the floor plan. Check its footprint with the leaf both open and closed before deciding where it belongs. Folded furniture still needs breathing room, and a tabletop is a visual marker rather than a screen for privacy.
11. Rolling Kitchen Cart
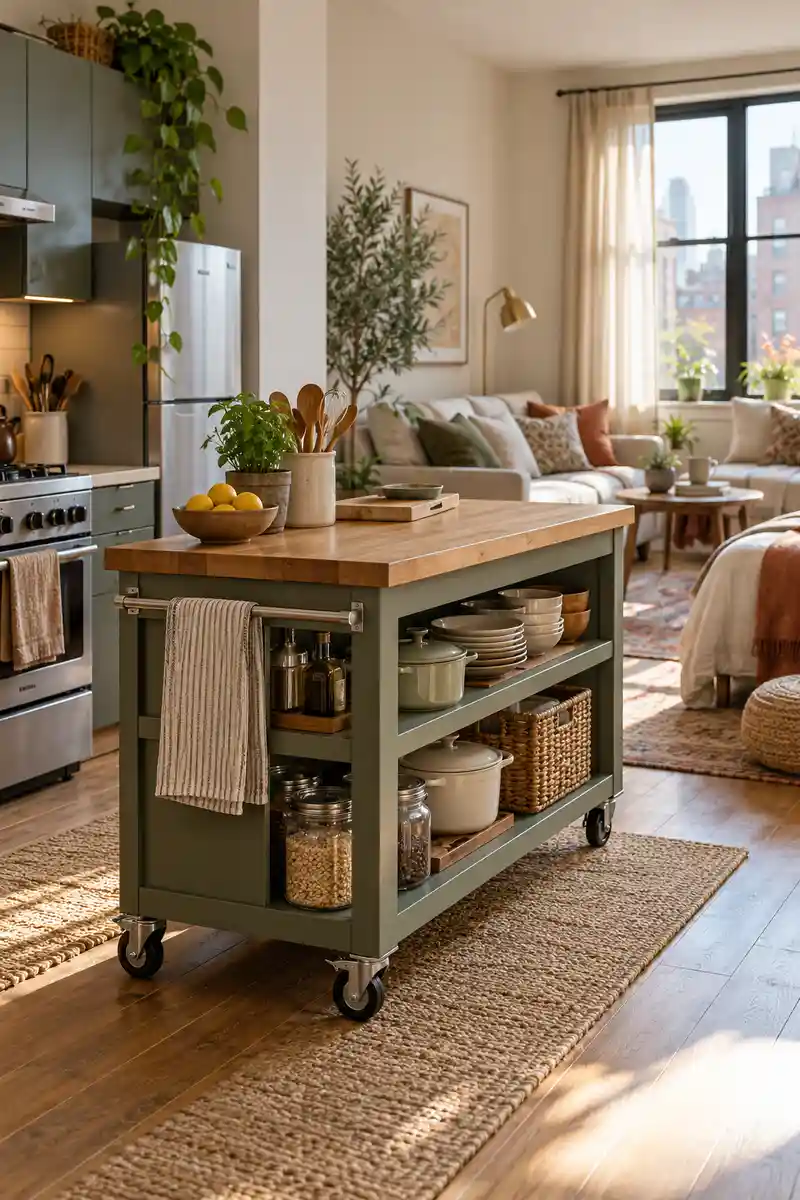
Quick Tip:
A cart only works as a boundary if it stays where you put it. Select a broad model with effective locking wheels, and keep its load within the manufacturer limit. Test it on your floor before arranging breakable items.
Position the cart at the edge of the cooking area so utensils and serving pieces stay close at hand. Leave appliance doors and kitchen circulation clear. Lock the wheels whenever it is parked, and move it by its frame rather than pulling a basket or leaning on the top shelf.
12. Low Planter Trough
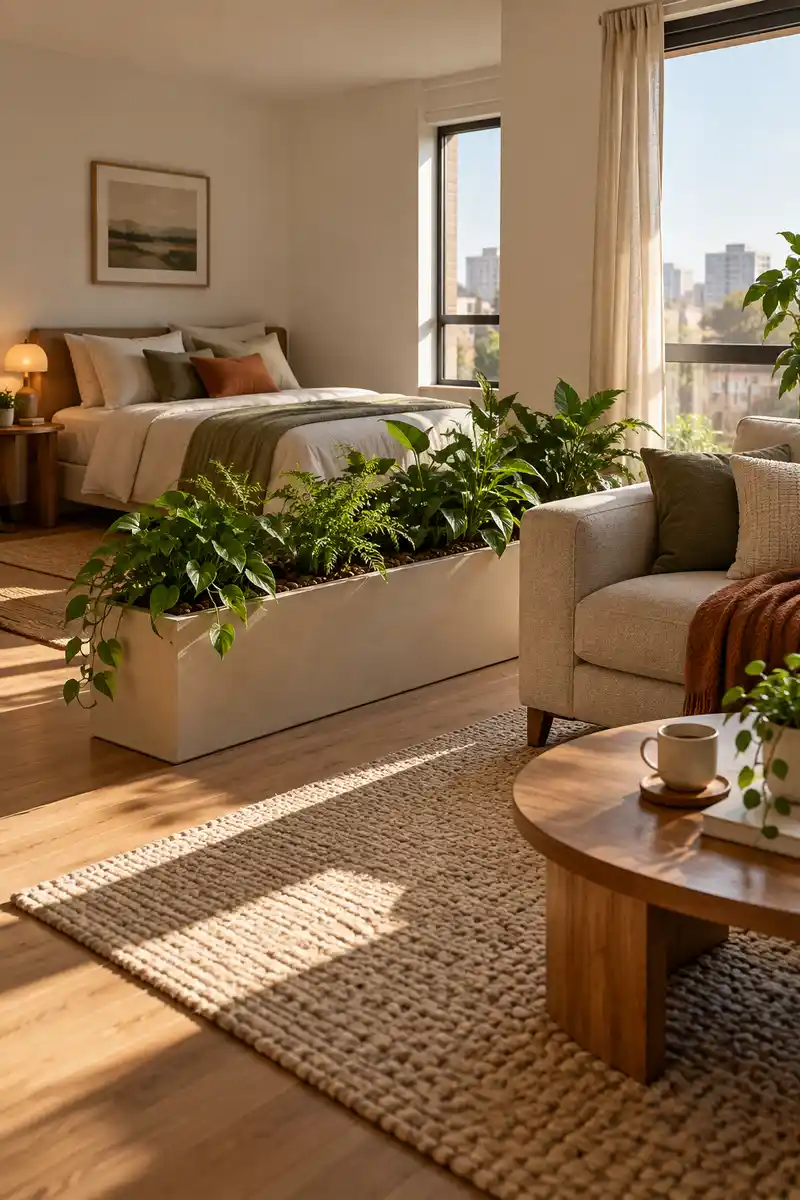
BEFORE:
The sofa and bed share an uninterrupted stretch of floor. A hard partition would make the room feel boxed in.
AFTER:
A broad, low planter marks the boundary with greenery. The room stays visually connected while the leaves soften the view toward the bed.
Choose a watertight inner tray and protect the floor from trapped moisture. Keep the planter low and stable, with plants suited to the actual light in that spot. A green boundary provides partial screening, but avoid thorny leaves or trailing stems where people brush past on their way through.
13. Grouped Plant Stands
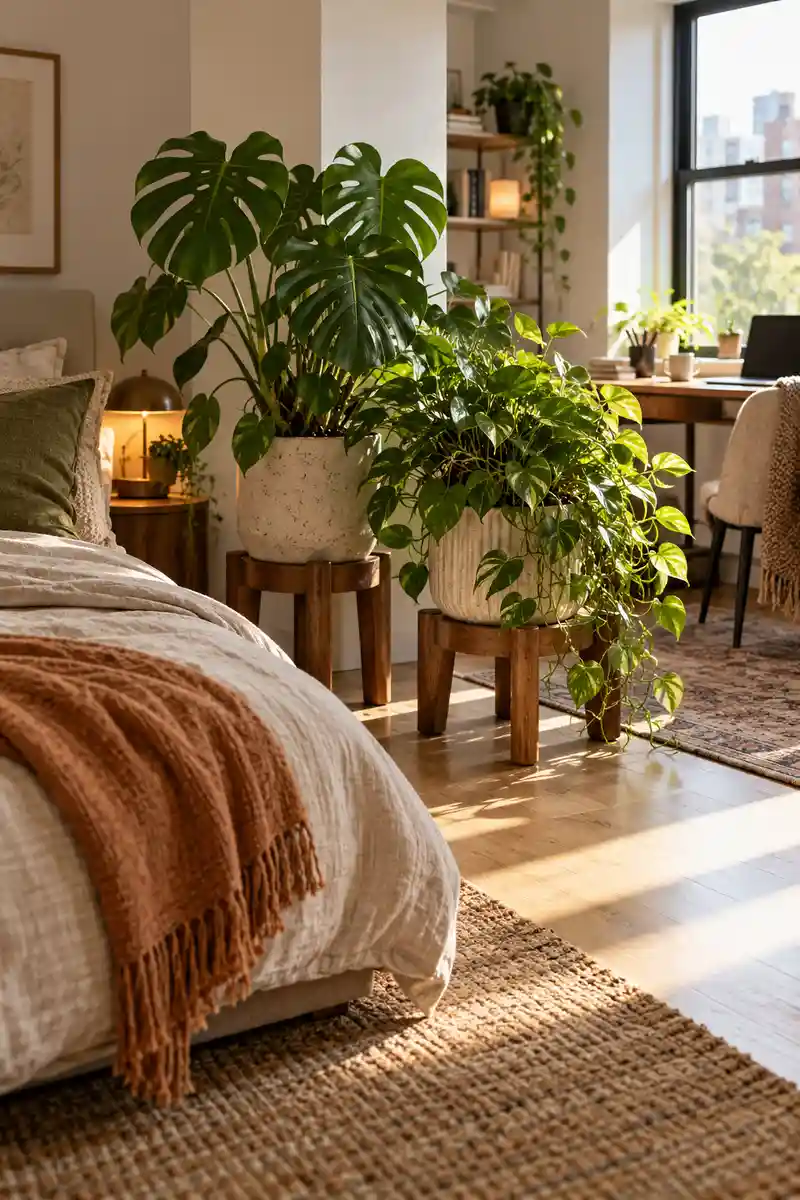
- Start with two broad, stable stands of slightly different heights.
- Set them together outside the main walking route.
- Place appropriately sized pots on each support.
- Check floor protection and watering access before adding the plants.
A compact plant group can soften the edge of a desk or bed without demanding a full partition. Use stands rated for the pots you choose, and keep taller plants on the more stable support. Leave enough space to water and inspect them without dragging wet containers across the floor.
14. Open Clothing Rack
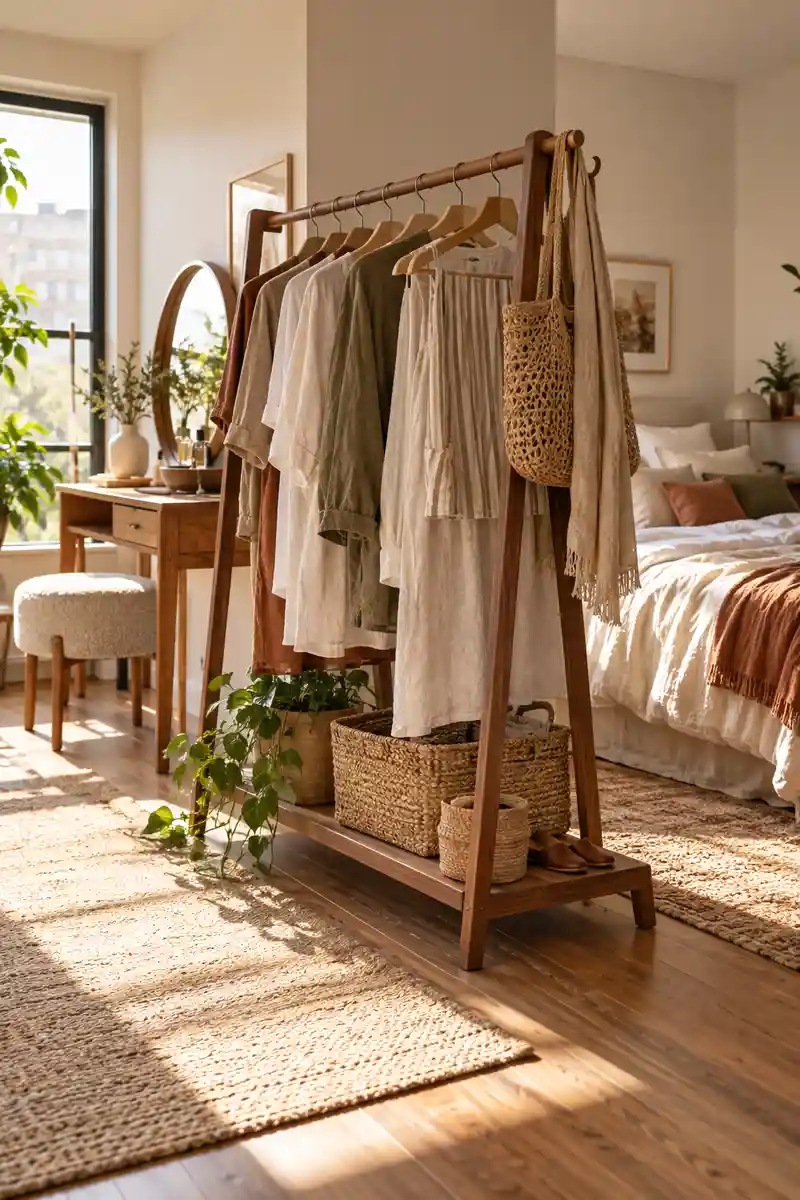
| Detail | Overloaded Rack | Edited Rack |
|---|---|---|
| Visual Effect | Heavy and busy | Light partial screen |
| Stability | Load may be uneven | Within rated capacity |
| Access | Clothes bunch together | Garments slide freely |
A freestanding rack works best beside a dressing corner, where the clothes already need a home. Select a stable model and distribute weight evenly. Leave a passage around it, and keep hanging garments clear of heaters. It offers a loose visual filter, so choose another solution for stronger bedtime privacy.
15. Entry Coat Stand
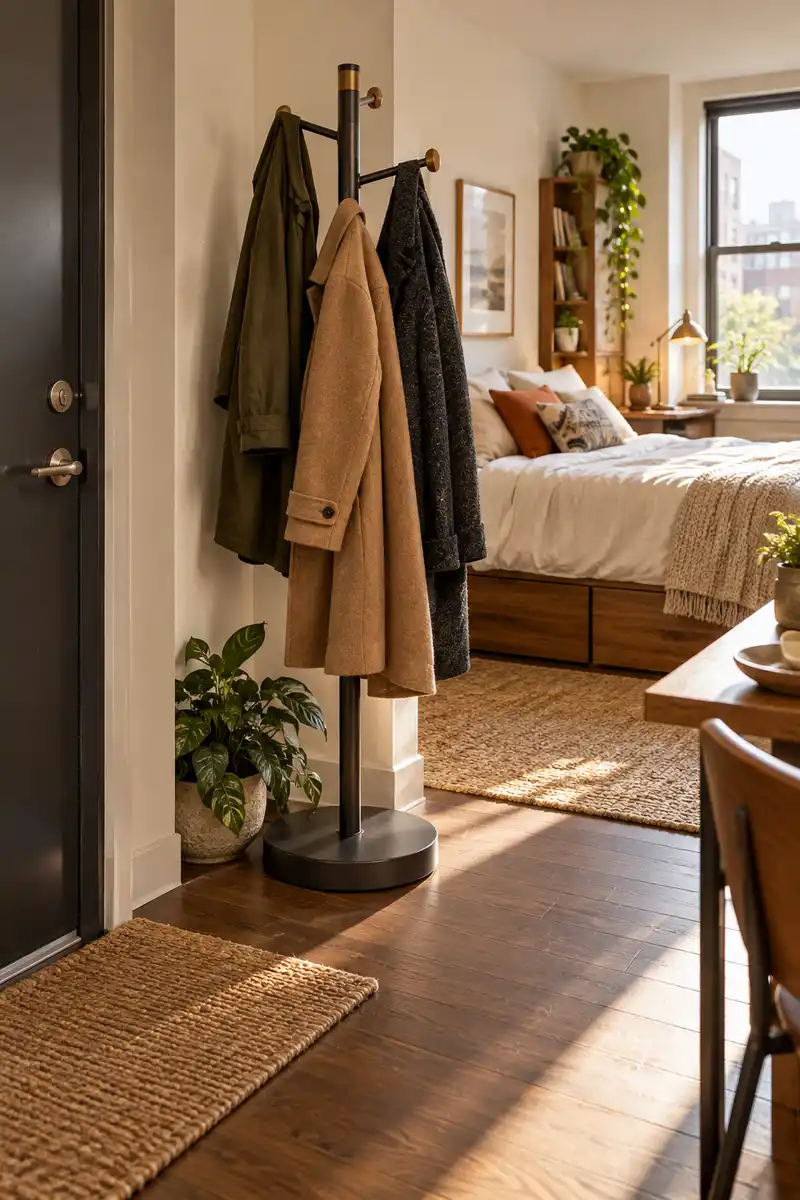
DO
- Choose a broad stable base.
- Keep coats balanced around the stand.
- Position it beside the entrance zone.
DON’T
- Load all bags on one hook.
- Place it behind a swinging door.
- Expect a narrow stand to conceal the bed.
The entrance can feel separate with one useful vertical marker. A coat stand anchors that small arrival area without a wall hook, especially beside a shoe tray. It provides a visual cue rather than a partition. Keep the floor around its base clear so the doorway remains easy to navigate.
16. Folding Fabric Screen
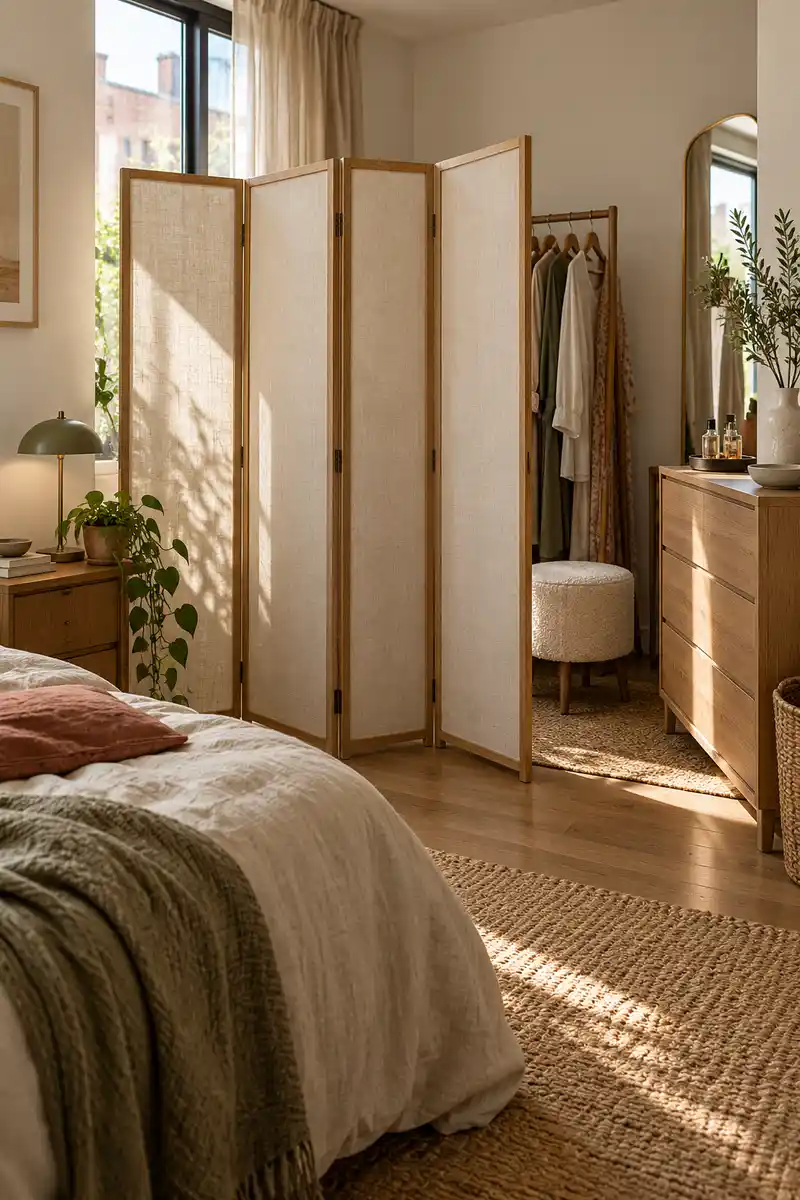
Best For: A soft dressing corner
Privacy: Depends on fabric opacity
Setup: Panels opened to the recommended angle
Check First: Stable footing and required clearances
Soft fabric brings a quieter look to a busy studio. Choose a purpose-built folding screen that stands securely when opened as instructed, leaving a generous passage beside it. Keep the material away from heat sources. Move or fold the screen when you need open space, rather than narrowing your exit route.
17. Curved Folding Screen
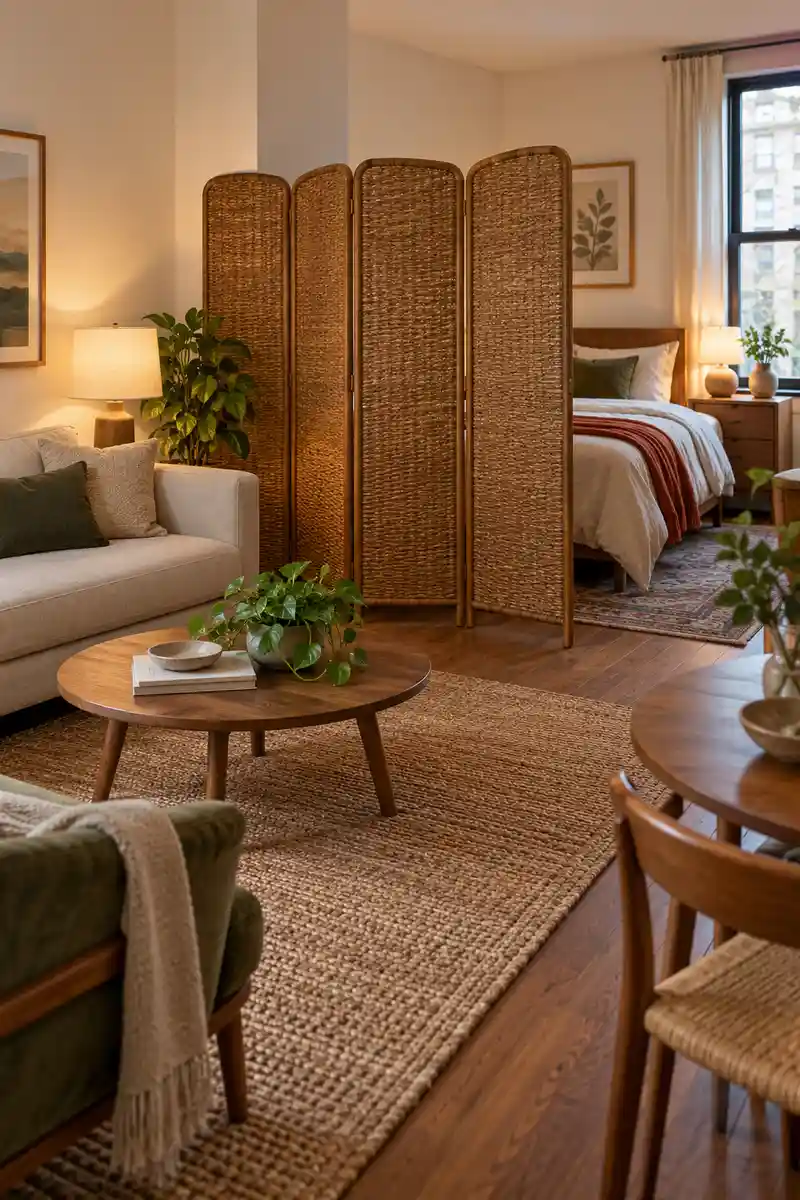
A gentle curve can hide the bed more naturally than a straight line across the room. Arrange a suitable folding screen in its recommended supported shape near the sleeping corner. The curve should guide movement around the edge, with every panel resting on the floor beneath it for stability.
Choose a finished surface that looks appealing from both sides, such as woven panels within a sturdy frame. Check the manufacturer instructions before experimenting with angles. Do not straighten the screen beyond its stable position just to gain coverage; a shorter secure arrangement is more useful than an unstable long one.
18. Freestanding Curtain Frame
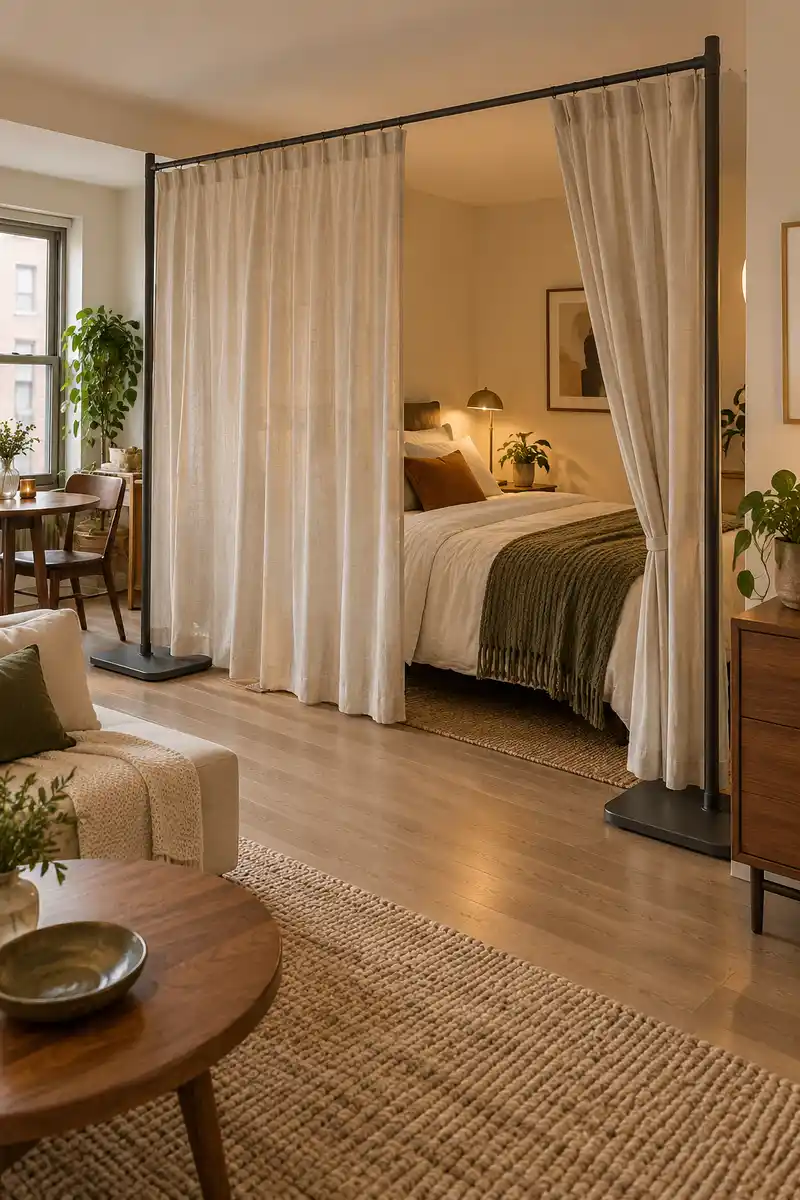
- Choose a purpose-built weighted freestanding frame rated for the curtain weight.
- Use lightweight fabric within that load rating.
- Place the support feet outside the walking route.
- Keep the curtain clear of heaters and openings.
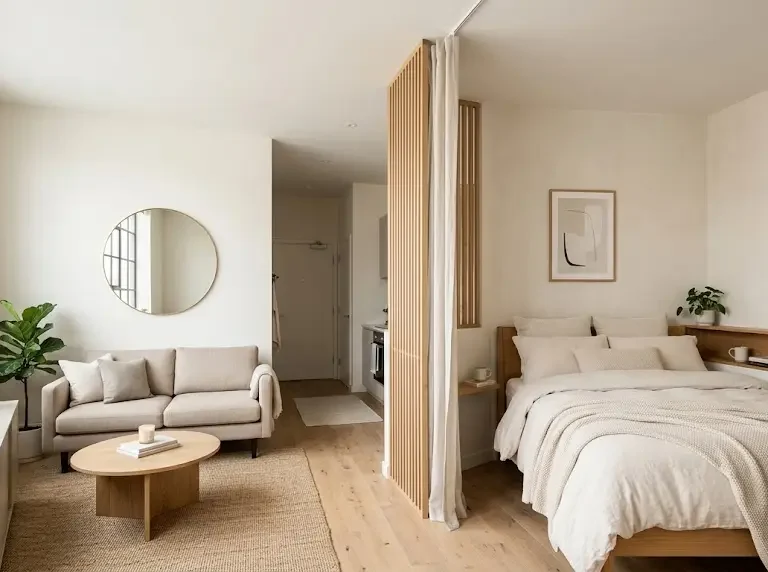
Fabric creates a softer line around a sleeping area and can open during the day. A stable floor-supported frame avoids drilling, but its feet need real floor space. Measure those feet as carefully as the curtain span, and follow setup instructions instead of improvising an unsupported rail or overloaded stand.
19. Low Slatted Screen
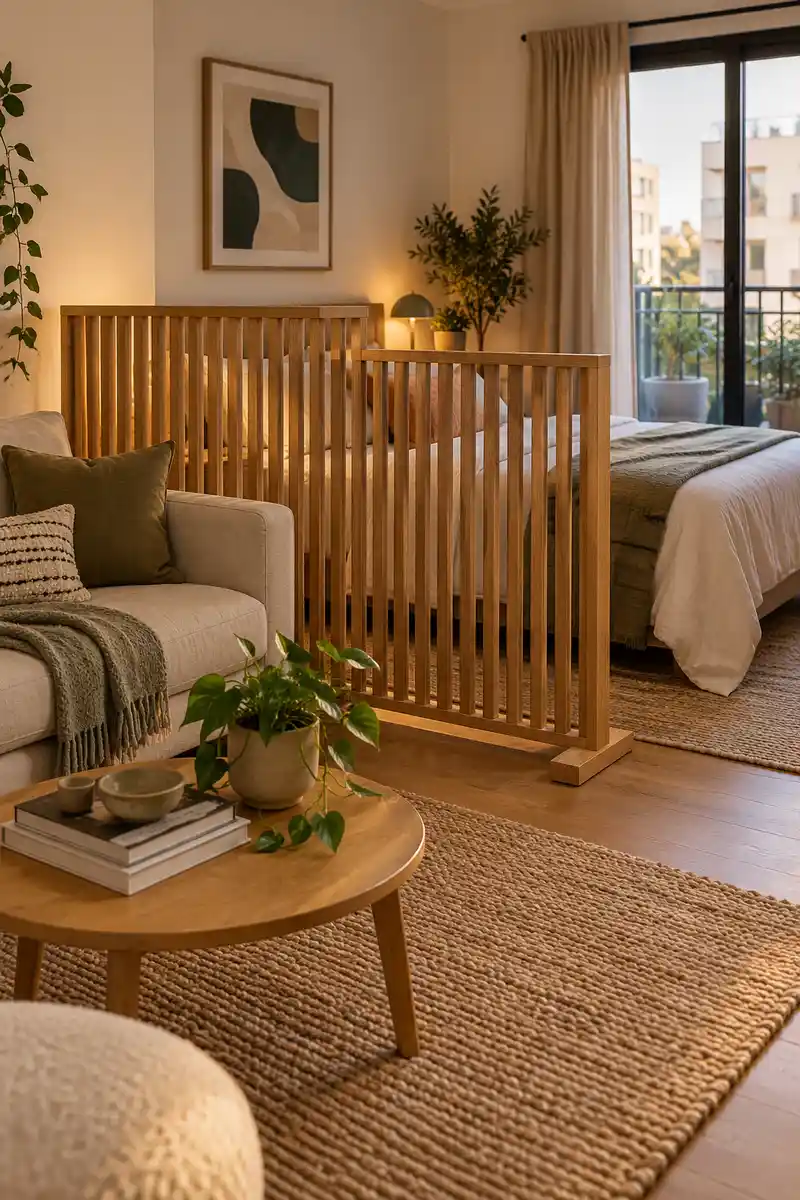
Quick Tip:
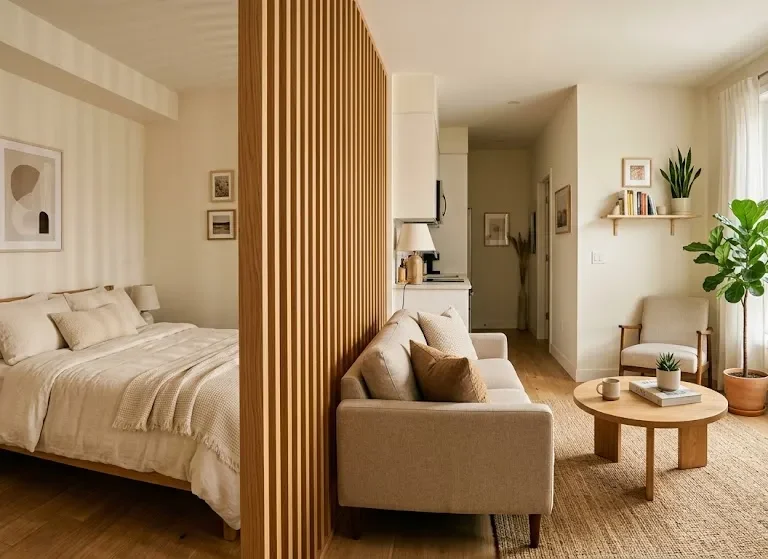
Light passes through the gaps, so slats offer screening rather than total concealment. Choose a low freestanding panel with a broad base, and confirm it needs no wall fixing. Keep its feet fully supported on a level surface.
A wooden slat panel adds a defined edge without making the apartment feel closed. Position it where the gaps soften the view of the bed or desk. Leave space around the base for easy movement, and avoid attaching shelves or plants that could change the balance of the original design.
20. Flat Top Storage Trunk
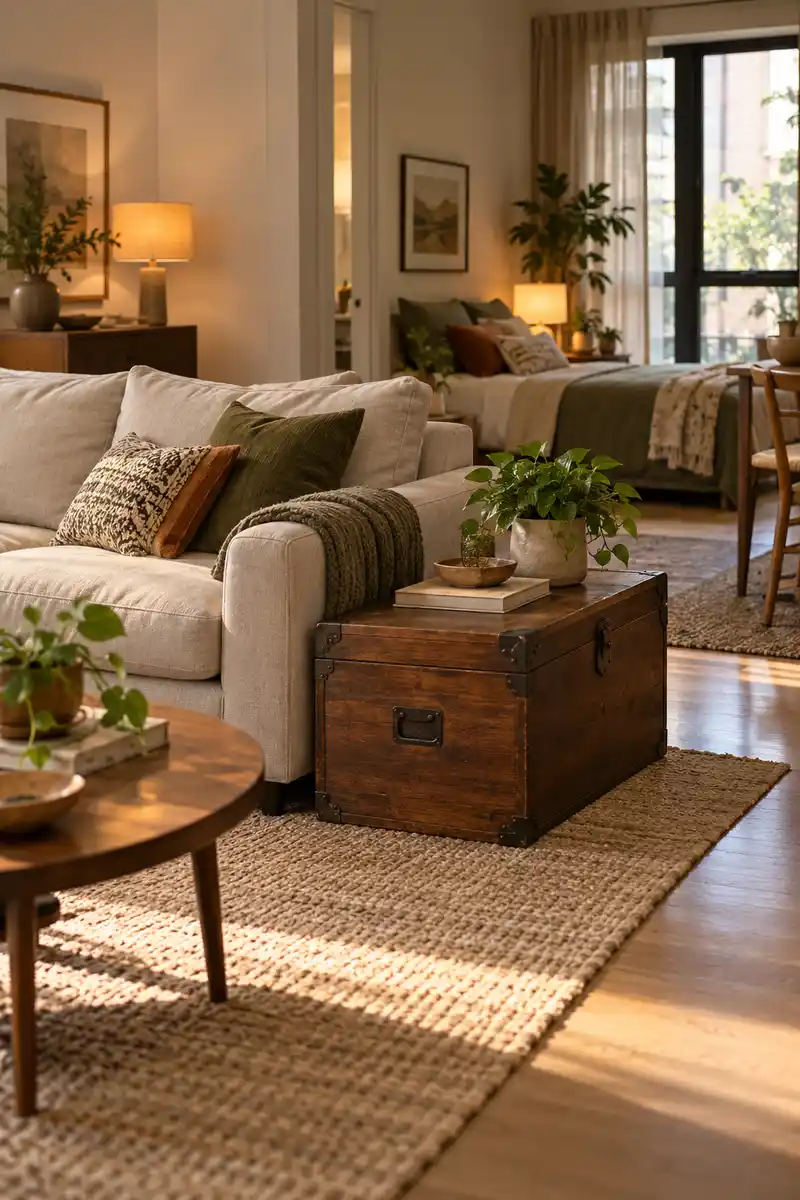
BEFORE:
Blankets collect beside the sofa and blur the edge of the living area. A narrow passage becomes an accidental storage spot.
AFTER:
A broad low trunk holds those blankets within the seating zone. Its clean outline marks the boundary while the passage stays open.
Choose a trunk with a safe lid mechanism and a footprint that fits entirely outside circulation. It can define a cozy lounge without much height, although it will not screen a sleeping partner. Use it for seating only if the manufacturer rates the lid and structure for that purpose.
21. Armchair Pair Boundary
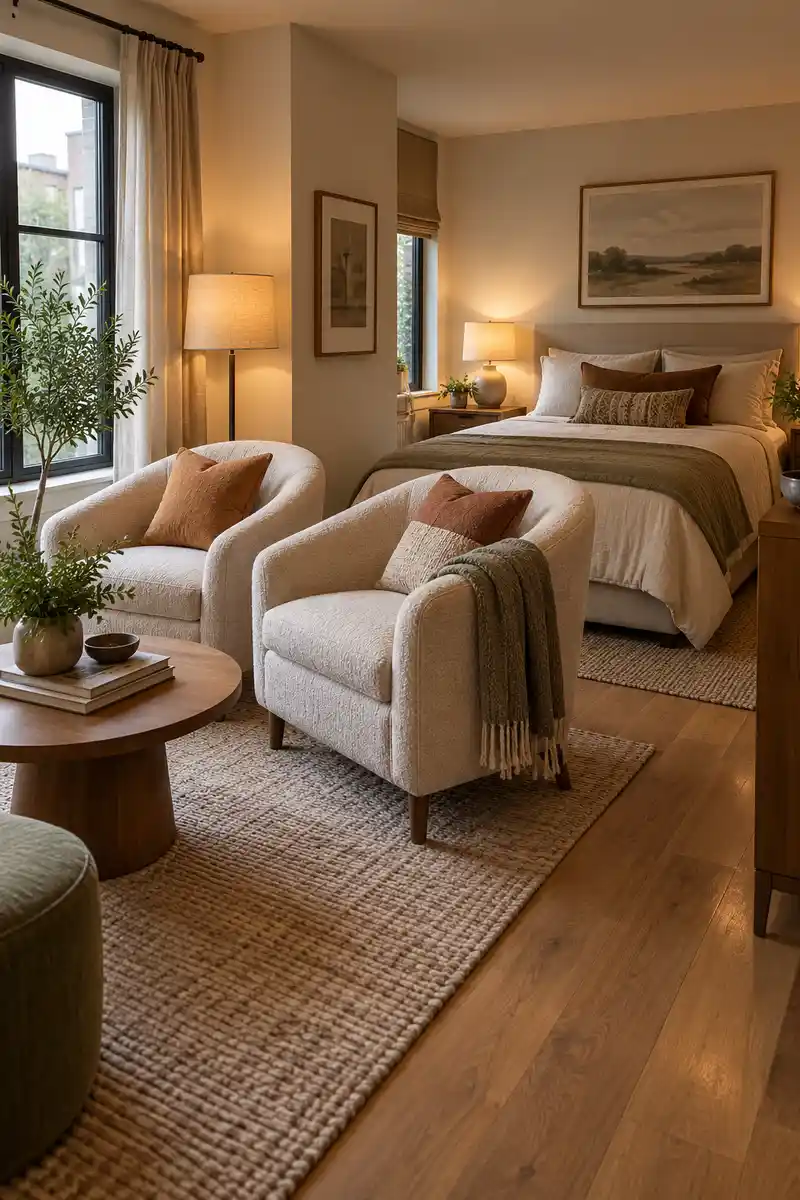
- Face two compact chairs into the lounge.
- Align their backs with the edge of the sleeping zone.
- Keep a clear route around the outside of the pair.
- Check that both chairs remain comfortable to approach and use.
Two chairs can establish a living area when a sofa would feel too heavy. Choose finished backs and stable frames that look intentional from the bed. A small shared side table can stay inside the lounge footprint. Avoid turning the space between chairs into the main route across the apartment.
22. Modular Floor Seating
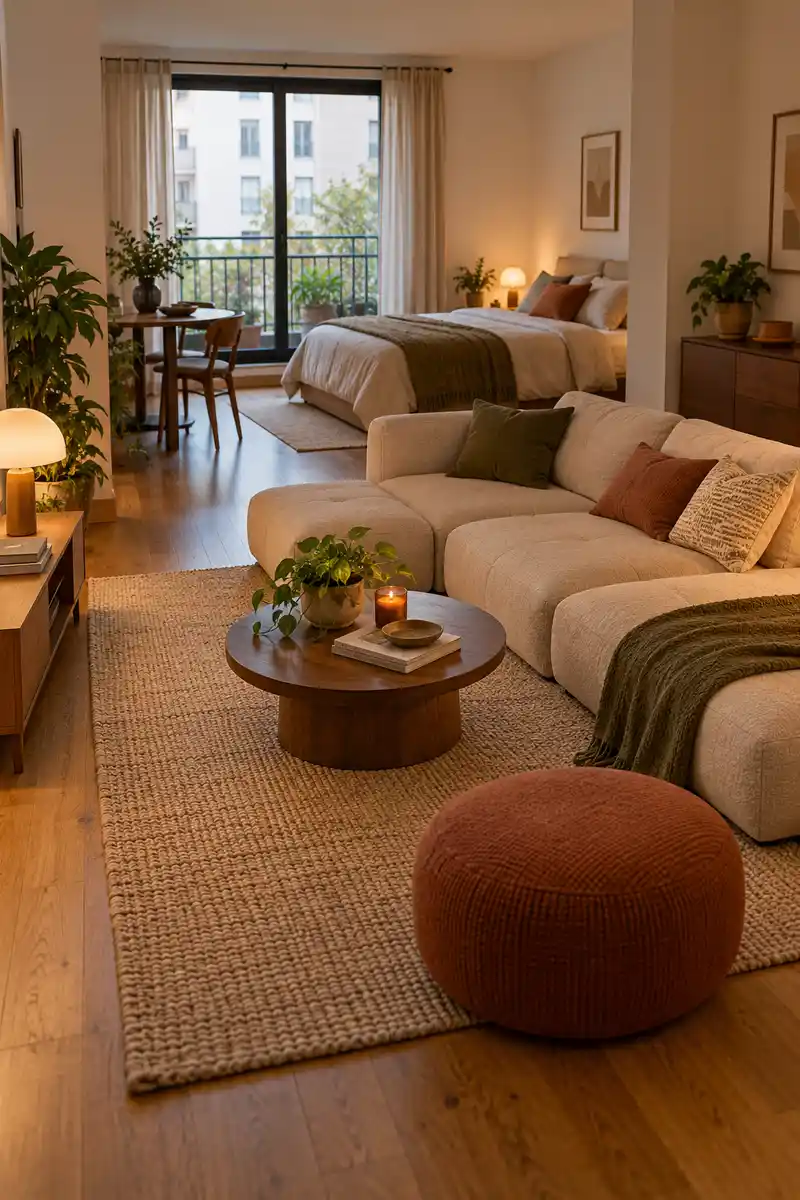
| Detail | Scattered Cushions | Defined Seating Group |
|---|---|---|
| Layout | Edges feel unclear | One intentional zone |
| Walkway | May become obstructed | Kept outside the group |
| Privacy | None | None; visual zoning |
Low modular seating marks a relaxed lounge while preserving long views through the studio. Keep the pieces together on a suitable nonslip rug and outside the normal route to the bed. This is zoning rather than screening, and it works best for people who find low seating comfortable to use.
23. Low Display Cabinet
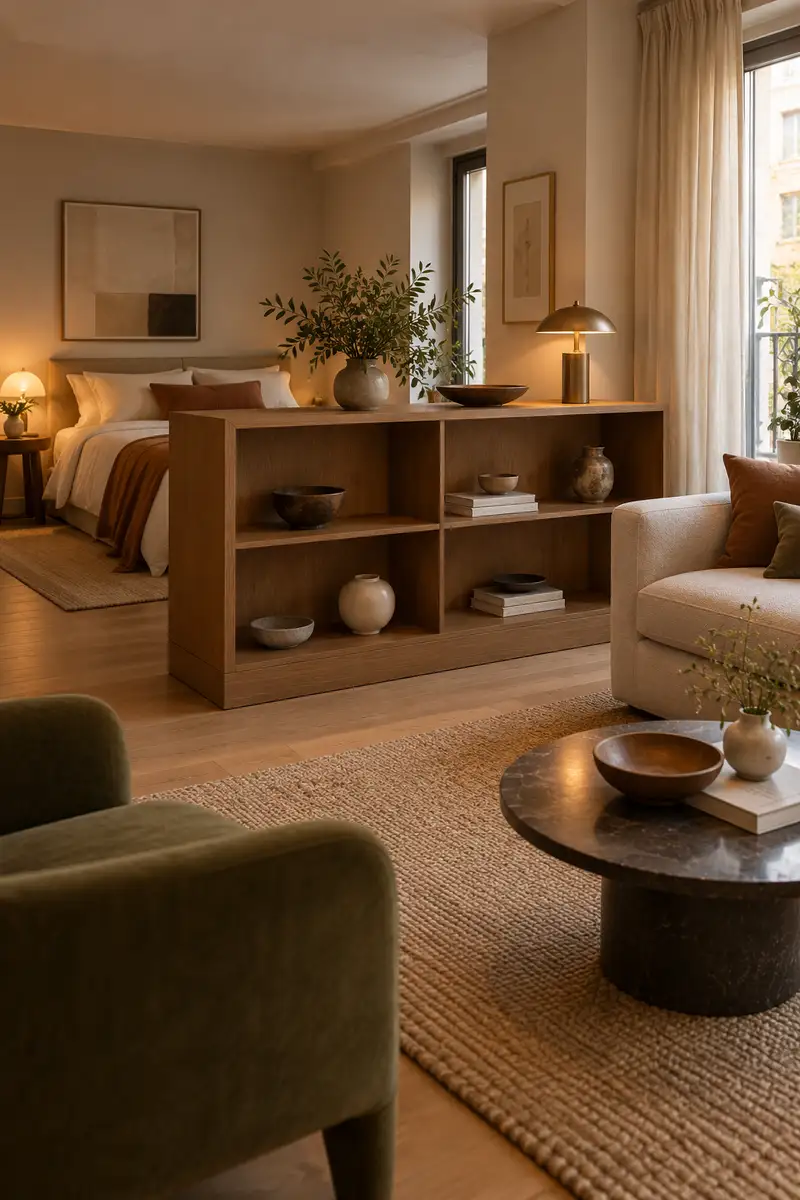
DO
- Choose a broad cabinet approved for freestanding use.
- Keep the top lightly styled.
- Use protected feet suitable for the floor.
DON’T
- Ignore required anti-tip hardware.
- Load heavy objects along one edge.
- Block access to drawers or exits.
A low display cabinet gives treasured objects a home while drawing a boundary beside the bed. Select a model with a finished back and follow every stability requirement. Keep fragile pieces away from the walking side, and choose a different cabinet if safe use depends on wall anchoring in your layout.
Conclusion
A comfortable studio does not need a permanent wall between every activity. Start with the boundary that would improve your day most, whether that is hiding the bed from the entrance or separating a desk from your evening routine. Keep furniture stable, protect the floor, and leave enough room to move comfortably around each piece. These studio apartment divider renter friendly ideas work best when the divider also earns its space through storage, seating, or useful privacy. Test one arrangement before buying anything, and share it with someone making a small rental feel more like home.
Community
Join the conversation
Add a useful idea, ask a specific question, or share what worked in your space. Every comment is reviewed before it appears.