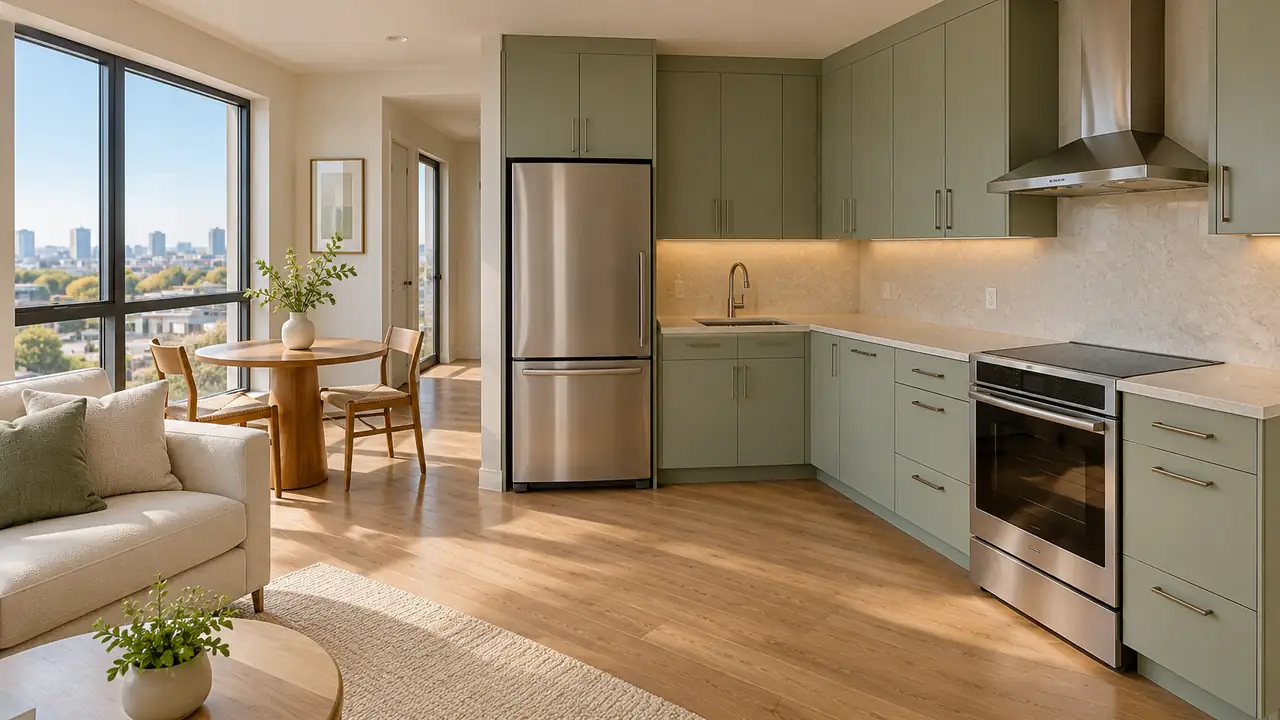
A kitchen for studio apartment living has to look good from the sofa and still handle an ordinary Tuesday dinner. The most useful designs begin with the room you already have: the position of its windows, existing services, and the route you walk every day. These twenty-one combinations pair a specific layout with a clear material palette, so you can compare whole-room ideas rather than collect unrelated accessories. Some suit a renovation; others offer colors and furniture choices you can borrow in a rental. Treat the images as design inspiration, not measured plans. Get permission for permanent changes, use qualified professionals where required, and follow appliance installation and ventilation instructions.
1. Quiet Single-Wall Kitchen
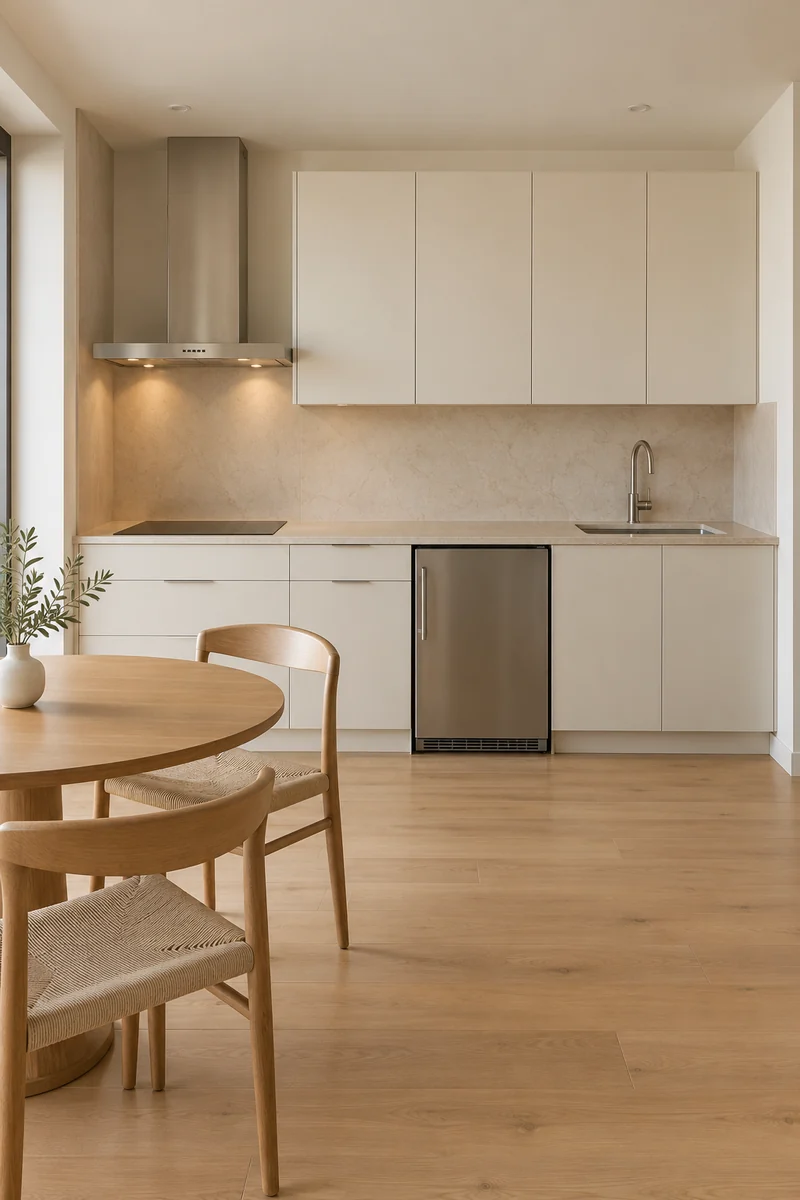
Give the kitchen one calm wall and let the rest of the studio breathe. Ivory cabinets, a pale backsplash, and a compact dining table create a complete arrangement without a second cabinet run. The long worktop becomes the visual anchor, so keep its central preparation area available for daily use.
This design suits a room where adding a peninsula would interrupt movement between the door and seating. Repeat the table's wood tone in one nearby furniture piece to connect the zones. Before ordering cabinetry, check appliance openings, ventilation requirements, and the space needed to open doors and drawers fully.
2. Warm White Galley
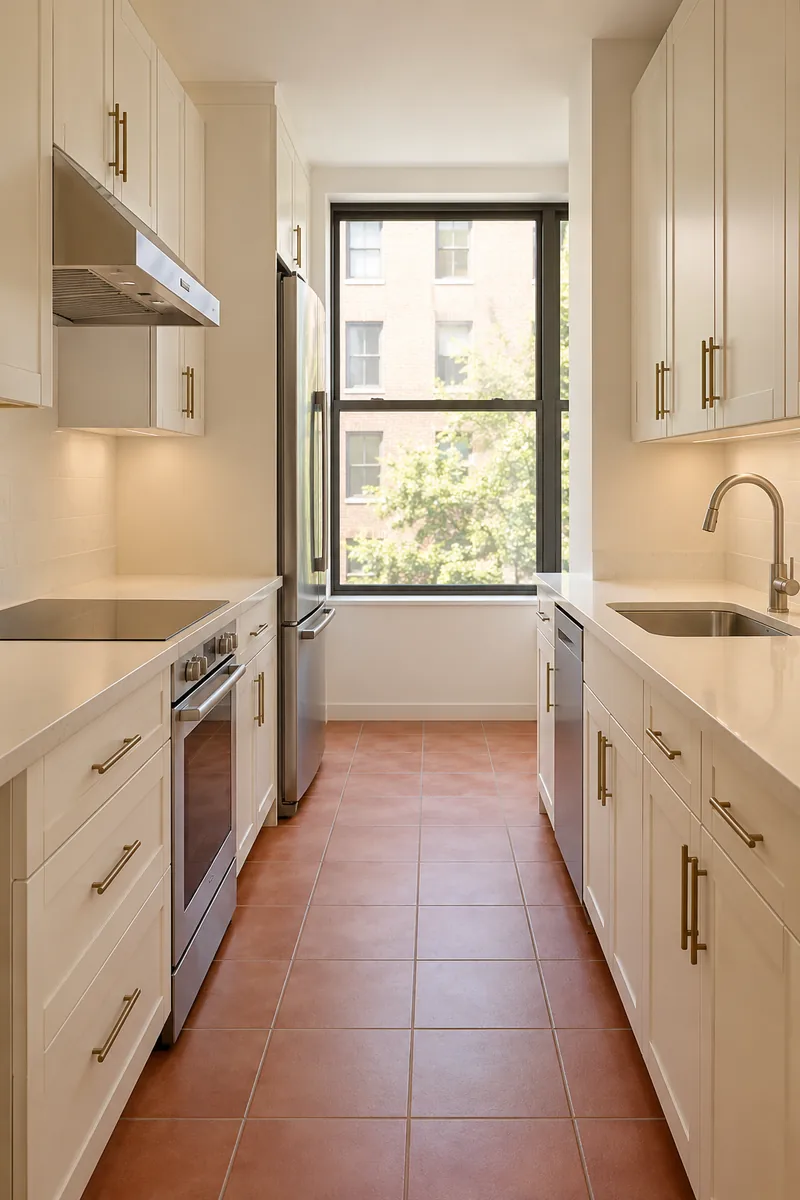
- Keep two parallel cabinet runs visually connected with the same warm white finish.
- Use a slightly stronger floor color to give the narrow room a clear base.
- Place the main work areas along opposing sides only where the room permits comfortable movement.
- Let the end window stay visually open instead of filling it with shelving.
A galley can feel purposeful when both sides belong to one design. The pale cabinetry carries daylight through the room, while earthy flooring adds warmth below. This arrangement needs careful door checks: test the refrigerator, dishwasher, and oven positions on the plan before committing to the two-sided layout.
3. Window-Facing L Layout
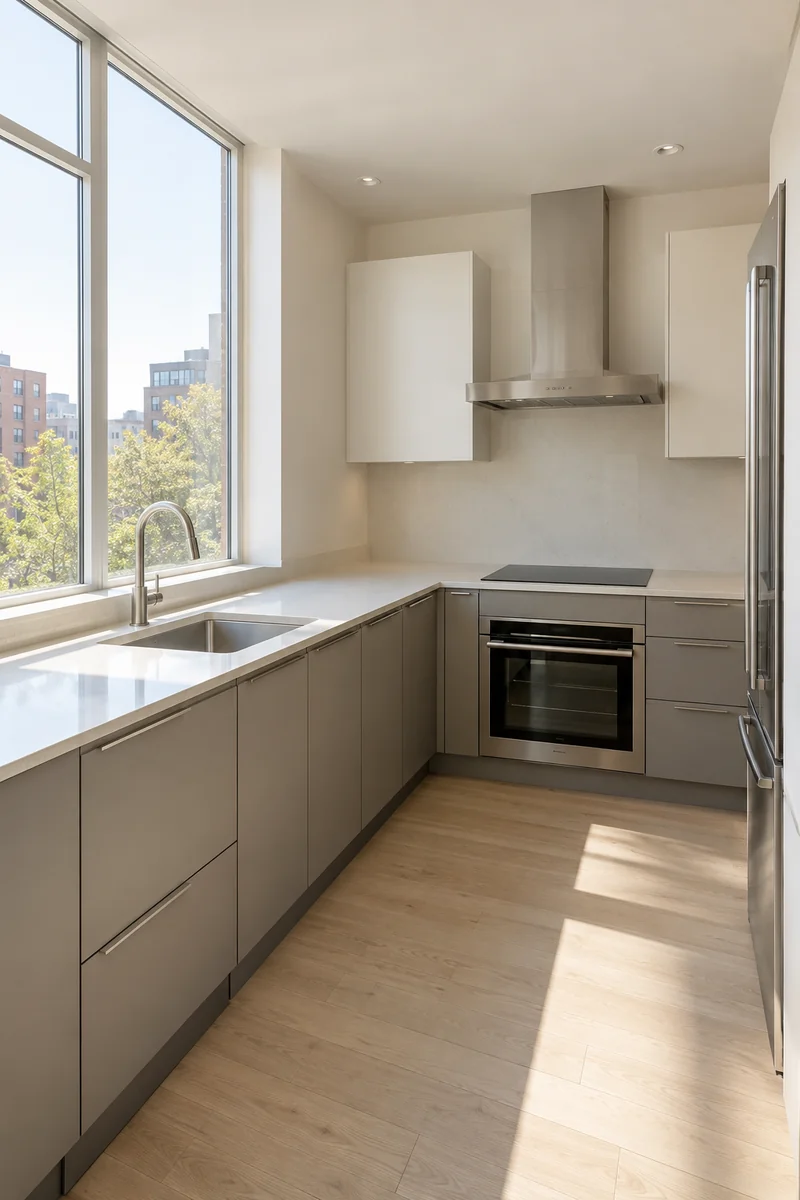
Quick Tip:
Let the window organize the room. If the existing plumbing and window operation allow it, position the sink along the bright run and reserve the return for cooking. Keep the inside corner useful rather than filling it with decorative objects.
An L-shaped layout gives a small kitchen two connected working edges while leaving the center open. Pale lower cabinets and a lighter upper wall keep the corner from feeling dense. Choose this configuration for its relationship to the window, then have a professional confirm services, appliance clearances, and installation details.
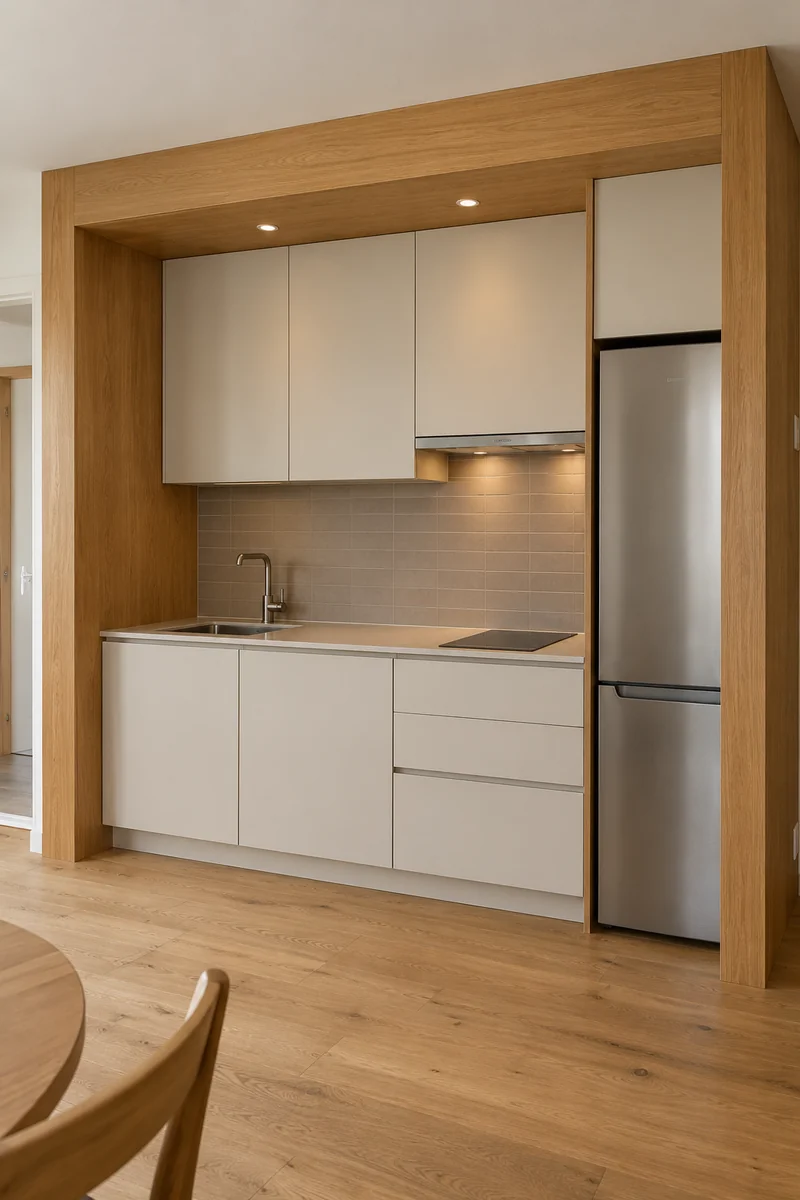
4. Oak-Framed Kitchen Alcove
BEFORE:
A compact kitchen recedes into a plain niche. Its cabinet finish feels unrelated to the furniture visible across the studio.
AFTER:
An oak surround frames the entire kitchen opening. Quiet inner cabinets and a restrained backsplash make the fitted area read as one intentional part of the room.
A frame gives an alcove definition without adding another piece of floor furniture. Keep the timber treatment outside required cooking clearances and coordinate it with a table or shelving elsewhere. Renters can borrow the palette through existing furniture, while any built-in surround needs permission and appropriate design review before installation.
5. Soft Green Peninsula
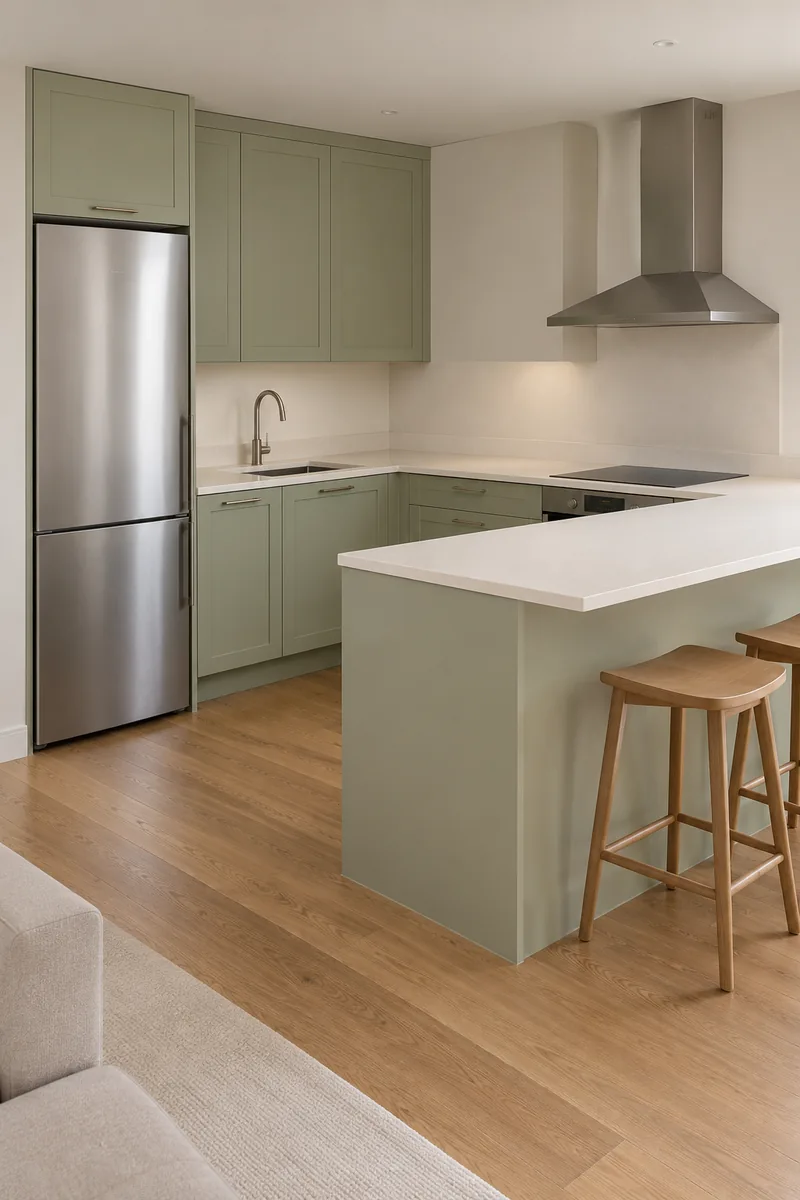
- Mark the proposed peninsula footprint and seating positions on a measured plan.
- Check all appliance openings and the route into the cooking area.
- Choose muted green cabinetry with a quiet cream worktop.
- Keep seating on the outer side and leave the working side available.
A short peninsula can make the kitchen feel sociable without placing a separate island in the room. Soft green introduces color across the whole arrangement, while a pale top keeps it gentle. The decision depends on usable circulation with stools occupied, so check that condition before falling for the finish.
6. Blue Cabinet Niche
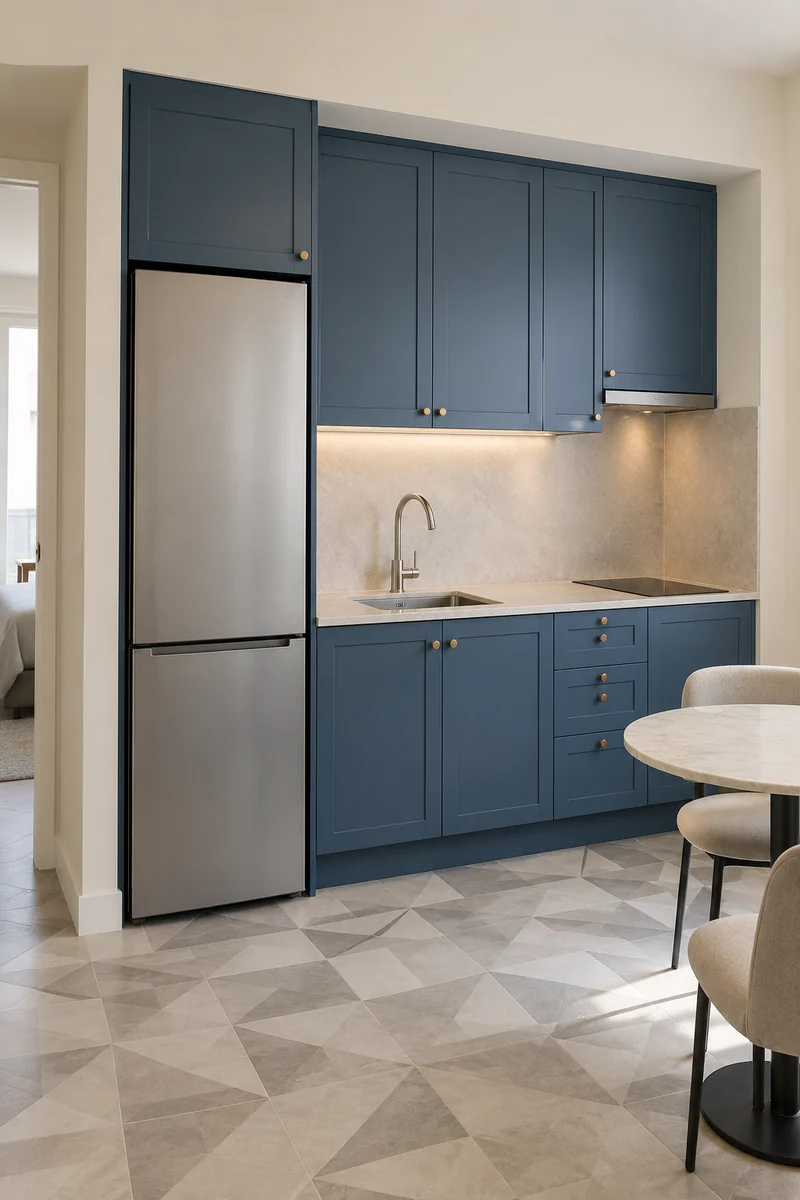
| Choice | Blue niche | Blue whole room |
|---|---|---|
| Color boundary | Cabinet opening | Walls and cabinetry |
| Nearby furniture | Light neutral pieces | Needs a coordinated palette |
| Visual effect | Defined kitchen zone | More enveloping color |
A blue niche gives the studio a distinct kitchen identity while the surrounding walls stay quiet. Pair the cabinets with a pale counter and a small table that does not compete for attention. Try a generous color sample in the actual room, since blue can look noticeably different after sunset.
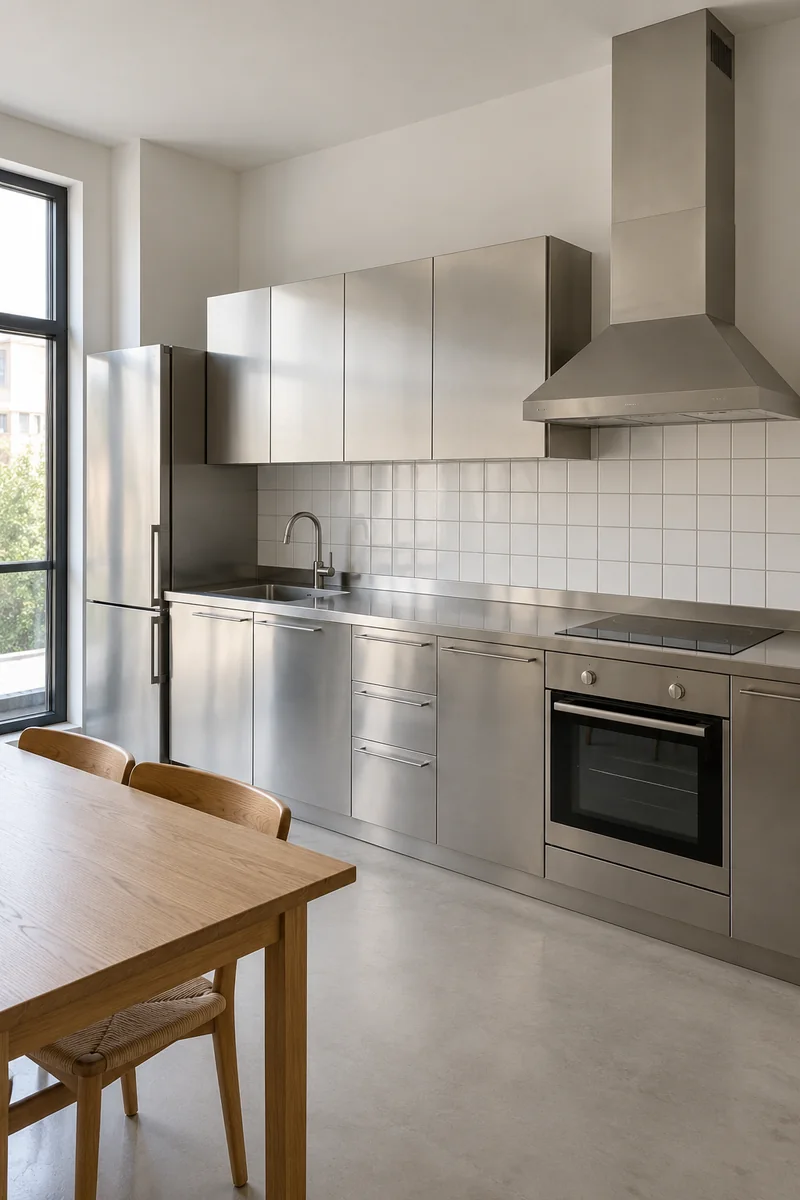
7. Stainless Working Wall
DO:
- Combine brushed metal cabinetry with a warmer dining surface.
- Choose a simple backsplash that supports the industrial direction.
- Compare the finish in the room before selecting the full run.
DON'T:
- Do not assume every metal finish will hide marks equally well.
- Do not add decorative objects beside the cooking surface.
- Do not mix several competing metallic colors across a tiny wall.
Brushed stainless gives a single-wall kitchen a practical workshop character. A wood table and quiet walls soften the composition so it still belongs in a home. Consider how you feel about visible fingerprints and everyday marks before choosing this look; maintenance preferences matter as much as the photograph's clean appearance.
8. Two-Tone Corner Kitchen
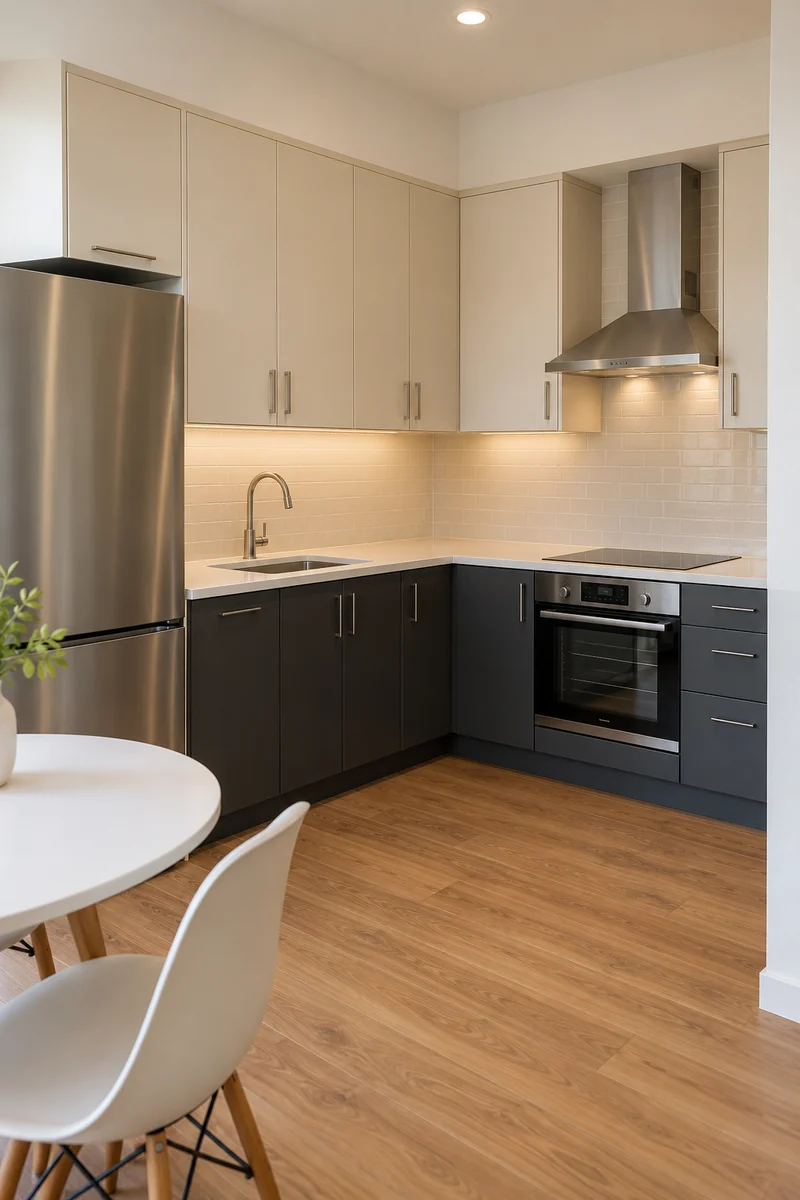
Layout: Two connected cabinet runs wrap a corner.
Base Color: Charcoal grounds the lower half of the room.
Upper Color: Cream keeps the wall cabinets visually quieter.
Linking Material: A pale continuous worktop joins both sides.
A corner kitchen can carry contrast without feeling chopped into pieces. Keep the division consistent, with darker cabinets below and lighter ones above, rather than changing color at random. Repeat one finish in nearby furniture. This creates a whole-room connection while allowing the kitchen to retain its own clear shape.
9. Arched Kitchen Opening
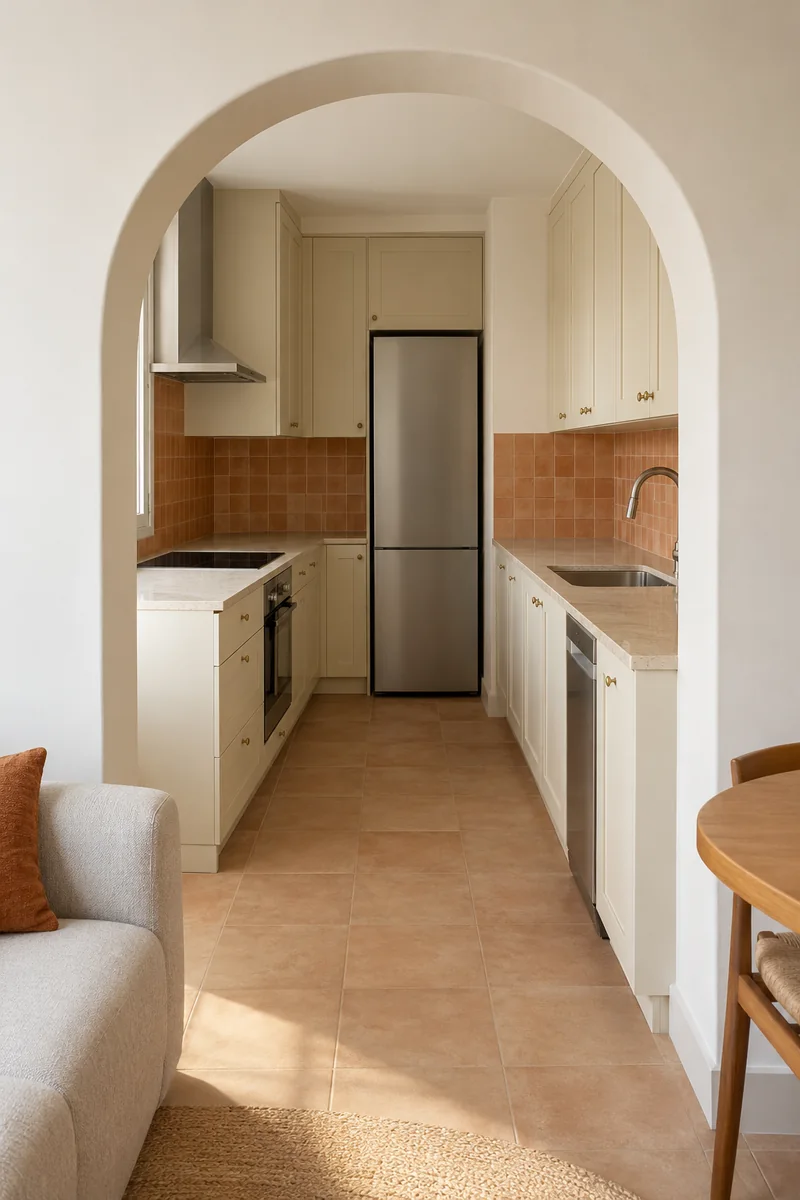
A broad arch can make a separate kitchen feel connected to a studio's living area. The curve softens the view into straight cabinet runs, especially with cream fronts and warm tile. Keep the opening generous and the route through it clear so the architectural detail does not become an obstacle.
Use this idea when the home already has an arch, or when a qualified professional confirms a proposed alteration is suitable. Changing an opening is not a cosmetic shortcut. Renters can echo the curve with a round dining table while leaving the existing structure, services, and kitchen enclosure unchanged.
10. Brick-Backed Linear Kitchen
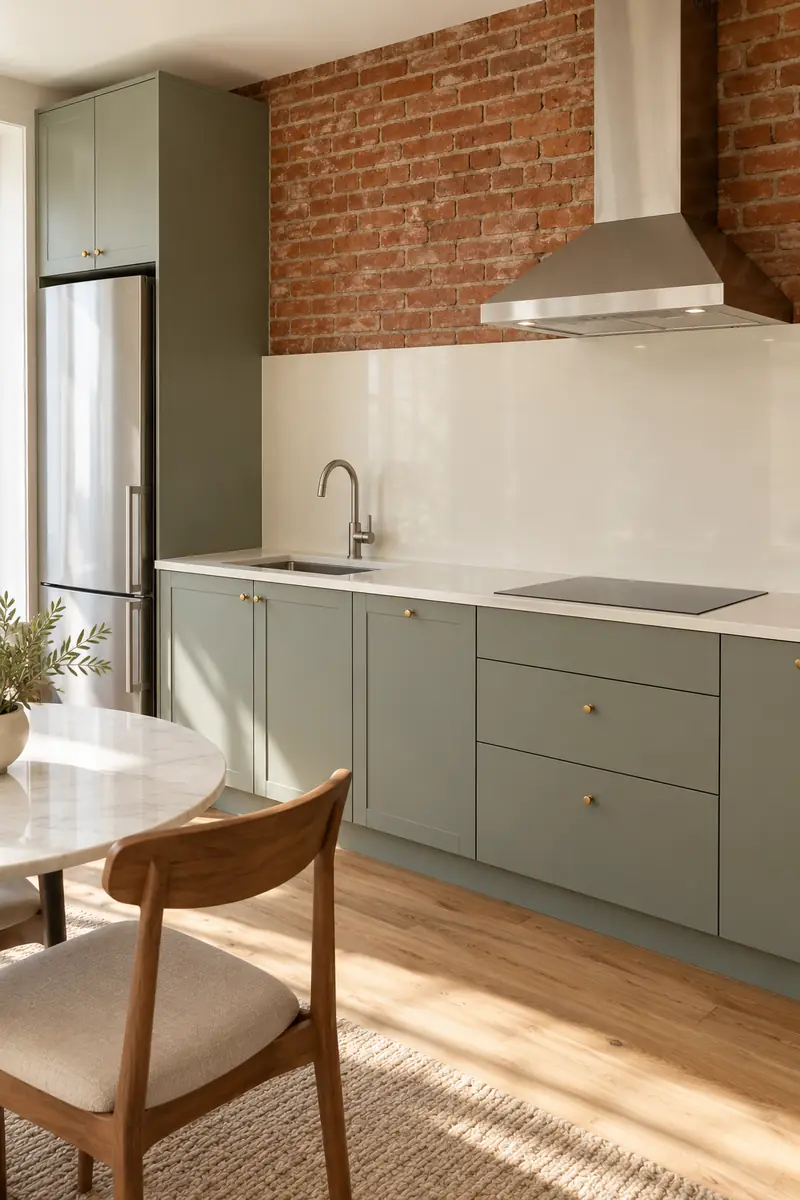
- Use the existing brick as the background character of the room.
- Place an appropriate washable backsplash across the working zone.
- Choose quiet cabinet fronts to avoid competing with the brick pattern.
- Connect the kitchen to a simple dining area with one repeated wood tone.
A brick backdrop works best when the rest of the linear kitchen has restraint. The masonry provides texture, while a plain worktop and backsplash keep the cooking area visually organized. Have the backsplash material and installation checked for the appliances involved, and avoid treating exposed brick as a universal splash solution.
11. Walnut Furniture Kitchen
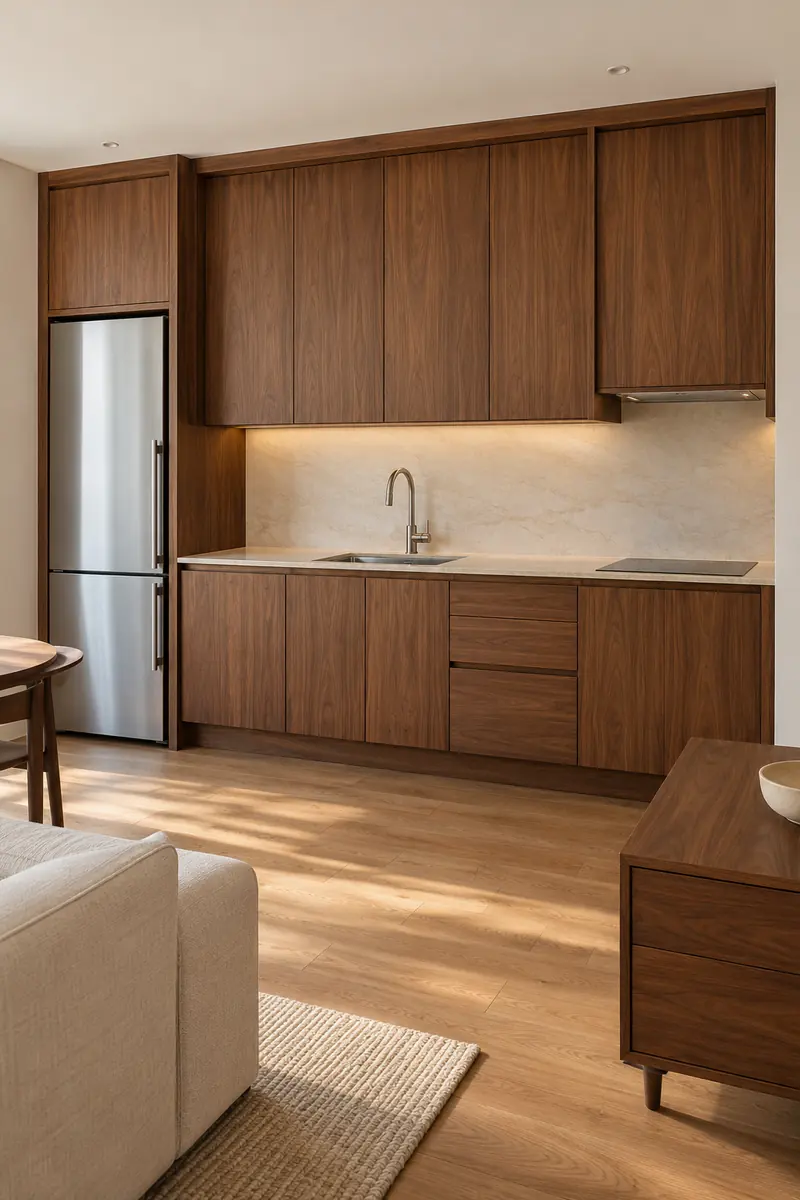
Quick Tip:
Think about the kitchen as part of the furniture wall. Match the cabinet wood tone to a sideboard or table across the room, then use a pale worktop to keep the working surface distinct. Compare real samples together rather than matching names on a screen.
Walnut-toned cabinetry gives a studio kitchen the presence of a substantial furniture piece. Tall and low sections feel related when the grain and door proportions are consistent. Preserve the ventilation and service access required by each appliance, even when the design aims for an unusually calm and integrated overall appearance.
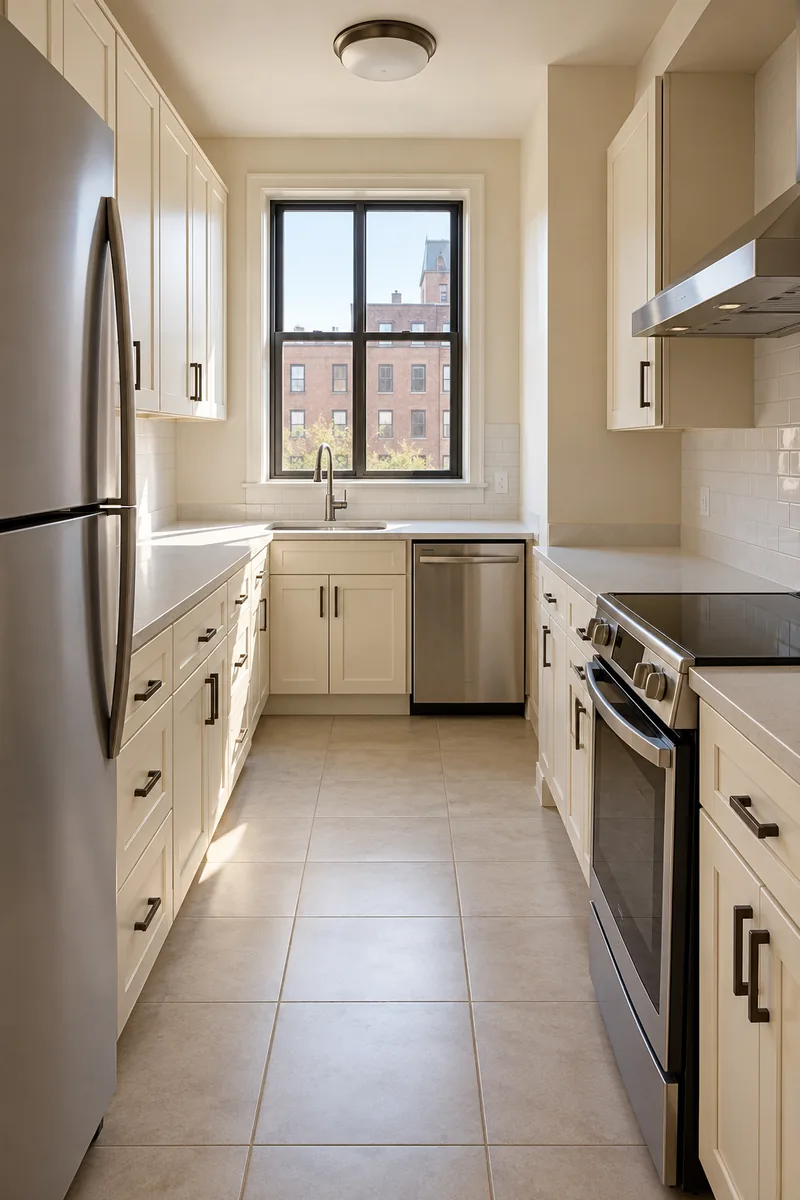
12. Cream Shaker Galley
BEFORE:
A narrow galley has several cabinet styles and competing handle finishes. The eye catches each change before noticing the room's daylight.
AFTER:
Cream shaker fronts repeat along both sides. Dark bronze handles, a pale counter, and simple flooring give the whole kitchen a single, quiet rhythm.
Shaker doors can bring familiar character to a compact galley without requiring a country-house setting. Choose modest frame proportions and repeat the same hardware throughout. If replacing fronts is not possible, borrow the cream-and-bronze palette through approved changes, keeping the layout and clear walking route as the main priorities.
13. Black-Framed Glass Kitchen
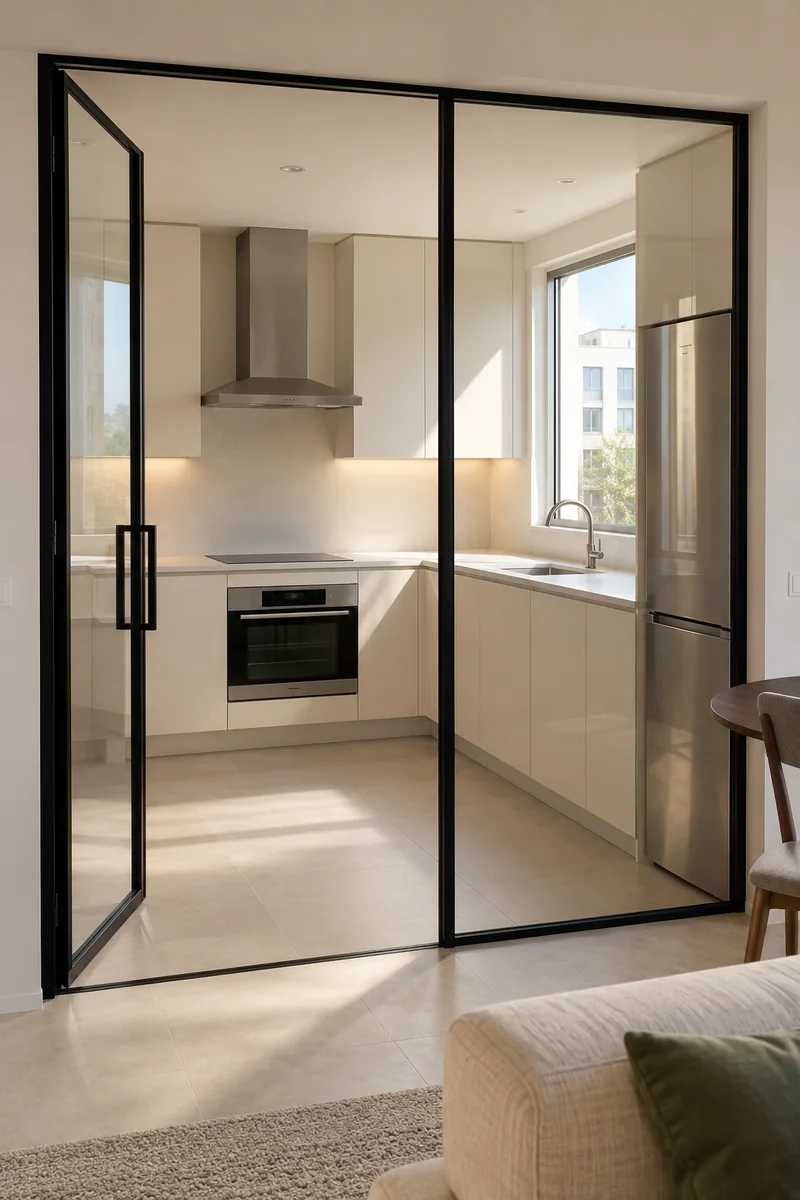
- Ask a qualified professional whether a glazed separation suits the existing layout.
- Choose a simple frame pattern that leaves a clear view into the kitchen.
- Check door movement, required ventilation, and the route through the studio.
- Keep kitchen finishes quieter than the strong black outline.
A glazed kitchen boundary can define cooking space while preserving a visual connection to the rest of the studio. The frame becomes a major design element, so nearby furniture can stay simple. This is a specialist installation idea; glazing, ventilation, access, and any required enclosure must suit the specific property.
14. Pale Plywood Kitchenette
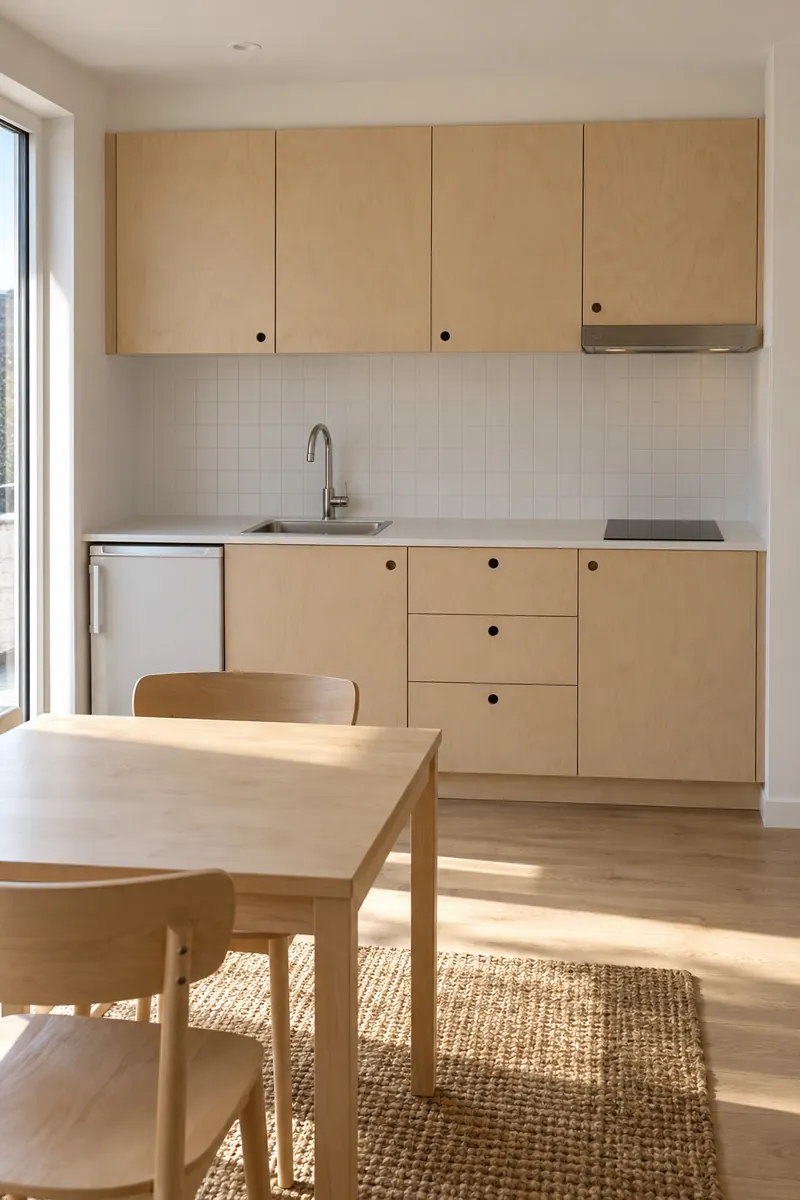
| Choice | Plywood-led palette | Paint-led palette |
|---|---|---|
| Main character | Visible warm grain | Even color |
| Partner finish | Plain pale backsplash | Wood furniture |
| Before selecting | Review edges and sealing | Review finish and cleaning |
Pale plywood gives a small kitchenette a light workshop feel, especially beside a simple white backsplash and compact dining furniture. Use cabinetry designed for kitchen conditions, with suitable edge treatment and finishes. Carry the wood tone into one neighboring piece rather than covering every surface with the same grain.
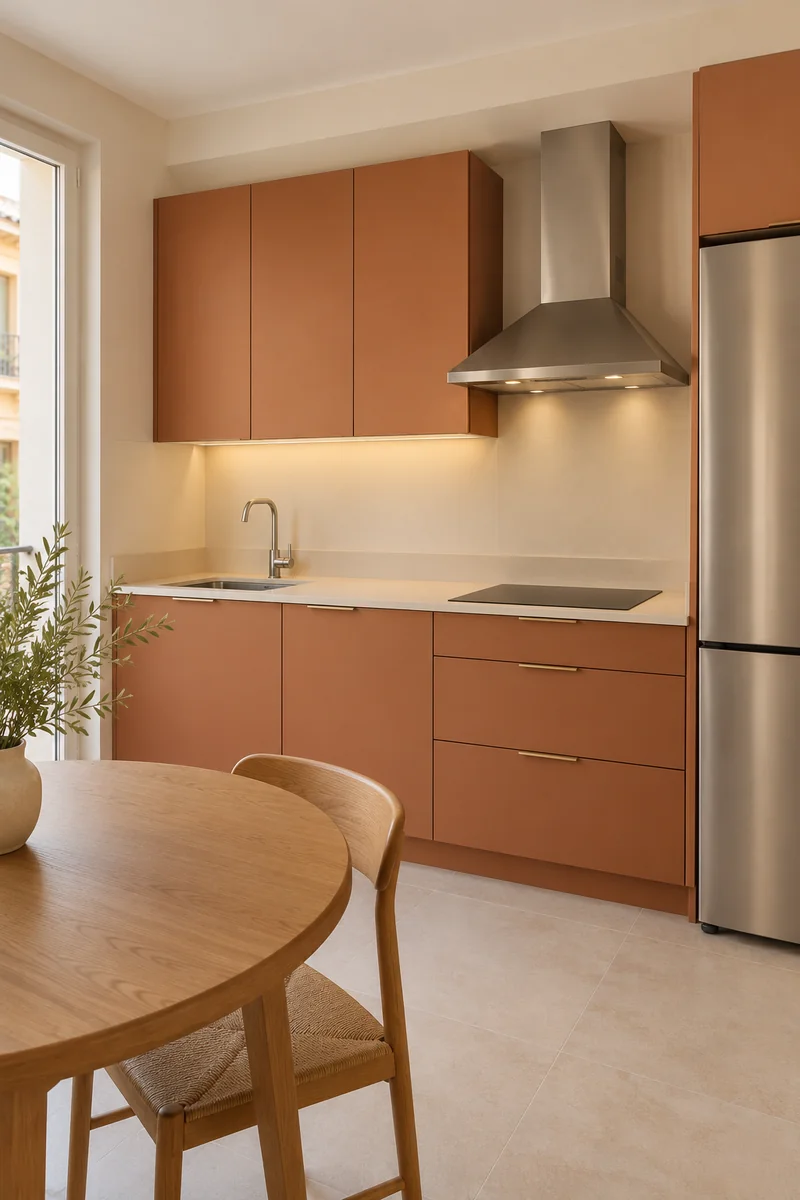
15. Terracotta Cabinet Wall
DO:
- Let muted terracotta cabinetry be the main color statement.
- Pair the cabinets with a pale counter and simple wall finish.
- Test the color beside the studio furniture you already own.
DON'T:
- Do not crowd the counter with matching decorative objects.
- Do not choose several equally strong accent colors for the same view.
- Do not assume a small paint sample shows the effect of a full wall.
A terracotta cabinet wall brings warmth to a studio even when the surrounding furniture is neutral. Keep the color dusty rather than sharply orange if you want a softer result. The practical success still comes from a straightforward layout, clear preparation space, and a dining position that leaves circulation open.
16. Rounded End Peninsula
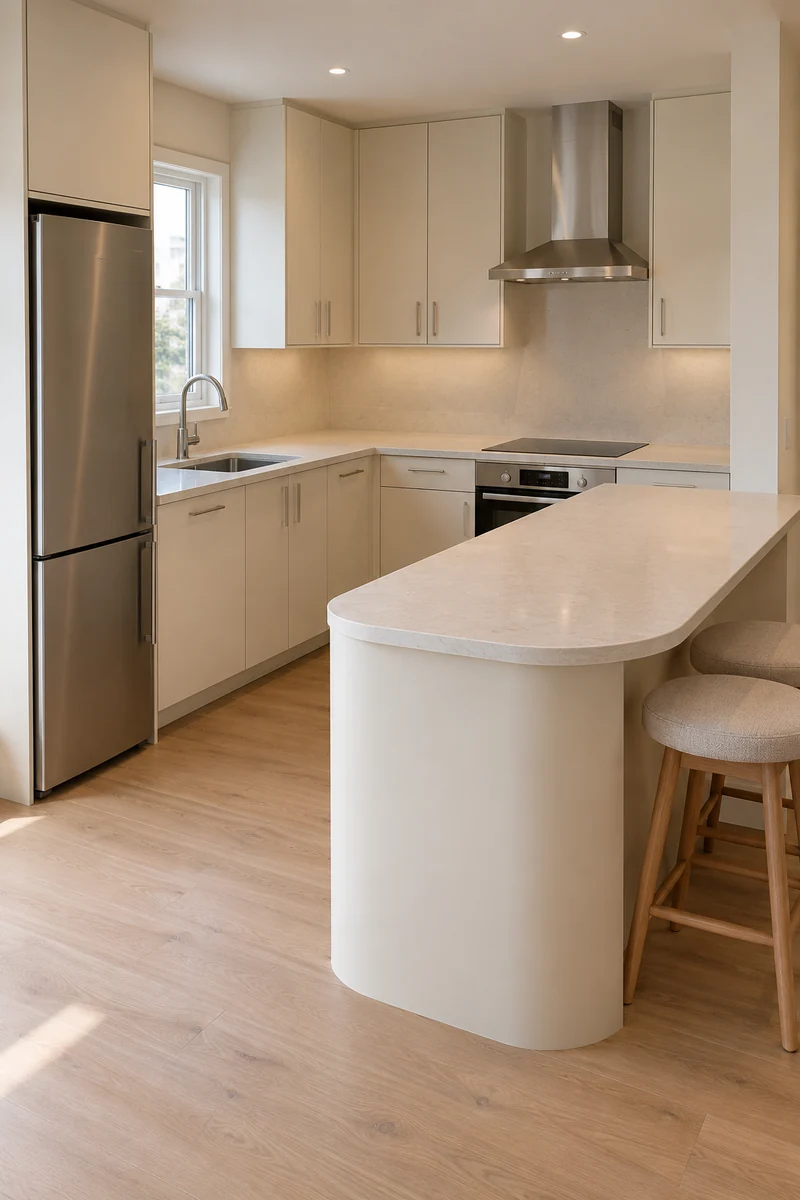
Layout: A short peninsula ends in a broad curve.
Palette: Cream cabinets meet a pale stone-look top.
Seating: Stools tuck along the outer edge.
Planning Check: The full curved footprint and occupied seats need room.
A curved peninsula end changes the way a kitchen meets the living area. The rounded outline feels furniture-like, particularly with stools that tuck away after breakfast. Ask the fabricator and kitchen designer to confirm support, edge construction, and clearances; the attractive curve still needs a practical, properly built base underneath.
17. Pocket Door Kitchen
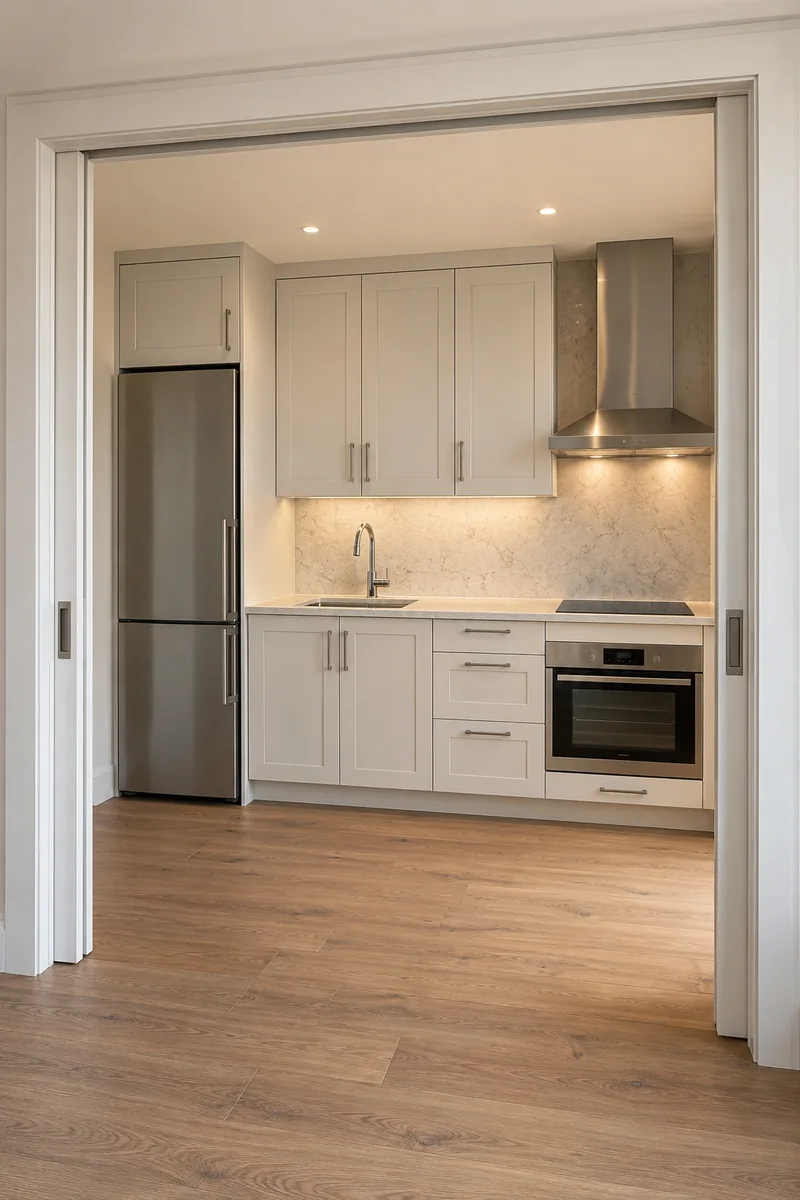
A kitchen behind pocket doors offers a clear change between cooking time and the rest of the evening. Light cabinet fronts and a plain counter keep the open view calm. The doors slide into wall pockets, so their construction must be considered with the kitchen rather than added casually afterward.
Ask a qualified designer to check the wall structure, services, ventilation, and appliance requirements before considering this arrangement. Doors must never compromise safe operation or required access. For a rental, take inspiration from the quiet interior palette instead of attempting to enclose an existing cooking area with improvised panels.
18. Stone-Look Monochrome Kitchen
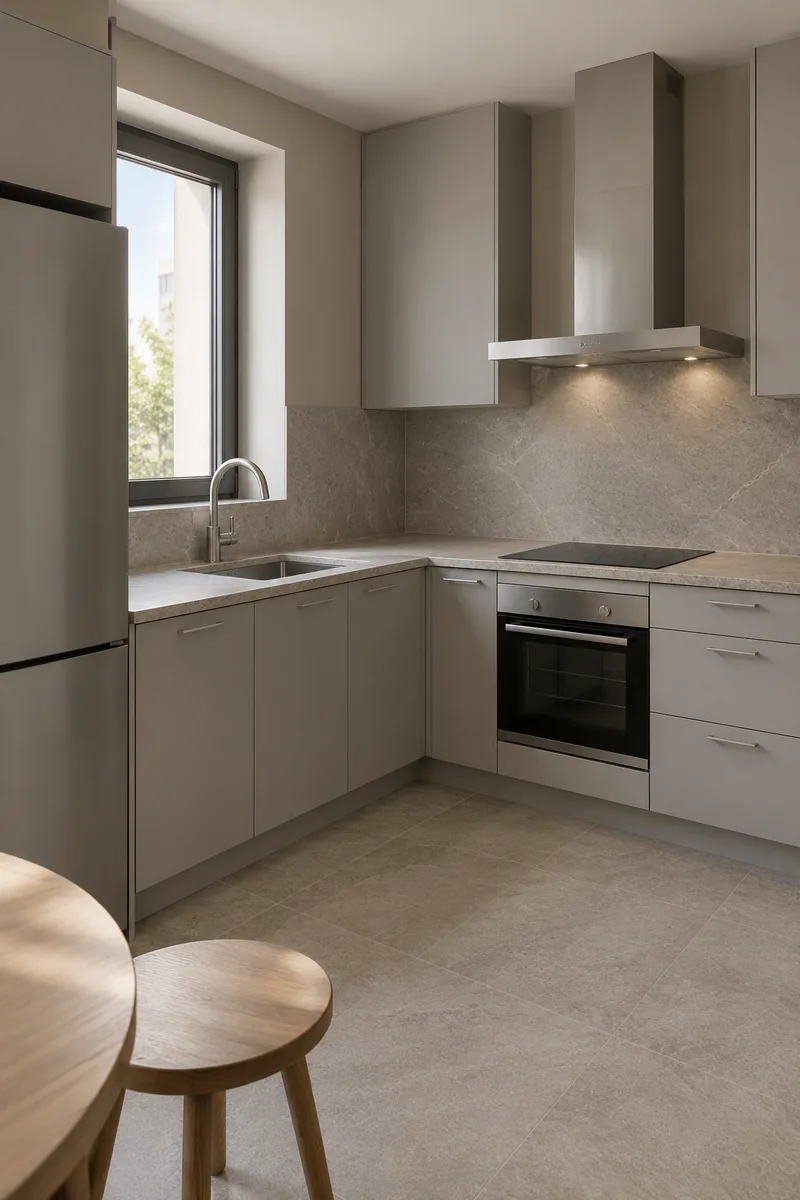
- Choose a warm gray family for the cabinetry and main surfaces.
- Use subtle pattern so the small kitchen reads as a connected whole.
- Add wood seating outside the cooking zone for a softer contrast.
- Compare complete material samples in daylight and evening light.
A monochrome kitchen feels most inviting when its surfaces vary gently in texture. Stone-look counters, soft gray fronts, and a restrained backsplash can create depth without strong color changes. Compare cleaning and care requirements before choosing materials; a coordinated appearance should still suit the amount of maintenance you want to do.
19. Sunny Yellow Kitchenette
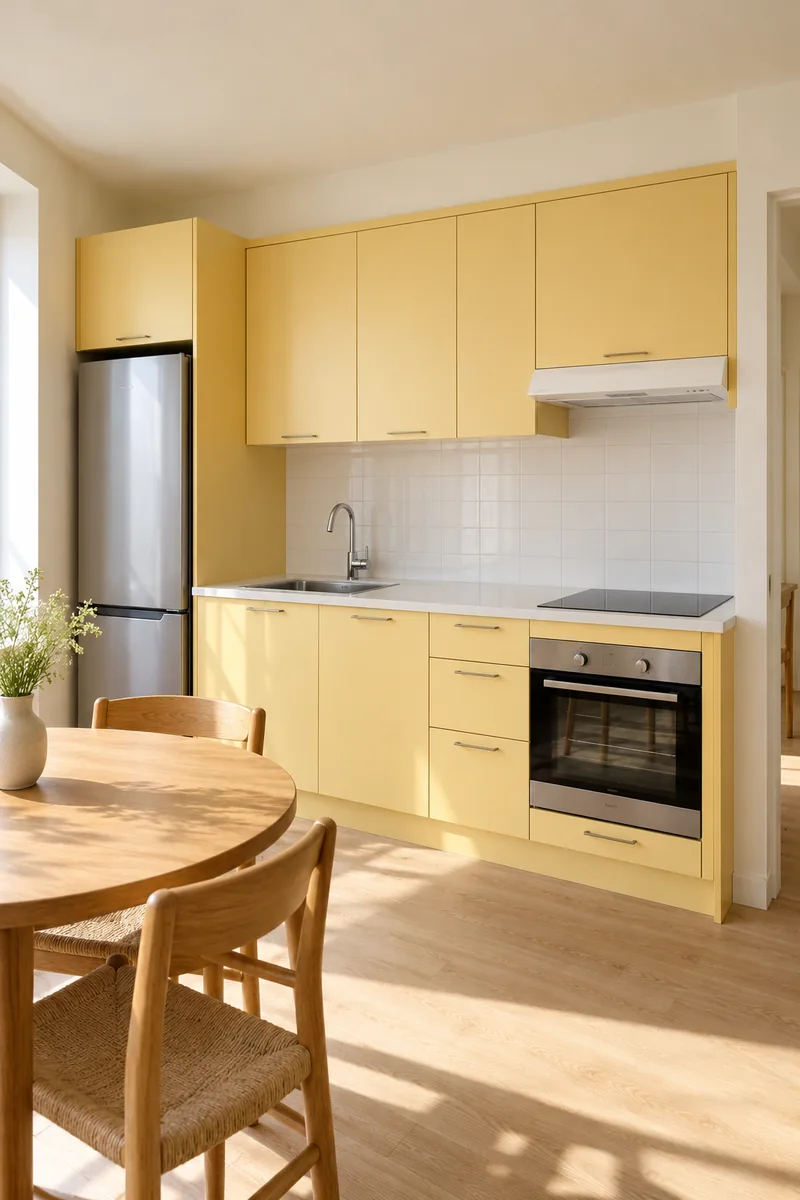
Quick Tip:
Use a gentle yellow as the kitchen's warm center. Keep the wall, backsplash, and worktop simple so the cabinet color has room to work. Pair it with ordinary wood dining furniture for a friendly, lived-in direction.
A yellow kitchenette can make a plain studio feel personal with relatively few competing details. Choose a shade that works with the room's natural light and existing floor. If permanent changes are not allowed, test the idea through a yellow dining chair or freestanding furniture placed outside the cooking zone.
20. Split-Level Dining Peninsula
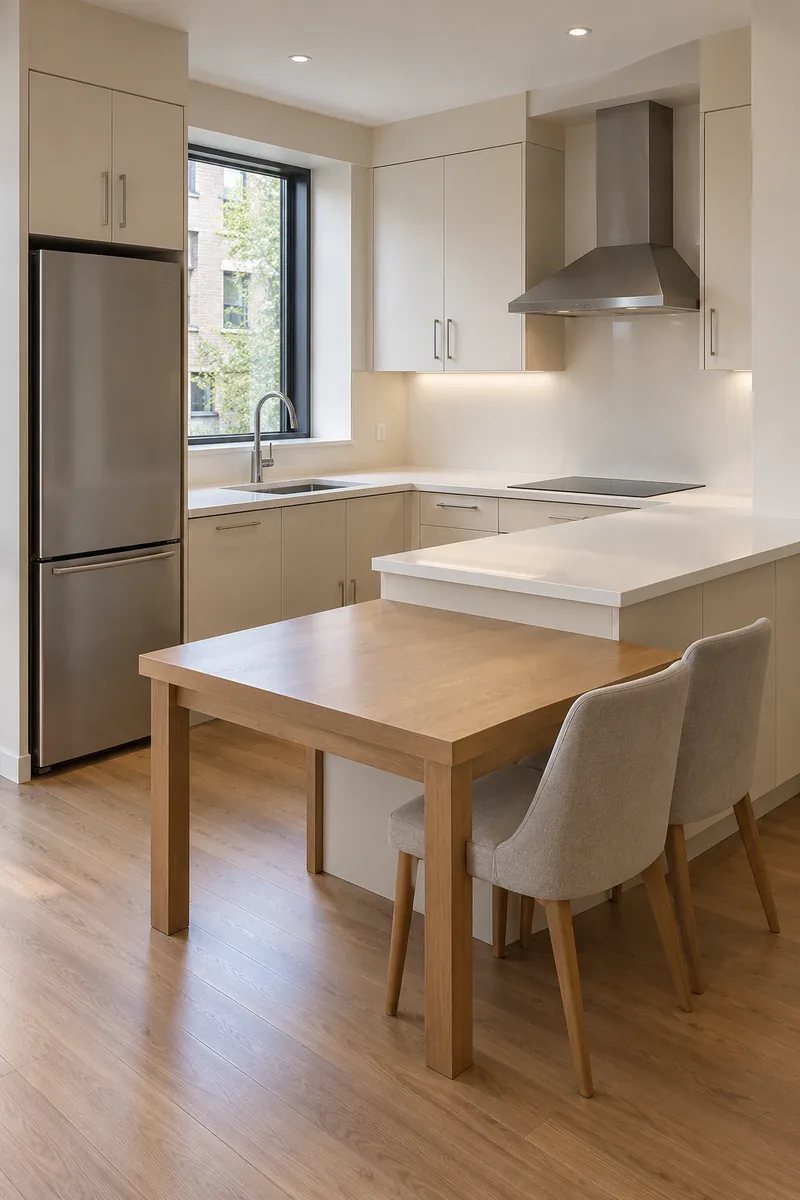
BEFORE:
The kitchen edge holds both food preparation and casual meals at one height. Plates and cooking equipment compete for the same stretch of surface.
AFTER:
A properly designed peninsula combines a working counter with a lower dining extension. Each level has its own purpose and suitable seating or standing position.
Two levels can help a peninsula serve different activities, but they also require more careful planning than a plain rectangle. Check legroom, support, seat height, and the occupied footprint with the designer. Choose matching or closely related materials so the change in height feels intentional within the small room.
21. Integrated Studio Kitchen
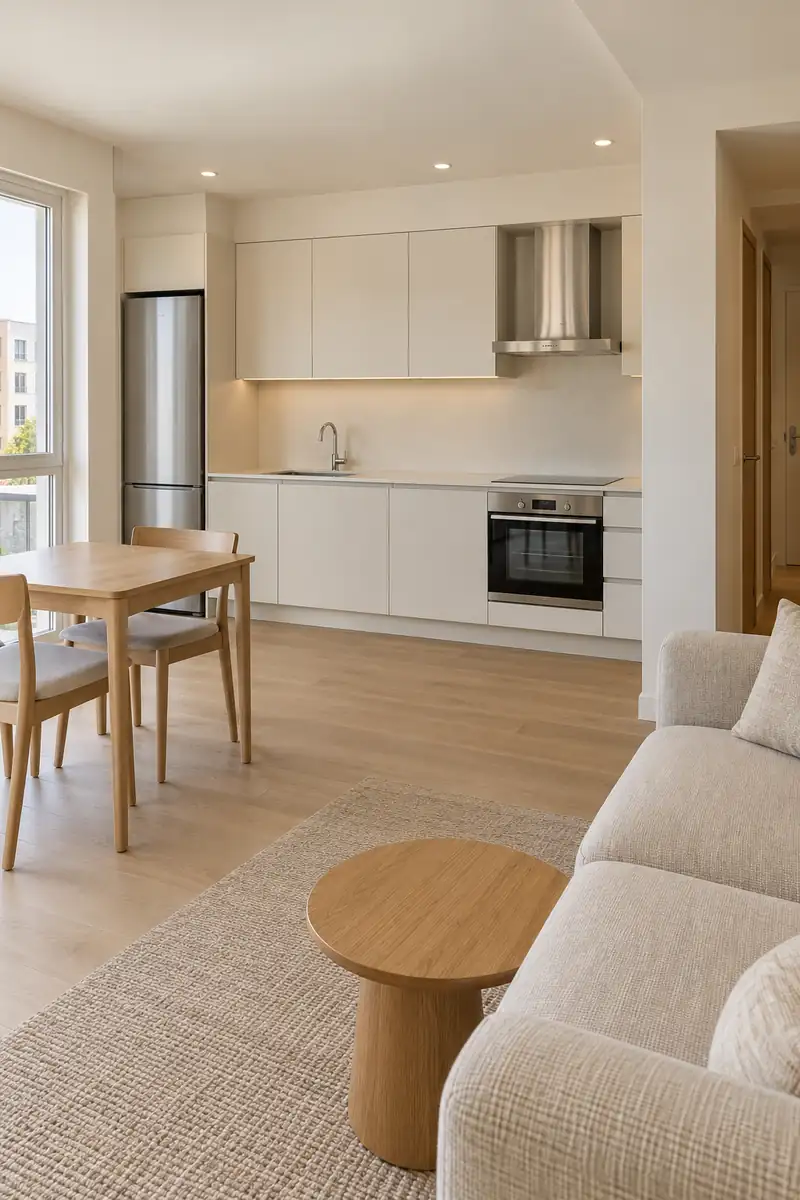
- View the kitchen from the sofa and identify the finishes already in that sightline.
- Choose a cabinet palette that relates to those existing pieces.
- Place dining furniture where it connects the zones without obstructing appliance doors.
- Keep the cooking area clear and use distant furniture for personal decoration.
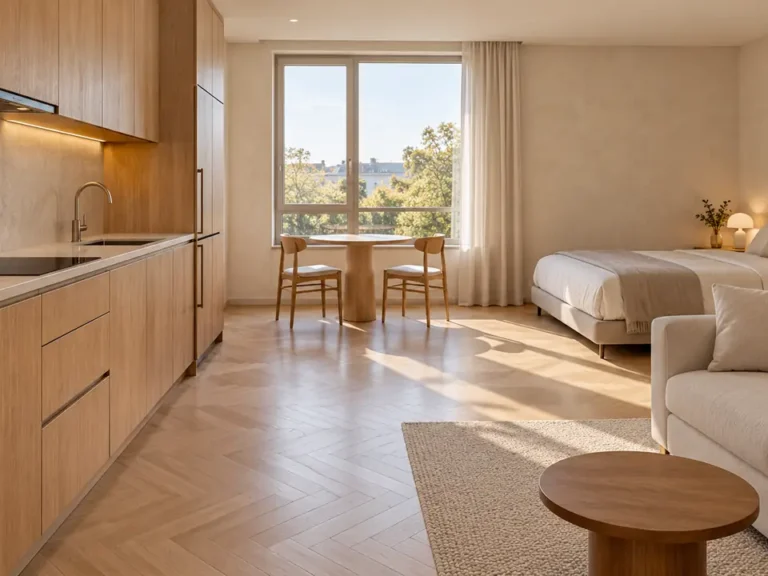
The strongest overall design considers the studio as one connected home. A kitchen in warm neutrals, a related dining table, and a compatible sofa can feel coherent without matching exactly. Start with what you already own, then make a measured plan that protects the everyday routes between cooking, sitting, and sleeping.
Conclusion
The right kitchen for studio apartment living supports the way you cook while making the whole room feel considered. Start with the layout your space can comfortably accommodate, then choose a small group of finishes that work together. Borrow the blue niche's definition, the galley's focused arrangement, or the furniture kitchen's warm connection to nearby seating. You do not need to combine every detail. Save your favorite design to Pinterest, try one manageable color or furniture change, and share the idea with someone planning a compact home. For structural or appliance changes, turn the inspiration into a professionally checked plan.
Community
Join the conversation
Add a useful idea, ask a specific question, or share what worked in your space. Every comment is reviewed before it appears.