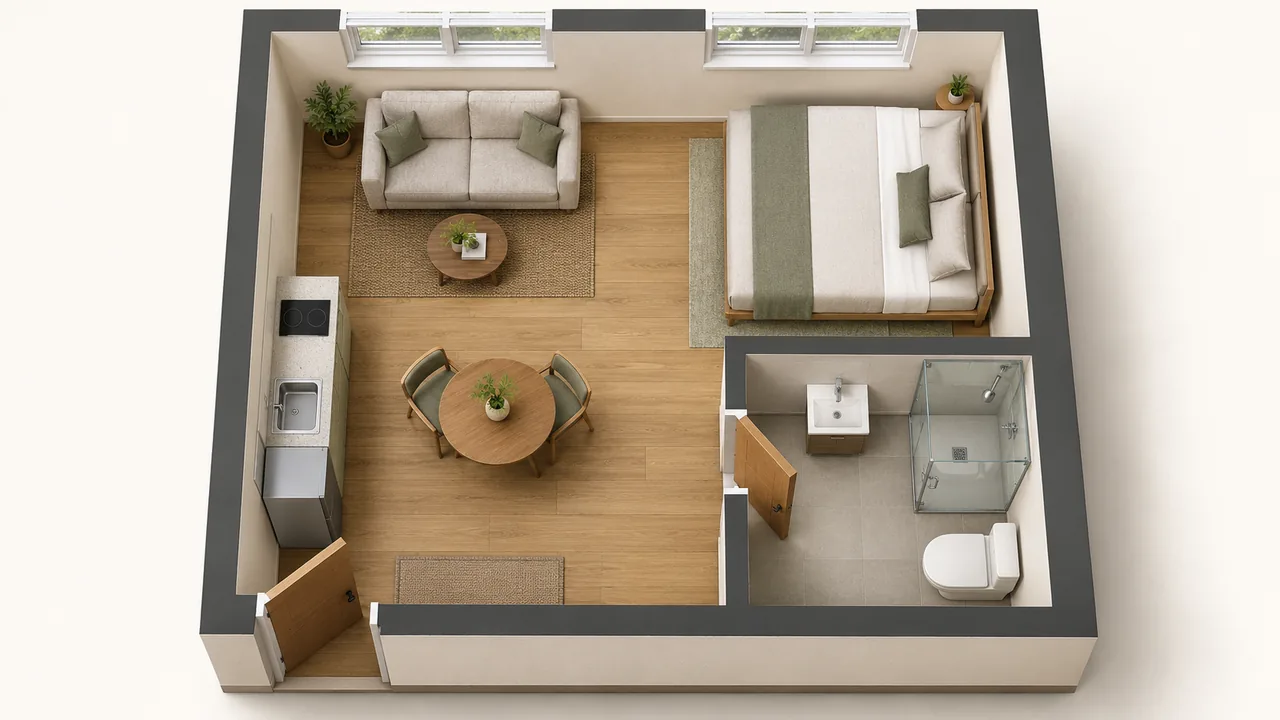
A useful studio layout starts with the route you take through an ordinary day. These tiny studio apartment layout floor plans show fourteen ways to arrange sleeping, sitting, eating, and working areas without giving every activity a separate room. The strongest choice depends on your actual windows, fixed kitchen, bathroom, storage, and furniture rather than a single ideal arrangement.
Each image is an illustrative furnished concept, not a measured construction plan or a code-approved design. Measure your room, door swings, windows, furniture, and opening mechanisms before trying one. Keep existing exits and access routes clear, and seek suitable professional guidance before changing walls or building services. Use the drawings to compare priorities, then test the arrangement with your daily routines before moving anything heavy.
1. Long-Wall Bed
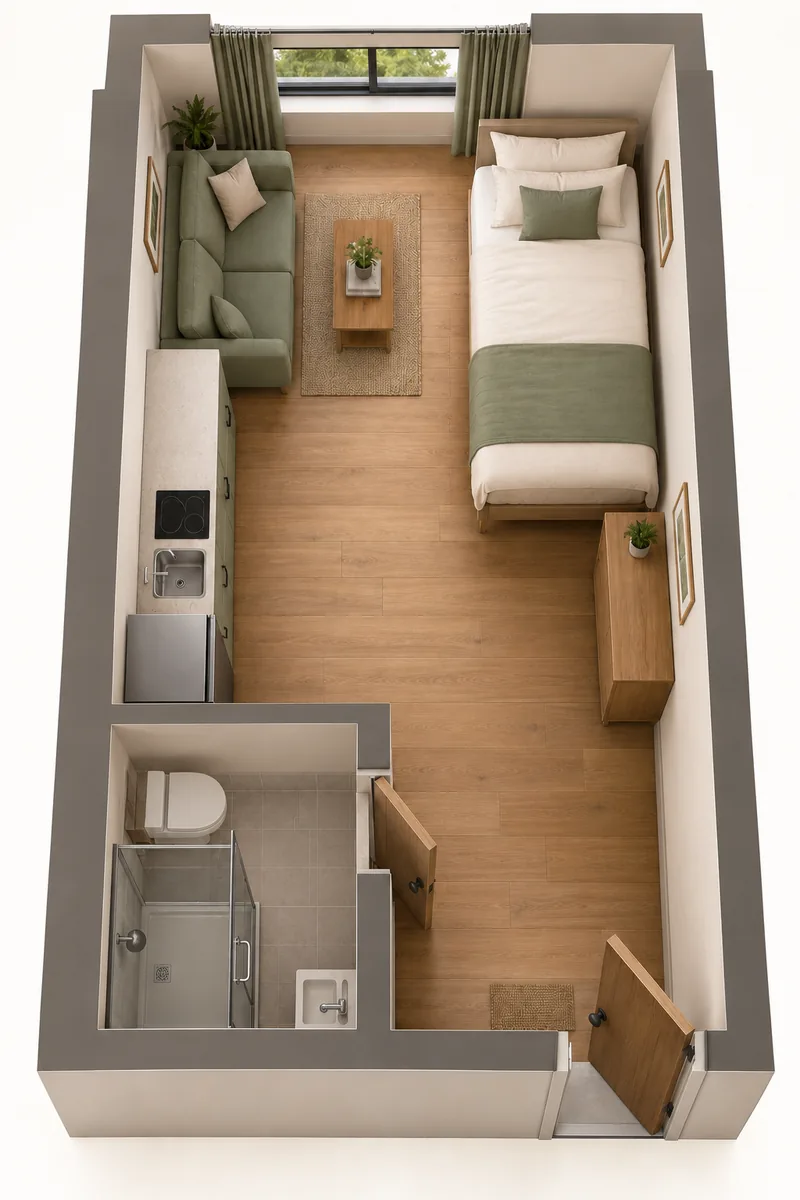
A long uninterrupted wall can give the bed a sensible home while leaving the middle of a narrow studio easier to use. Set the bed lengthwise beside that wall, with a compact sofa opposite and the kitchen closer to the entrance. Keep the bathroom door outside the sleeping footprint.
The tradeoff is access along the wall side of the mattress. Test how you get into bed, change sheets, and reach nearby storage before deciding that the arrangement works. A small movable side table may be enough beside the accessible edge, leaving the central route available for everyday movement.
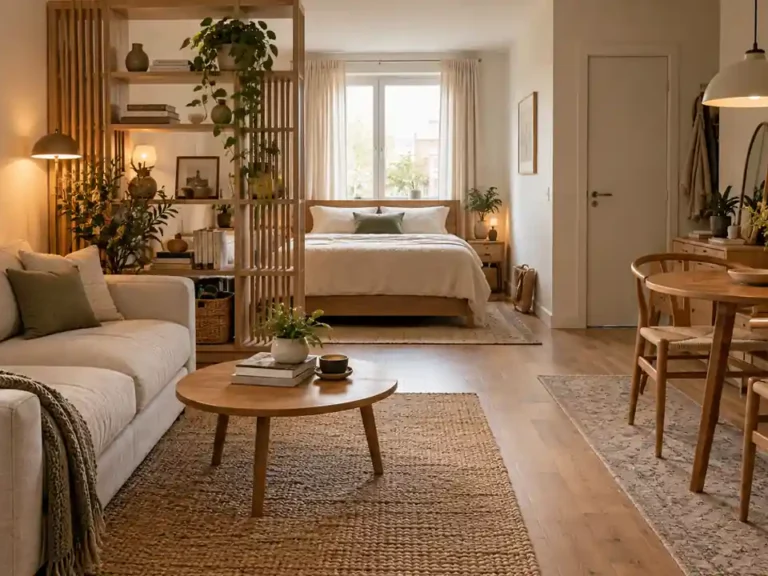
2. Window-End Living
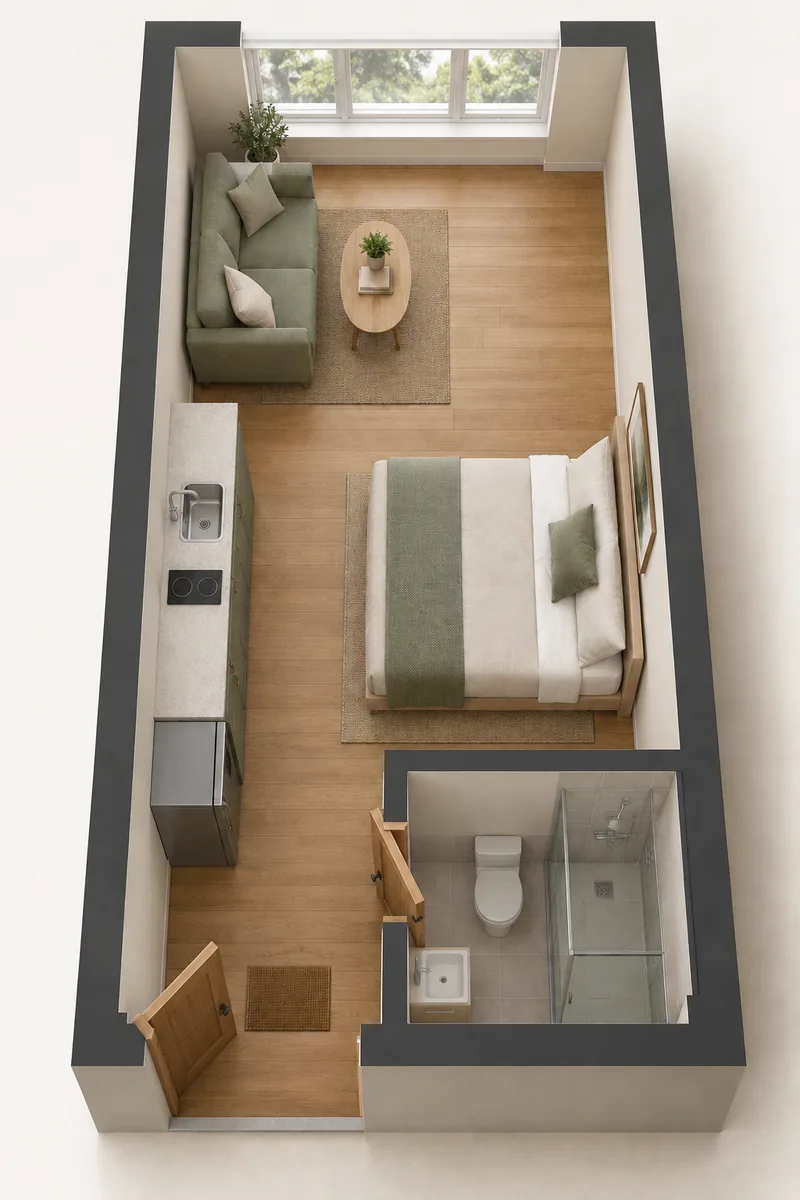
- Reserve the brightest end of a rectangular studio for the place you sit during the day.
- Position a compact sofa beside the window rather than across its opening.
- Place the bed farther along an interior wall, with its own reachable reading light.
- Keep a continuous route from the entrance past the kitchen and bathroom to the living area.
This arrangement suits someone who spends more waking time on the sofa than at a desk. Light can still travel toward the bed when furniture stays low. Check the window opening, any heating equipment, and the path to required exits before committing to a seat near the perimeter of the room.
3. Existing Alcove Sleep
Quick Tip:
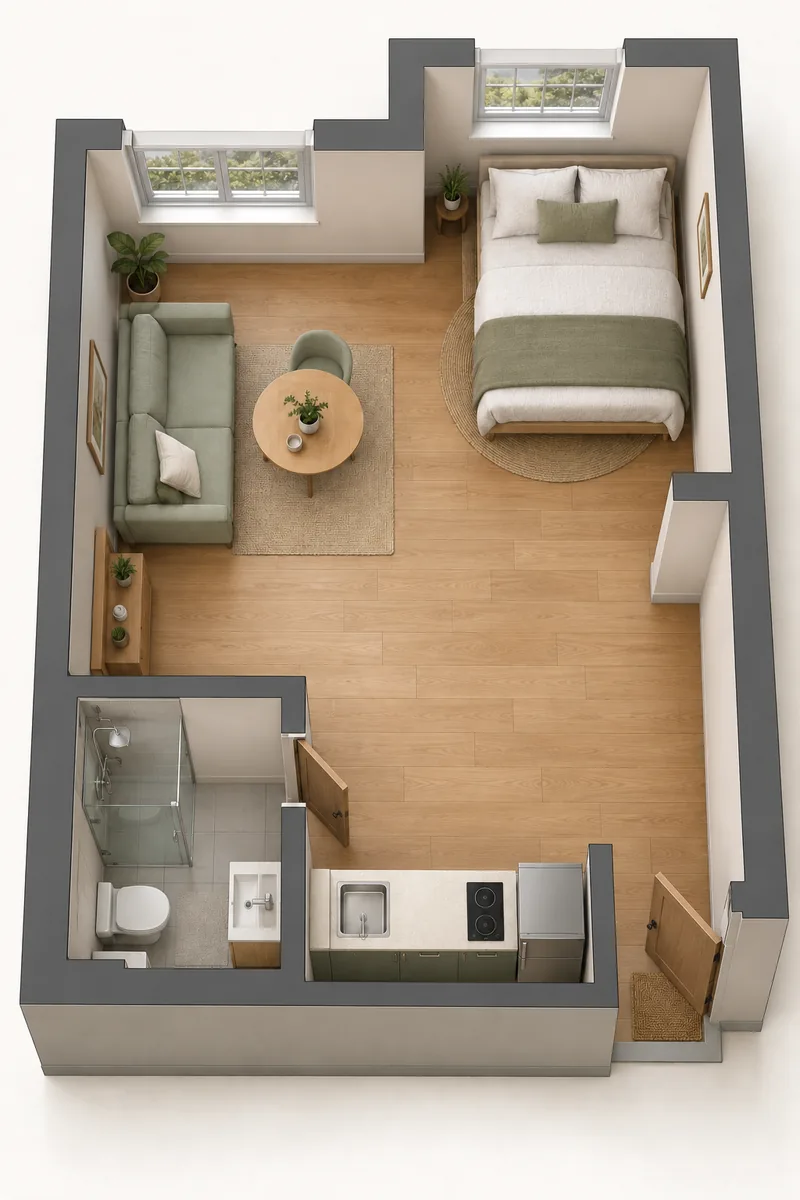
An existing recess can give the bed a defined position without building another room. Measure the full frame and the approach into the recess, including baseboards and any door trim. Keep the opening broad enough for your own comfortable daily access.
Use the alcove only if it already provides a practical sleeping position with appropriate ventilation and access. The illustration suggests furniture placement, not approval for converting a closet into a bedroom. Leave the main space for a small sofa and table, then check how bedding changes and storage doors work in practice.
4. L-Shaped Corner
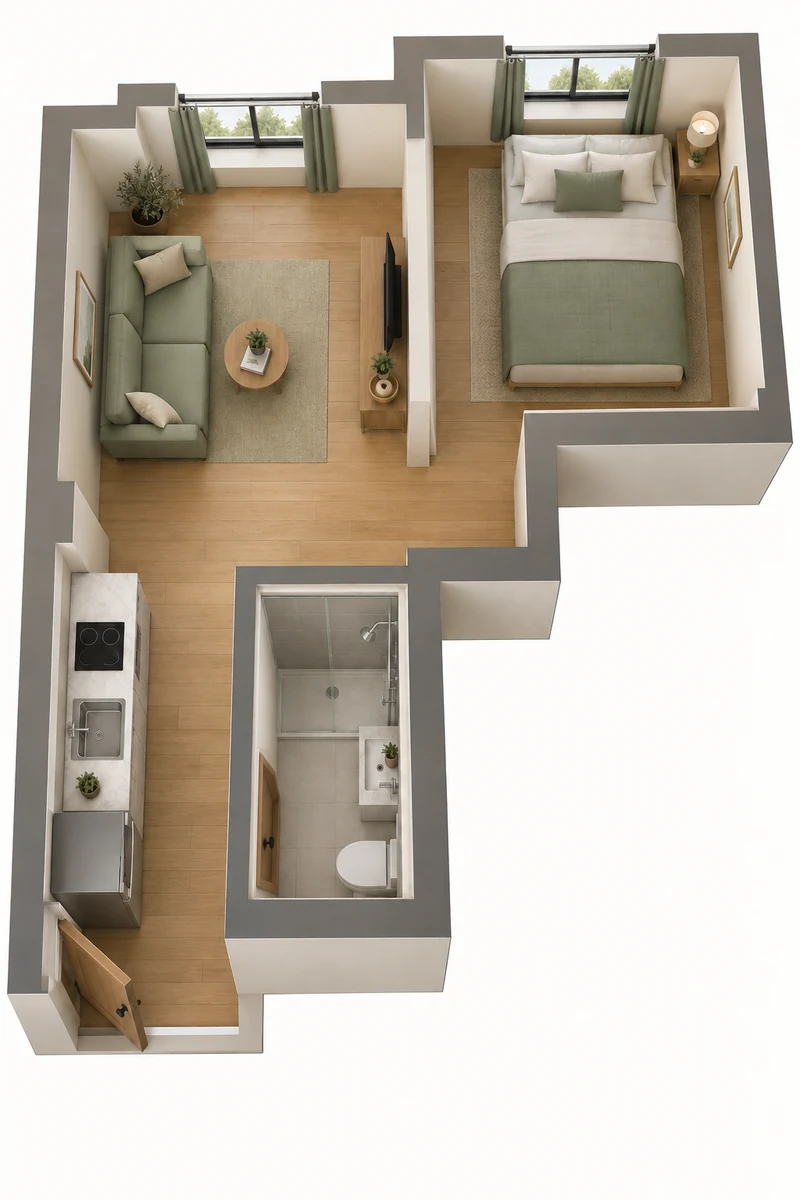
BEFORE: Furniture follows the longest wall even though the studio bends around a corner. The bed sits in the same direct view as the entrance and cooking area.
AFTER: The bed occupies the shorter leg of the existing L shape. Living furniture sits in the broader leg, connected by a clear route around the corner.
Let the shape provide visual separation before adding a screen or cabinet. Keep the inside corner open enough to turn comfortably while carrying laundry or shopping. This concept depends on the actual location of windows and doors, so use the room shape as a clue rather than copying the drawing literally.
5. Sofa-Back Boundary
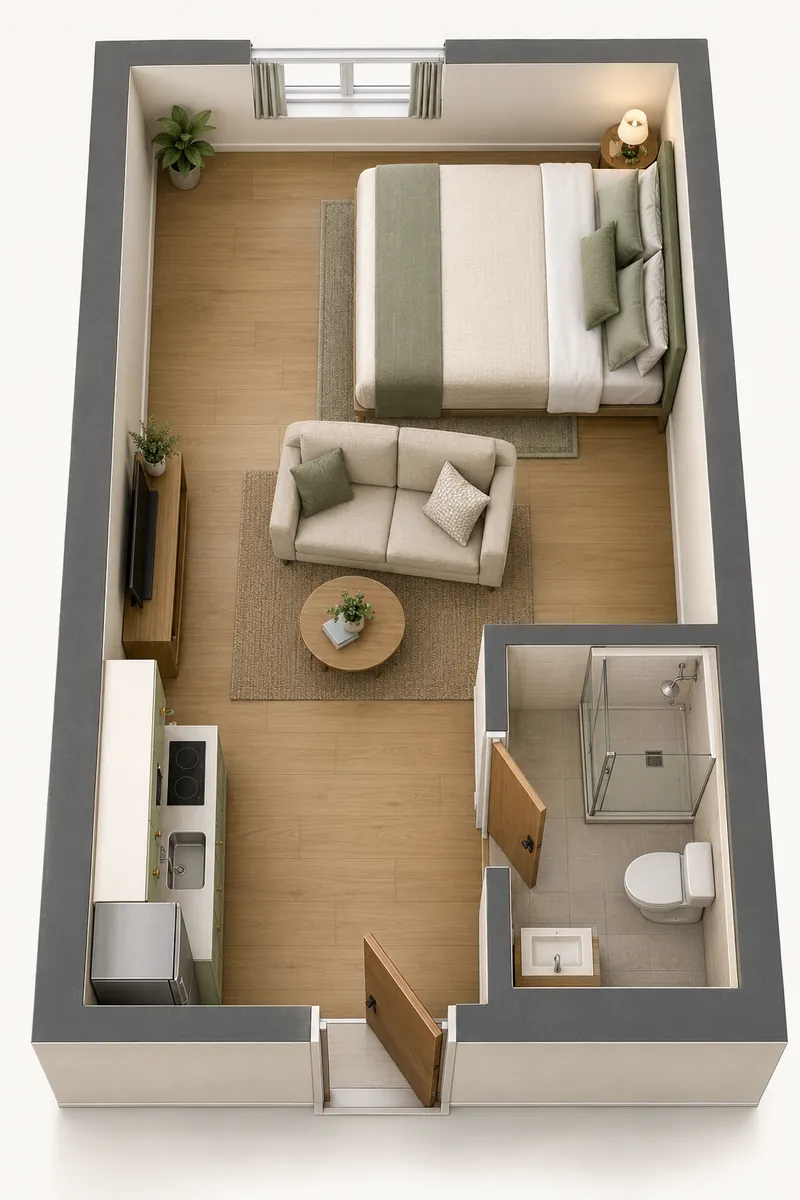
- Place the bed against a wall where its usable sides remain reachable.
- Turn a compact sofa so its back faces the sleeping zone.
- Leave a direct passage beside the sofa connecting the entrance, bathroom, and bed.
- Test the sofa depth and bed footprint together before adding any console between them.
The change in furniture direction gives each area its own focus without enclosing either one. You can sit facing the living zone instead of the pillows. Avoid filling the gap behind the sofa automatically; that spare space may be what makes reaching the bed and opening a nearby wardrobe feel comfortable.
6. Centered Dining Pause
| Detail | Table Against Wall | Table Between Zones |
|---|---|---|
| Dining position | Uses one edge of the room | Creates a small shared destination |
| Chair movement | Often limited on the wall side | Needs room around occupied chairs |
| Best priority | More open central floor | A distinct place for daily meals |
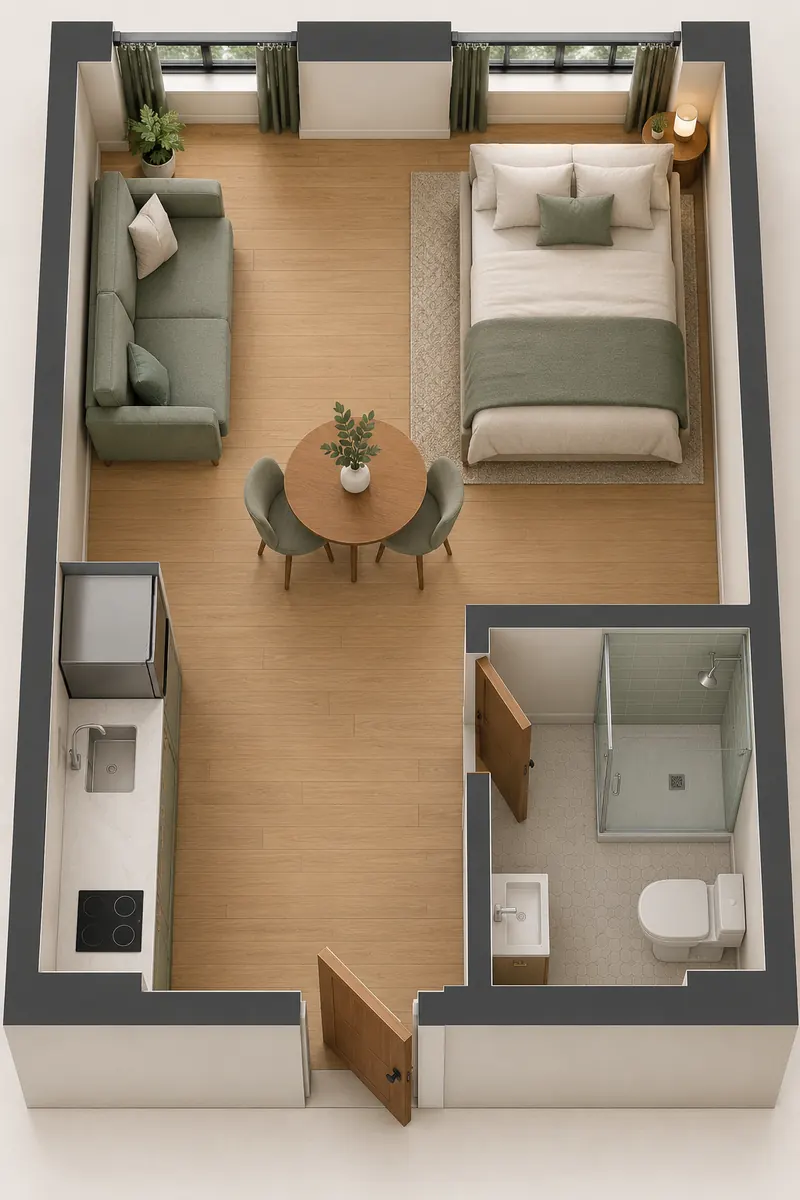
A small round table can sit between living and sleeping areas if the main route passes beside it. Test the layout with a person in each chair, not only with seats tucked away. Keep the table modest and remove a separate coffee table if both surfaces make the middle feel crowded.
7. Parallel Activity Walls
DO
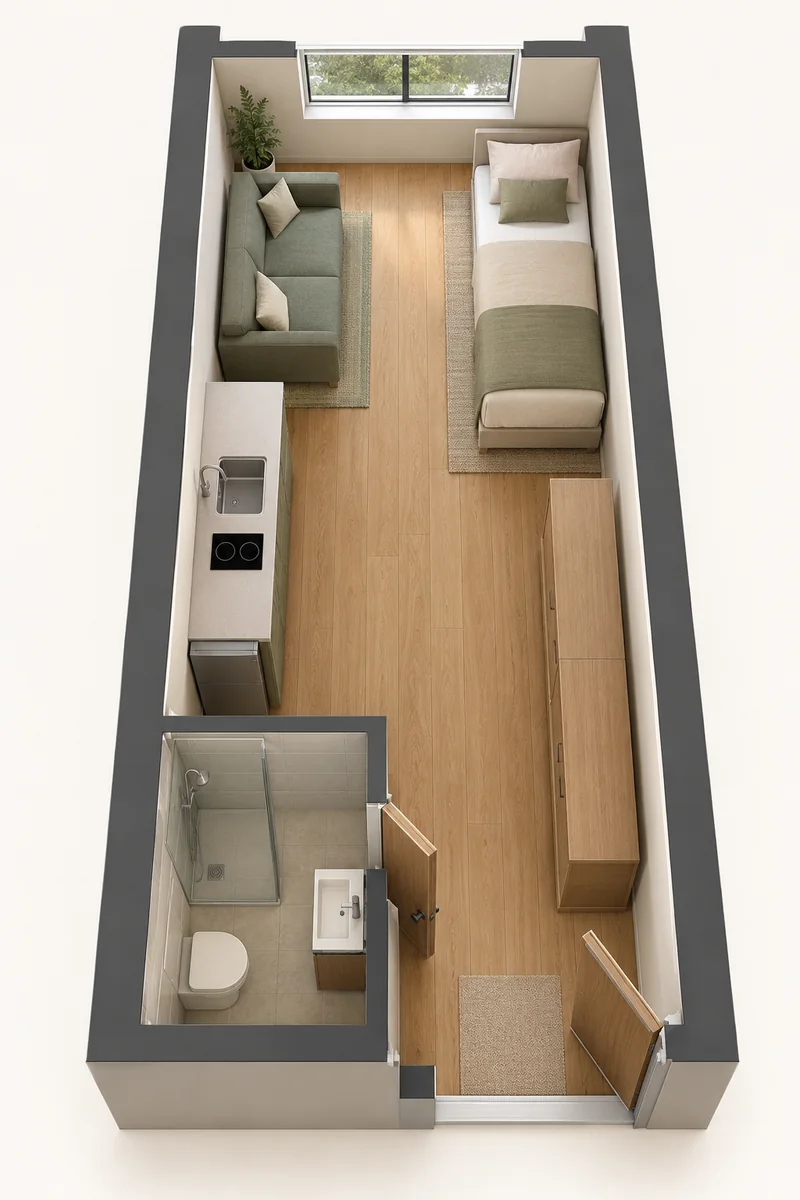
- Group the bed and clothing storage along one side.
- Keep kitchen and compact seating along the opposite side.
- Leave the center as an obvious continuous route.
DON'T
- Put a loose stool in the middle of the route.
- Assume cabinet fronts need no opening space.
- Let bed linen trail into the passing area.
Parallel furniture bands can make a long studio easier to understand. Each side has a job, while the middle remains available for movement. Measure the widest points of the actual pieces, including handles and arms. If the remaining route feels pinched during a trial, remove a piece rather than forcing the pattern.
8. Open Center Square
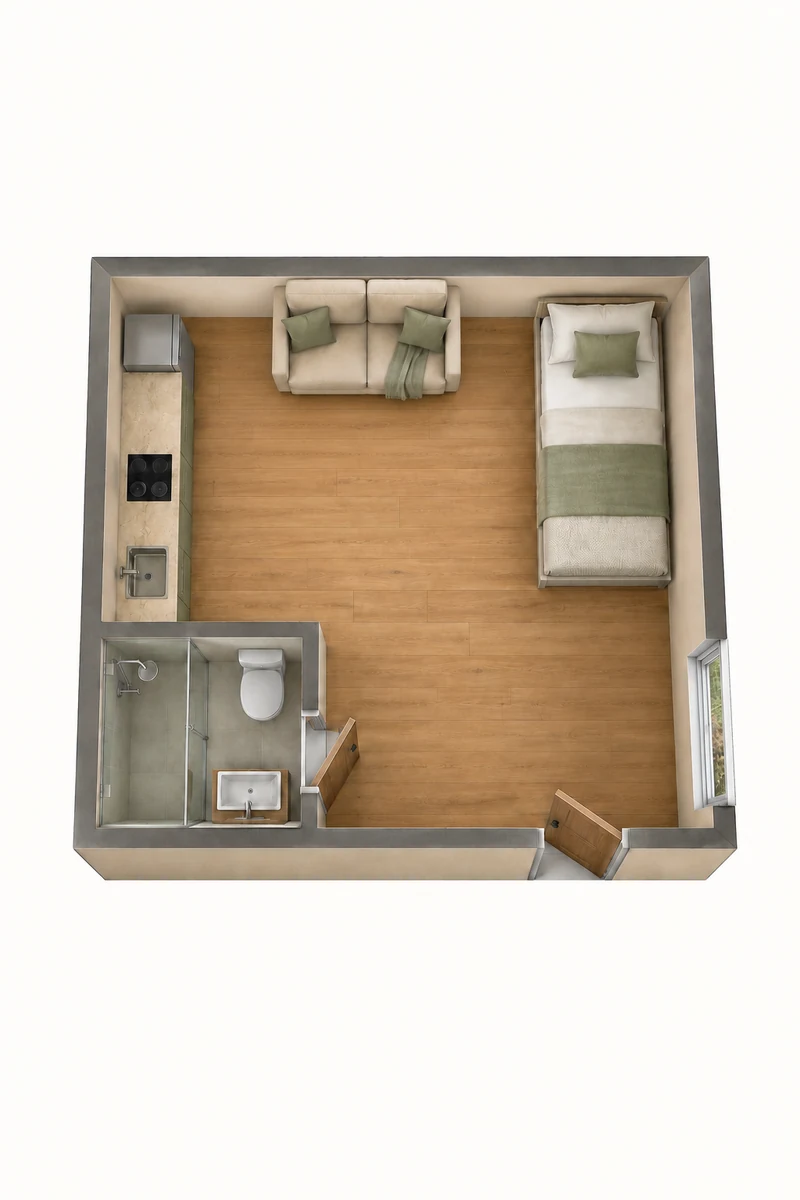
Best Shape: A broadly square room with several usable wall sections.
Furniture Position: Larger pieces sit around the perimeter.
Everyday Benefit: The center stays available for movement or stretching.
First Check: Entry, bathroom, and storage doors still open normally.
A square studio does not need a centerpiece simply because space appears in the middle. Put the bed on one wall and a compact sofa on another, then keep the table small. Resist wrapping every edge with storage; a few empty wall sections help the furniture feel deliberate instead of crowded together.
9. Window-Side Workstation
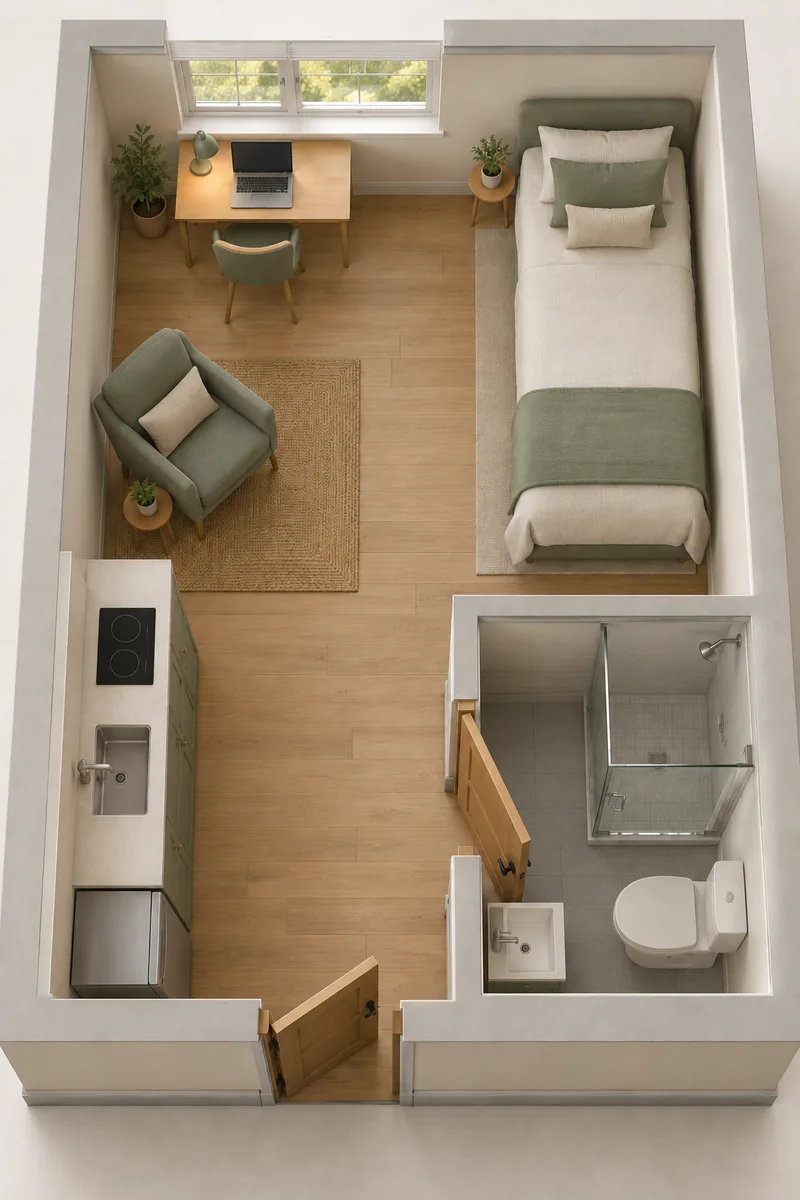
A dedicated desk earns its place when working at home is part of your normal week. Position a compact workstation beside the window, leaving the opening accessible, and place the bed along a quieter interior wall. A small chair near the kitchen can provide everyday seating without adding a sofa.
Check the desk with its chair pulled out and your actual equipment in place. Cables should reach safely without crossing the route to the bathroom or entrance. If meals happen here too, keep supplies in a nearby closed box so the surface can change roles without moving the furniture itself.
10. Offset Entry Storage
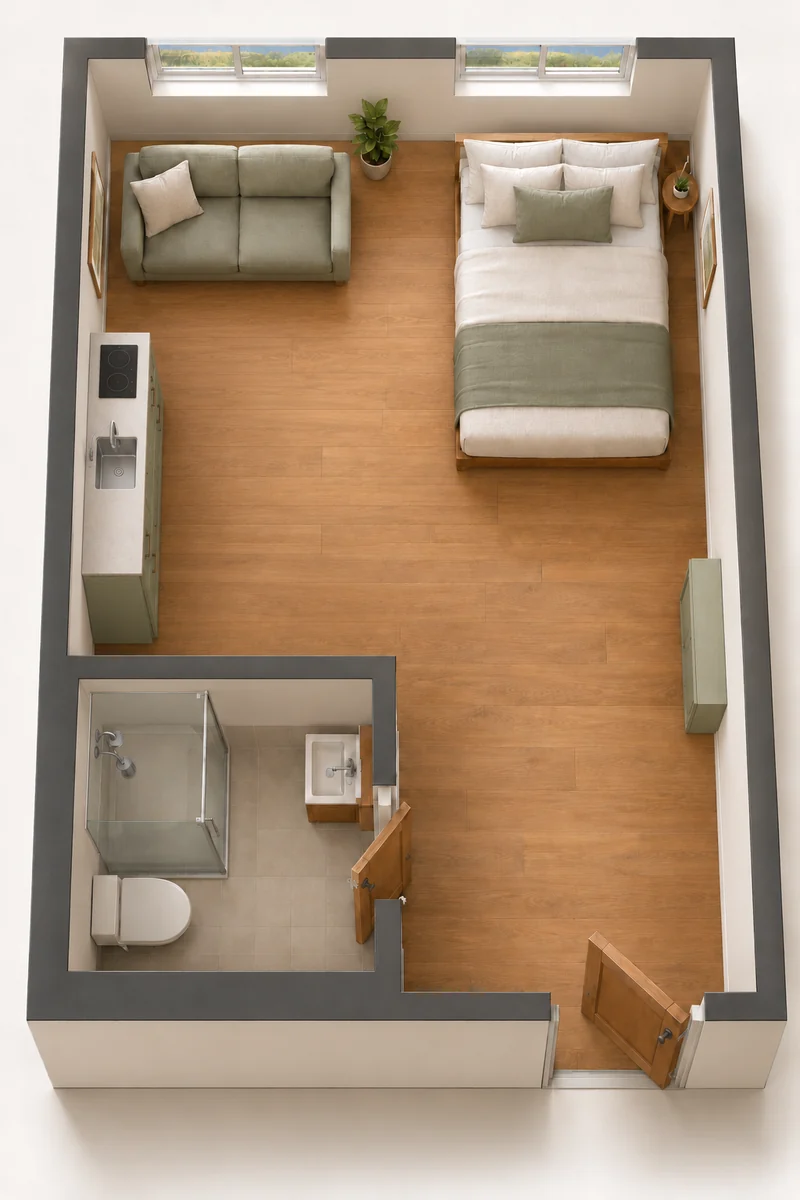
- Give arriving bags a destination before they spread into the sleeping zone.
- Place a shallow closed cabinet on an entry wall outside the door swing.
- Offset the bed farther into the main room so its pillows are not the first thing beside the entrance.
- Keep the bathroom approach and kitchen access independent of the cabinet opening.
A little separation at the threshold can make the entire studio feel more organized. Choose storage for the belongings you actually bring home, then check its depth against the entry route. Follow any required anchoring instructions and rental permissions. A cabinet that crowds the doorway creates more inconvenience than it solves daily.
11. Daybed Living Plan
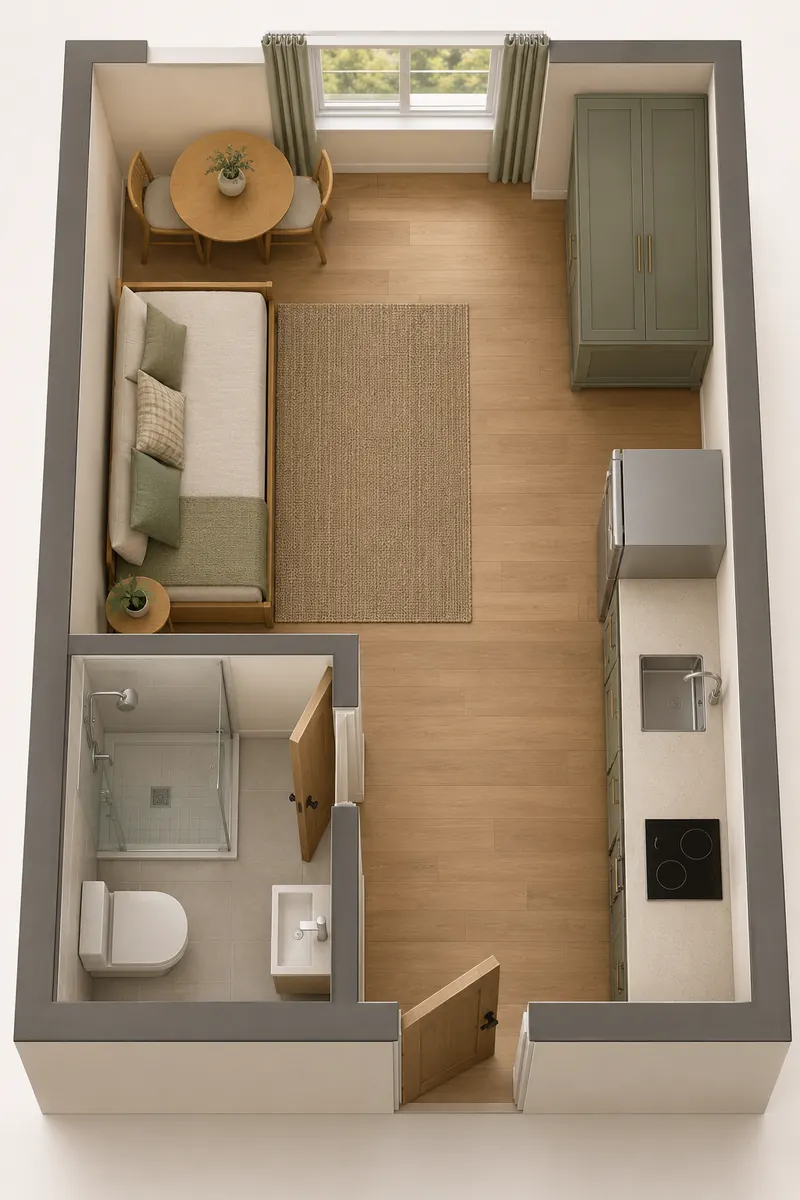
Quick Tip:
A daybed can let one furniture footprint serve as both seating and sleeping space. Choose a model suitable for regular sleep and your own comfort needs. Leave a reachable place for daytime cushions when it is time to make the bed.
Place the daybed on a solid wall with a small table nearby, then keep the opposite side for a wardrobe and compact dining spot. Test the mattress size, bedding storage, and nightly routine before choosing this approach. The plan works best when you are comfortable resetting the same surface each day.
12. Open Sleeper Sofa
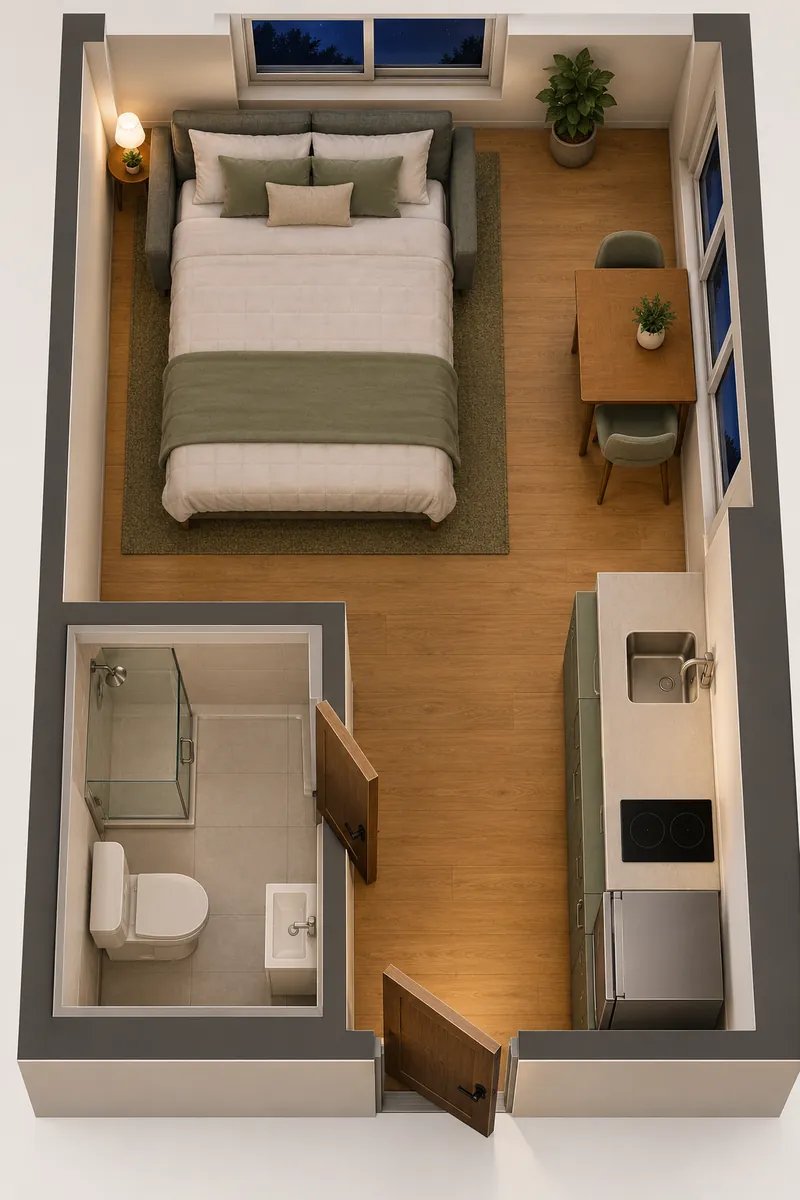
BEFORE: The studio looks spacious while the sofa is closed, but its opened bed pushes against the dining chairs. Reaching the bathroom at night requires moving furniture.
AFTER: The dining table sits beside a different wall, outside the sofa bed opening. A clear route remains available while the sleeping surface is fully extended.
Draw both positions of the sleeper on your own room sketch before buying. Include the frame mechanism, bedding, and the space you need to open it safely. Follow the manufacturer's instructions and try the mattress if possible. This illustration shows the nighttime arrangement because that is where the difficult conflicts often appear.
13. Twin Corner Beds
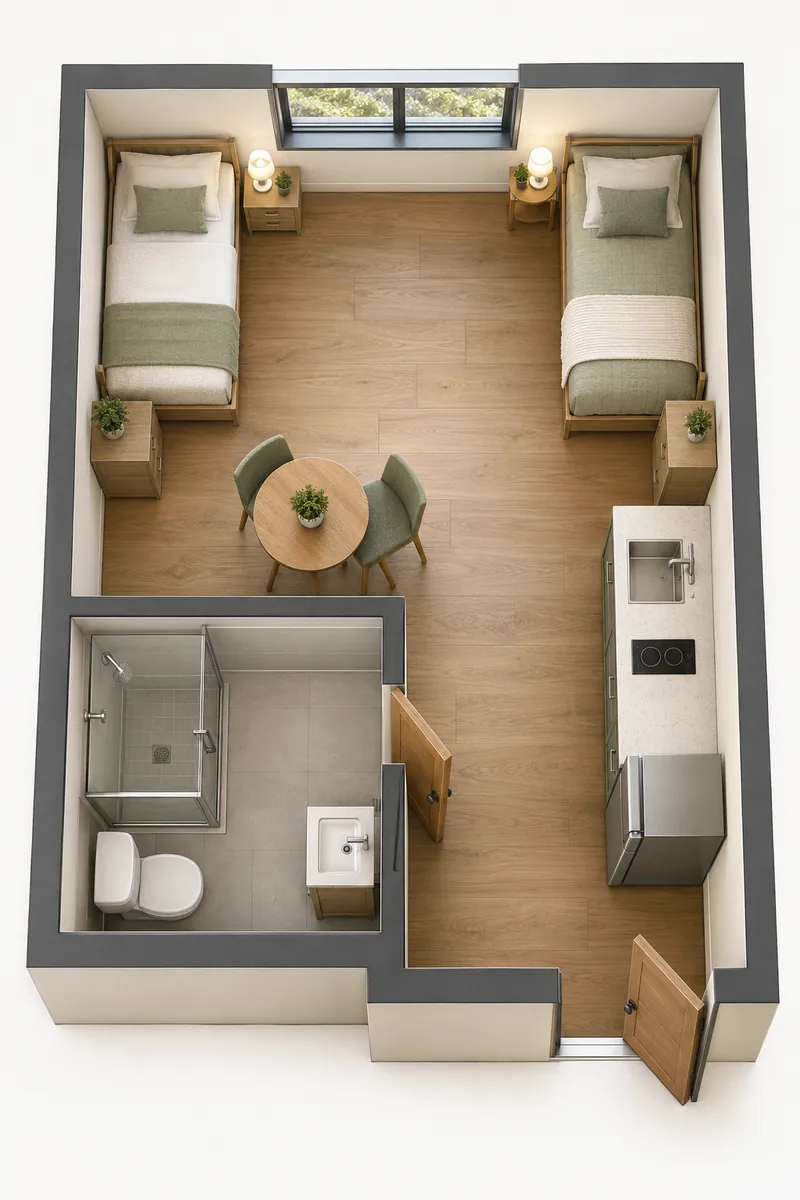
- Place two single beds in separate corners, with each accessible from the shared floor area.
- Give each sleeper a small reachable bedside surface and personal storage.
- Position a modest table in the shared zone only if occupied chairs leave the route clear.
- Walk from both beds to the bathroom and entrance without crossing the other sleeping footprint.
Two corners can create recognizable personal areas without filling the studio with partitions. This is visual separation, not sound isolation, so shared expectations about calls and lighting still matter. Check equal usefulness rather than perfect symmetry; both people should have practical access to their belongings and a comfortable route out of bed.
14. Kitchen-Side Dining
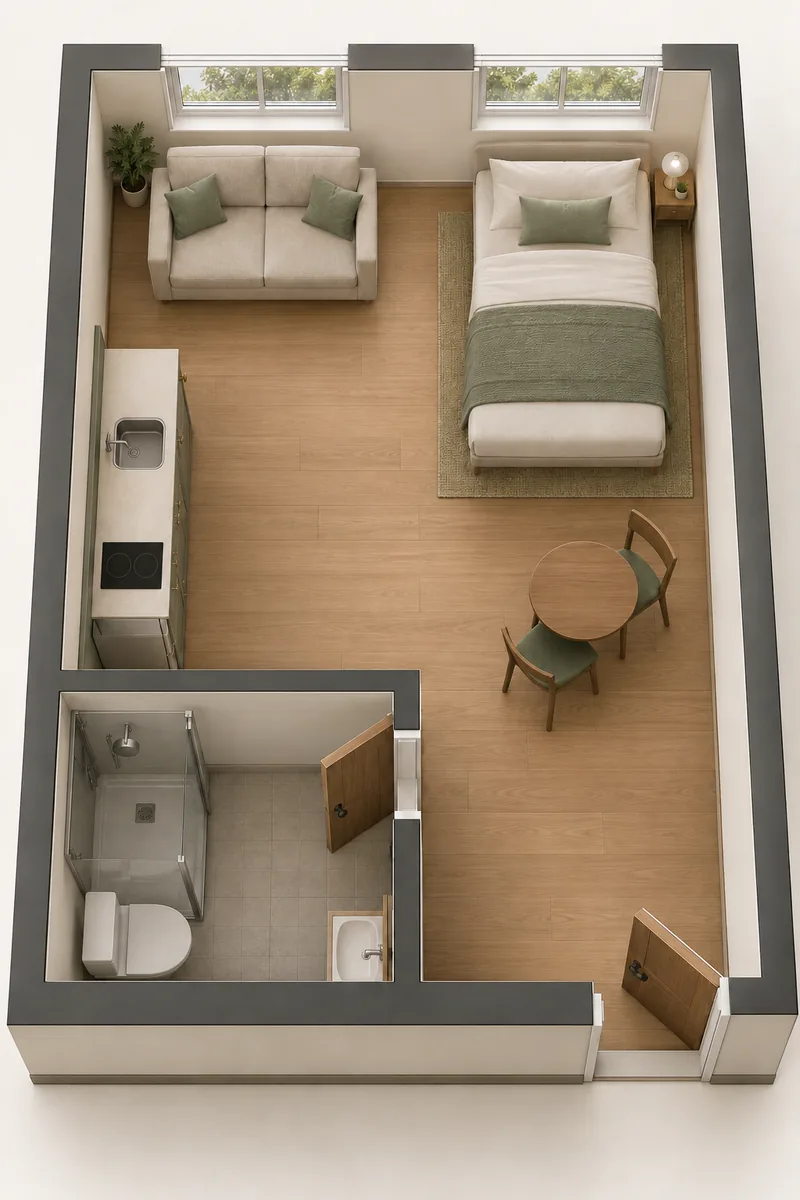
| Detail | Dining In Room Center | Dining Beside Kitchen |
|---|---|---|
| Serving meals | Carry dishes across the room | Keep eating near food preparation |
| Living floor | Table shares the central zone | More room remains for seating |
| Check carefully | Passing occupied chairs | Cabinet and appliance opening paths |
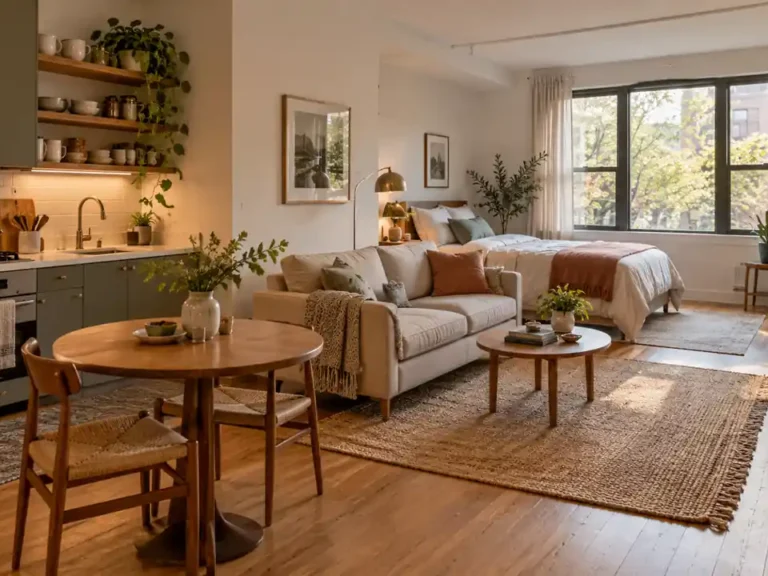
A compact table beside the kitchen can make the rest of the studio easier to arrange. Keep it outside the working area needed for doors, drawers, ventilation, and appliance use. Let the bed occupy the far wall and the sofa face the open living zone, with a continuous route between all areas.
Conclusion
The most useful tiny studio apartment layout floor plans begin with your priorities and the room you actually have. Decide whether daily meals, working, shared sleep, or open floor matters most, then choose a concept that supports that routine. Measure the real furniture and doors, test every opening, and walk the routes with chairs in use and beds ready for sleep. These illustrations are starting points, so adjust them rather than treating them as construction instructions. Save the ideas on Pinterest, try a simple furniture change this week, and share this article with someone planning a more functional small home.
Community
Join the conversation
Add a useful idea, ask a specific question, or share what worked in your space. Every comment is reviewed before it appears.